

 My dad works in Chinatown in Seattle, and when my brothers and I were young he’d occasionally bring home a bright pink box filled with Asian bakery treats. These coconut buns (or gai mei bao) were always a family favorite. I’ve been searching for a recipe for awhile, and when I bit into one of these I knew I’d found it. The best part of gai mei bao is the buttery coconut filling, and this recipe doesn’t just nail the flavor — it allows for a generous amount in each bun. These buns are a great introduction to Asian baked goods; and even the non-coconut fans in my life gladly scarf these down.
There are a lot of steps to this recipe; don’t be intimidated! It all comes together quite easily in an afternoon. If you want to split up the work, make the dough on the first day and proof overnight in the fridge. Take out the dough about an hour before you want to wrap the buns so it can get to room temperature. During that time, make the filling and topping.
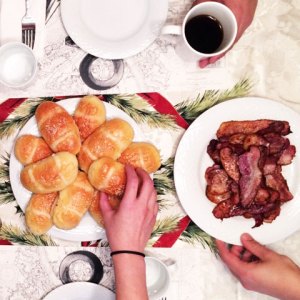 This recipe calls for a couple unusual ingredients (caster sugar and whole milk powder). I found everything I needed at Bulk Barn, though your local Asian market should also carry them. If you have difficulty locating caster sugar (which is basically superfine sugar — NOT powdered), you can whiz regular granulated sugar in the food processor for 10 seconds or so. This recipe also incorporates the tangzhong method, which involves cooking a portion of the flour with liquid in order to give the bread a longer-lasting soft texture. These buns keep well for a few days (I recommend microwaving a few seconds after the first day), and make a delicious breakfast alongside bacon and a cup of coffee.
(Note: I weigh my ingredients — highly recommended! — when making these buns, but have included approximate US equivalents below.)
Chinese Coconut Cocktail Buns (Gai Mei Bao)
Adapted from Christine’s Recipes
Makes 16 buns
Tangzhong Ingredients (will make a little more than needed for this recipe):
- 50gm / 1/3 c bread flour
- 250ml / 1 c water (could be replaced by milk, or 50/50 water and milk)
Tangzhong Method:
- In a small saucepan, slowly add liquid to flour and mix until smooth. Cook over medium-low heat, stirring constantly with a wooden spoon, whisk or spatula to prevent burning and sticking while you cook along the way.
- The mixture will gradually thicken. Once you notice some “lines” appearing in the mixture for every stir you make with the spoon, it’s done. Remove from heat.
- Transfer tangzhong to a clean bowl. Cover with a cling wrap sticking onto the surface of tangzhong to prevent from drying up. Let cool. The tangzhong can be used immediately once it cools down to room temperature. Leftover tangzhong can be stored in fridge for a few days. (Note: The chilled tangzhong should return to room temperature before adding into other ingredients.)
Bun Ingredients:
- 160 ml / 2/3 c milk, warmed (any kind will do)
- 1 egg, whisked
- 160 gm / 2/3 c tangzhong (for method, please see above)
- 6 gm / heaping 1 tsp salt
- 70 gm / 1/3 c caster sugar
- 10 gm / 2 tsp whole milk powder
- 360 gm / 3 c bread flour, plus more if needed
- 10 gm / 3 tsp active dry yeast
- 40 gm / 1.5 tbsp butter, melted and cooled to room temperature
Filling Ingredients:
- 180 gm / 13 tbsp butter, softened at room temperature
- 80 gm / 2/3 c caster sugar
- 50 gm / 1/2 c cake flour
- 60 gm / 4 tbsp milk powder
- 90 gm / 1 c unsweetened desiccated coconut
Topping Ingredients:
- 35 gm / 1/3 c cake flour
- 40 gm / 3 tbsp butter
- 20 gm / scant 1/8 c caster sugar
- 1 egg, whisked (with a splash of milk, optional)
- Sesame seeds for sprinkling on top, to taste
Sugar glaze (optional):
- 1 tbsp sugar + 1 tbsp water
Method:
- In a medium bowl, dissolve yeast in warm milk to activate. Set aside.
- In a large bowl, whisk together flour, sugar, salt, and milk powder.
- Once the yeast is active and bubbly, add egg and tangzhong and stir to combine.
- Make a well in the middle of your dry ingredients. Slowly add the wet to the dry ingredients, incorporating with a spatula or wooden spoon. Dough will be sticky at first. Once in a cohesive ball, add melted butter. Knead until dough becomes smooth and soft, yet pliable (~8 – 10 minutes). If the dough is too sticky and will not come together, add additional flour a couple teaspoons at a time until it does.
- Cover dough with cling wrap or a linen towel and set aside in a warm area until doubled in size (or proof in the refrigerator overnight).
- While dough is proofing, make filling and topping (see below).
- Transfer proofed dough to a clean floured surface. Gently deflate and divide the dough into 16 equal portions. Form into ball shapes. Cover with cling wrap and let rest for 15 minutes.
- Roll or press out each portion of the dough into an oval shape. Place a portion of filling in the middle of the oval lengthwise. Fold the bottom third up over the filling, then fold the top third down over the other layers (like a letter). Pinch seam closed. Turn bun over and tuck the ends underneath, pinching to seal.
- Transfer bun to a parchement lined baking tray with seam facing down. Repeat this step with the remaining dough portions and fillings. Cover with a plastic wrap and let them proof for about 45 to 60 minutes, or until doubled in size.
- Preheat oven to 350F.
- Lightly brush whisked egg on the surface of each dough. Pipe two lines of toppings and sprinkle some sesame seeds. Baked for about 15 minutes, or until golden brown. About 5 minutes before finished, remove from oven and brush tops carefully with sugar glaze, if desired. Return to oven. Remove from the oven and brush on a second coat of sugar glaze. Let cool on a wire rack. Enjoy!
Filling:
- Combine the butter and sugar well. Sift in in milk powder, cake flour, and coconut. Mix to combine.
- Form filling mixture into a long tube. Divide into 16 equal portions. Set aside. (I like to put in the fridge while dough is proofing to make it easier to handle.)
Topping:
- Mix the softened butter with sugar well. Sift in the cake flour and combine well.
- Transfer into a ziplock bag and snip off a corner. Pipe over the tops of buns after egg wash.
I have been reading this blog for some time. Wanted to let you know that. I am a fan and enjoy your post. I see this bread it looks like it will be a fun and iieretstnng bread. My mother makes coconut filling bread for diwali each year and everyone in our family loves it. I think I need to spend more time next time & follow your advice.
The proportions seem to be way off. I followed the recipe exactlyand the dough was a watery mess. I had to add another 1/4 to 1/3 cup flour to get the dough to a state where it can be kneaded.
I’m sorry you had problems with the dough! I highly recommend going by weight if possible; it’s much more accurate for baking. Also, the humidity of your kitchen can affect the dough as well, so you may need to adjust a little each time you make it. This is a somewhat sticky dough, so I do recommend kneading for several minutes before adding more flour.
Hiya, I followed your recipe using weight but doubled it , the aroma of the baking buns was intoxicating and the flavor was spot on, I haven’t had such a wonderful coconut bun since Mon Hei Bakery was in business, thanks so much.
Lilly
That’s the best compliment! So glad they brought back such good food memories.
Hello, on Christine’s recipe she has 8 bun quantity which you have doubled but for the bread flour, where she used 230, this would double to 460 but your recipe states 360. Is this a typo? Only I notice that one comment was that the mixture was too wet
I use closer to the 360g amount but have updated for those who might be having trouble with the amount of flour. Thanks!
This is the first bread I’ve ever made and they came out great! I did have the same issue as other commenters with the dough being too sticky but added flour slowly until it came together as instructed. The leftover tangzhong was the perfect amount for the Japanese Milk Bread Rolls recipe on King Arthur’s website.
Going to make these gai mei baos again this week for my parents in time for Chinese New Year.