Graham Cracker Snickerdoodles

graham cracker snickerdoodle

People often ask how I come up with ideas of what to make. I have many sources of inspiration — cookbooks, Instagram, the supermarket (moreso when it was normal to go there and just browse…one day, one day) — but perhaps the most common one is that I need to use something up. In this case, it was a small bag of graham cracker crumbs that wasn’t enough for making a pie crust or anything else semi-useful. I happened to be in a cookie-making mood (pretty common these days), so I figured I’d just chuck them in my snickerdoodle dough and see what happened.

Well, the cookies were good but not quite right; but now of course the idea of graham cracker snickerdoodles was stuck in my head. So yes, I had to go get more graham crackers to continue testing and tweaking the proportions of this recipe. And yes, now I have another small bag of graham cracker crumbs just waiting to be the muse for another recipe. Vicious cycle, tough job, someone’s gotta do it!

Anyways, about these graham cracker snickerdoodles. These cookies combine the soft chew and slight tang of a classic snickerdoodle with the pleasant wheatiness and honey-cinnamon vibes of a graham cracker. They’re the perfect mid-afternoon snack, though one of these days I’m going to test the theory that they’d make pretty fine ice cream sandwiches as well.

A few notes:

  • In the spirit of graham crackers, I use a whole wheat flour for the cookie dough. Traditionally graham flour is coarse and unsifted wheat flour, but here I’ve gone with my favorite sifted red fife flour from Flourist. It has a lovely flavor and texture, and works very well as a 1:1 swap for all-purpose flour in baked goods. I think any soft white wheat flour would work nicely here, or simply use all-purpose.
  • There are also actual graham crackers inside and out — some mixed into the cookie dough, and some in the sugar sprinkle used to roll the cookie dough balls in before baking. Don’t go overboard and add too many graham cracker crumbs to the actual dough — the dough will be too overloaded and won’t spread properly (I speak from experience). A digital scale is (and always is) your friend here.
  • If you don’t want to bake all the cookies off at once, you can refrigerate the dough up to 5 days or freeze for longer storage (in both cases, wait until right before baking to toss in the sugar sprinkle). It’s difficult to get the sugar sprinkle to stick to dough that is too cold, so I suggest taking the dough out of the freezer/fridge while preheating the oven. Roll the dough balls in your hands to slightly warm up the dough before rolling in the sugar sprinkle and baking.
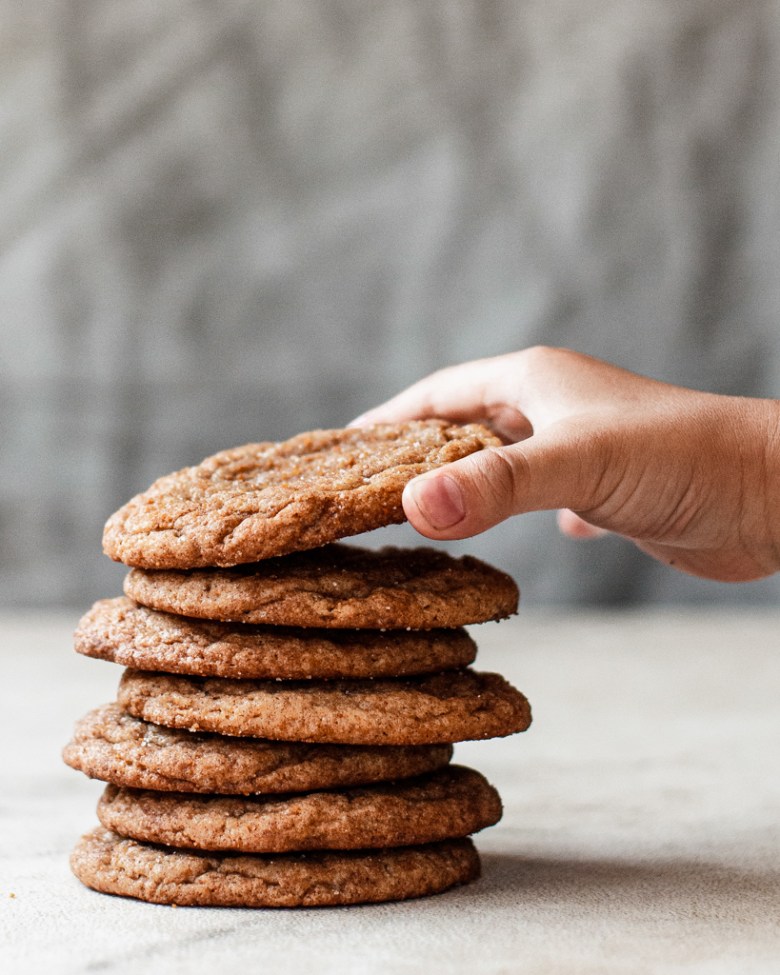
graham cracker snickerdoodle stack

Graham Cracker Snickerdoodles

Makes about 12 cookies

Ingredients:

For the snickerdoodle dough:
  • 113g (1/2 c) unsalted butter, at room temperature
  • 66g (1/3 c) granulated sugar
  • 66g (1/3 c) light brown sugar
  • 20g (1 Tbsp) honey 
  • 1 tsp cream of tartar
  • 1/2 tsp baking soda
  • 1/2 tsp ground cinnamon
  • 1/2 tsp kosher salt
  • 1 large egg, at room temperature
  • 1 tsp vanilla extract
  • 170g (1 1/3 c) white whole wheat flour or sifted wheat flour (I like Flourist sifted red fife)
  • 50g (1/2 c) finely ground graham cracker crumbs
For the sugar sprinkle:
  • 15g (1 Tbsp) finely ground graham cracker crumbs
  • 15g (heaping 1 Tbsp) granulated sugar
  • 1/4 tsp ground cinnamon

Method:

  1. In the bowl of a stand mixer fitted with the paddle attachment, combine the butter, sugars, honey, cream of tartar, baking soda, cinnamon, and salt. Mix on low to combine, then increase the speed to medium and cream until light and fluffy, about 3-4 minutes. Scrape down the sides of the bowl and the paddle a couple times during this process to ensure even mixing.
  2. Reduce the mixer speed to low and add the egg and vanilla. Increase the speed to medium and mix until smooth. Scrape down the bowl and paddle.
  3. With the mixer on low, add the flour and graham cracker crumbs. Mix just until combined. Use a flexible spatula to stir from the bottom of the bowl a few times to make sure everything is well-mixed and there are no pockets of unincorporated flour. Cover and chill until firm but still scoopable, about 45 minutes.
  4. While the dough is chilling, preheat the oven to 375°F with a rack in the middle and line two baking sheets with parchment paper. In a small bowl, whisk together the graham cracker crumbs, granulated sugar, and cinnamon for the sugar sprinkle.
  5. Portion the dough into twelve ping-pong sized balls, about 45 grams (3 tbsp) each. Toss each in the sugar sprinkle, coating completely. Place the cookies on the prepared baking sheets about 2½ inches (6 cm) apart.
  6. Bake the cookies one sheet at a time until the edges are golden but the centers are still soft and pale, about 10 to 12 minutes. Rotate the sheet in the oven halfway through baking. Immediately after baking, sprinkle on a bit more sugar sprinkle if desired. Cool the cookies on the baking sheets for about 5 minutes, then transfer to a wire rack to cool completely. Store leftovers in an airtight container.

Berry buckwheat crumb bars

berry crumb bars

Crumb bars, crumble bars, streusel bars — whatever you call them, I’m a fan. Mostly because they belong to my favorite food category, rustic fruit bressert (that’s breakfast and/or dessert).

COVID lockdown has made it extra challenging this year to keep track of the date, but thankfully the seasons still change. We are in the middle of berry season here in Ontario. And while I wasn’t sure if our annual traditions of strawberry and cherry picking would be possible this year, happily we managed to do both.

My family loves fresh fruit like candy, so I wasn’t sure I’d be able to actually make anything with the berries. But I squirreled away just enough to make these delightful berry crumb bars. I had some for breakfast and some for dessert and can confirm they go down equally well for either.

A few notes:
  • As with most fruit desserts, I love adding some wholegrain flour for extra flavor. If you don’t have buckwheat on hand, try rye, einkorn, or spelt! Or just substitute with more all-purpose if you don’t have any whole grains stocked.
  • For the filling, I used a mix of (very ripe) strawberries, cherries, and some miscellaneous frozen berries that I had lurking in the freezer. I fully defrosted the frozen berries and drained off the extra liquid to avoid a soggy crust.
  • Because my fruit was mostly quite ripe and juicy, I didn’t need to add much sweetener. If your fruit isn’t so ripe, adjust the sugar to taste or try mixing with a little jam.
berry crumb bars stacked

Berry buckwheat crumb bars

Makes one 8×8 pan

Ingredients:

For the crumb mixture:
  • 190g (1 1/2 c) all purpose flour
  • 60g (1/2 c) buckwheat flour
  • 1 tsp kosher salt
  • 50g (1/4 c) granulated sugar
  • 50g (1/4 c) light brown sugar
  • 200g (14 T) unsalted butter, cold and cubed
  • 30g (1/3 c) rolled oats
  • 30g (1/4 c) sliced almonds (or other chopped nuts)
  • 30g (2 Tbsp) turbinado sugar
For the fruit filling:
  • 400g (~2 1/2 c) mixed berries, finely diced (if frozen, thaw and drain before using — see notes above)
  • 13g (1 Tbsp) sugar (or to taste)
  • 12g (1 1/2 Tbsp) cornstarch
  • Pinch of salt
  • Squeeze of lemon juice

Method:

  1. Preheat the oven to 375°F with a rack in the middle. Line an 8 x 8-inch pan with two long criss-crossed pieces of parchment, leaving a couple of inches of overhang on all sides. (This will make it easy to remove the bars later.) Lightly grease the parchment.
  2. In the bowl of a food processor, combine the flours, salt, and sugars. Pulse to combine. Scatter the cold, cubed butter over the top. Pulse until the mixture forms clumps but is not completely smooth (this took me about 20-25 short pulses).
  3. Transfer about a third (~180g) of the mixture to a separate bowl. Add the oats, almonds, and turbinado sugar and use your fingertips to quickly pinch in, forming a clumpy streusel. Refrigerate until needed.
  4. Transfer the remaining two-thirds (~360g) of the mixture to the prepared pan. Use your fingers or the bottom of a small glass or measuring cup to press the crumbs evenly into the bottom of the pan. Prick all over with a fork. Bake for about 10-15 minutes, or until just set. Transfer to a wire rack while you prepare the fruit filling (no need to let it cool completely).
  5. To make the filling, stir together the fruit, sugar, cornstarch, salt, and lemon juice. Spoon the fruit mixture evenly over the par-baked crust, then sprinkle evenly with the reserved streusel mixture.
  6. Bake until the crumb topping is golden and the fruit juices are bubbling in the center, about 45-50 minutes. Allow to cool completely on a wire rack before slicing (for cleanest results, chill for an hour in the refrigerator). Refrigerate leftover bars in an airtight container for up to 5 days; serve cold or at room temperature.

Mango ice cream

mango ice cream

Last week I asked my 4-year-old whether he preferred chocolate or vanilla, and he replied “mango.” This is coming from a kid who really likes chocolate, so you can imagine just how deep his mango love runs. At any rate, mango desserts reign supreme in this household — whether it be mango cake, mango pudding, or this creamy and delicious mango ice cream.

This is a Philadelphia-style, or eggless ice cream. The base is super easy to make and comes together in under 10 minutes (assuming you use canned mango puree — more on that in a second). I gravitate towards Philadelphia-style ice cream when fruits are involved — as much as I love custard bases, the eggy richness tends to dull fruit flavors a bit. Not here — the mango is fresh and present!

A couple of notes:

  • I am all about using canned mango puree (or pulp). It’s super smooth and relatively cheap, and the flavor is really consistent. I’ve made a lot of mango puree over the years and it’s just not my favorite thing to do — you have to strain it to get it super smooth, and if your mangoes are a bit “meh,” the flavor of your final dessert will be lacking as well. I get my mango puree from our local Asian supermarket. Alphonso and Kesar varieties are the most common here, and both work great. Make sure you’re getting pulp or puree, not juice.
  • Of course, if you’re swimming in fresh mangoes and want to make your own, that’ll work too — just dice, blend in a food processor, and make sure to strain it for the best texture. You might have to add a little sugar to taste if your mangoes are not super sweet.
  • This ice cream base is adapted from one of my favorite ice cream cookbooks from Salt & Straw. It does ask for a few “special” ingredients — namely milk powder, corn syrup, and xanthan gum. These all help create a nice, smooth texture and increase shelf-life. I can get all these ingredients from my local supermarket, but they are all fairly easy to find online as well.
  • Note that this recipe makes a good amount of ice cream, about the max my 1.5 quart Cuisinart ice cream maker can handle. If your ice cream maker has a smaller capacity, you may want to churn in two batches or reduce everything by 1/4 to 1/3.

Mango ice cream

Makes a generous 1 quart/liter / Base recipe adapted from Salt & Straw

Ingredients:

  • 100g (½ c) granulated sugar
  • 15g (2 Tbsp) milk powder
  • ¼ tsp xanthan gum
  • ¼ tsp kosher salt
  • 330g (1 1/3 c) whole milk
  • 40g (2 Tbsp) corn syrup
  • 330g (1 1/3 c) heavy cream
  • 330g (1 1/3 c) mango puree (I prefer canned)

Method:

  1. Make the mango ice cream base: In a medium saucepan, whisk together the sugar, milk powder, xanthan gum, and salt. Whisk in the milk and corn syrup.
  2. Heat over medium, whisking constantly, until the mixture is steaming and slightly thickened and the sugar is dissolved, about 3 minutes. Pour into a heatproof container and whisk in the heavy cream and mango puree. Refrigerate until cold, at least 4 hours or up to 3 days.
  3. Churn the ice cream: Churn the chilled base according to the instructions for your machine, until the mixture has the texture of soft serve (for my machine this is about 25 minutes). Transfer to a freezer-friendly container (a loaf pan works well). Cover with parchment paper, pressing it to the surface of the ice cream so it adheres, then cover with a lid. Freeze until firm, at least 6 hours. Ice cream will keep for up to 3 months.