Toasted Milk Ice Cream

toasted milk ice cream

If you’ve hung around here or my Instagram much, you’ll know I have a thing for toasted milk powder. It’s magical stuff, my secret weapon for injecting extra brown buttery, caramelly, hazelnutty flavor into baked goods.

If the concept is new to you, here’s a crash course. Milk powder is essentially a concentrated powder of milk solids, made by preheating, evaporating, and reheating milk. It’s a staple in my baking kit; I use it most often in my enriched sourdoughs to make extra tall and soft loaves (by increasing the protein and lactose without adding extra liquid).

I first came across the idea of toasting milk powder on Francisco Migoya’s old blog (sadly it’s no longer online), though have since read about it in older articles on other sites such as Ideas in Food. The concept is brilliant — by toasting milk powder, you’re able to add more of the tasty brown bits that give brown butter its flavor and aroma without adding additional fat or liquid! I do think toasted milk has its own unique taste, with hints of caramel and toasted nuts. It’s a special flavor that I’ve come to love, and am always thinking of new ways to include it in my bakes.

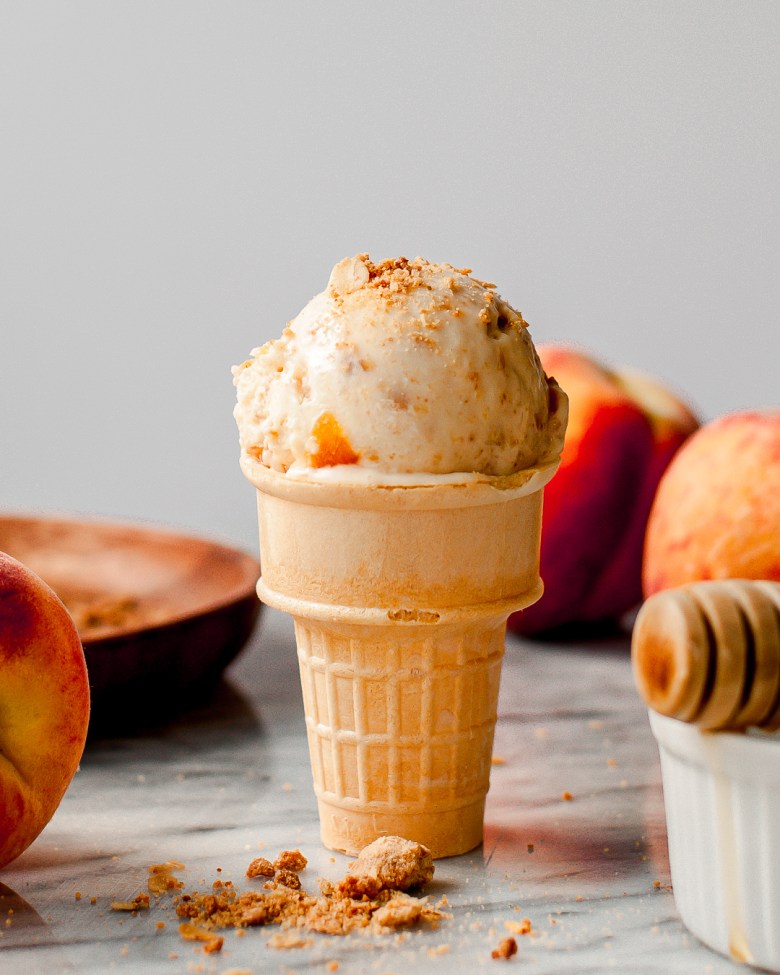
My latest obsession is this toasted milk ice cream. It truly is like no other ice cream flavor I’ve had, deceptively plain-looking but with an intriguingly rich flavor. I did tests with an added ripple of fudge and toyed with the idea of adding a milk jam or butterscotch swirl, but in the end I like it best on its own.

How to toast milk powder

I prefer to toast nonfat milk powder in either instant pot (pressure cooker) or the microwave for the most even and controlled results. (Please see my toasted milk banana cream pie post for instructions on those methods.) You can also toast milk powder as you would nuts, either in a dry saucepan on the stove, or in a single layer on a sheet pan in the oven at 325F, stirring often. Milk solids burn very easily, so either way make sure you stir often and keep an eye on it.

Note that I always use nonfat or skim milk powder as I only want to add the milk solids and not any additional fat to my recipes. While I have had readers say they’ve used toasted whole milk powder with success I personally have not tried it.

Chasing texture

I went through quite a few tests chasing the perfect texture for this ice cream. I knew from previous recipes that toasted milk powder doesn’t always dissolve easily in milk products. I suspect this is because it’s not fat-soluble; but TBH I’m still fuzzy on the exact reasons because I have had some cases where it dissolved easily. (Unfortunately I can’t remember the exact brand of milk powder I was using.) Depending on the application, this might not be a big deal. For example, in my banana cream pie I didn’t have a problem with it because of all the other textures involved in that dessert.

However, for this ice cream, I really wanted something silky smooth. I thought just grinding down the milk powder really finely and straining out any big bits would work, but unfortunately it wasn’t that simple. I tried an immersion blender, a regular blender, blending cold, blending hot, double straining, etc. While blending helped some, in the end I could still detect some little granules and it was bumming me out.

Milk powder as an infusion

What finally worked for me was to treat milk powder like an infusion: I first heated the dairy with the toasted milk powder, let it infuse in the fridge overnight, then strained and made sure it was grit-free before mixing up my ice cream base. A regular sieve was not effective in straining out all the particles, but a double layer of cheesecloth does the trick perfectly!

Other ingredients for custard ice cream

I opted for a custard ice cream because I wanted that rich, slightly chewy texture from an egg yolk base. Most of the ingredients are common and self-explanatory, but a couple warrant a little explanation:

  • Glucose or light corn syrup: Using an inverted sugar such as glucose or light corn syrup gives frozen desserts a more viscous, less icy texture. I almost always use it for a portion of the sweetener in my ice creams. Many people shy away from these products because they associate it with high fructose corn syrup. They are NOT the same thing; high fructose corn syrup is corn syrup that has been further treated to contain more fructose and is sweeter than regular corn syrup (or glucose). Check your local baking supply store or online for glucose; in my area corn syrup is available in most grocery stores. In a pinch you can replace the inverted sugar with the same weight of granulated sugar, though the ice cream will be more sweet and icy.
  • Xanthan gum: Don’t let the name scare you — xanthan gum is just a natural gum that in this case works as a stabilizer, inhibiting the growth of ice crystals. Just a tiny bit drastically improves the texture and shelf life of homemade ice cream. I found mine at the local grocery store and online. If you can’t find xanthan gum, you can replace it with 5g of tapioca starch whisked with 20g cold milk. Stir this slurry into the custard base after it reaches temperature, before straining.
toasted milk ice cream

Toasted Milk Ice Cream

Yield: About 1 liter
Prep Time: 30 minutes
Cook Time: 20 minutes
Additional Time: 16 hours
Total Time: 16 hours 50 minutes

A creamy custard ice cream infused with toasted milk powder for a caramelly, nutty, brown-buttery flavor.

Ingredients

For the infused dairy:

  • 440g whole milk
  • 330g heavy cream (35%), plus more as needed
  • 50g deeply toasted nonfat milk powder

For the toasted milk custard base

  • 150g granulated sugar
  • 1/4 tsp xanthan gum (optional but recommended for best texture)
  • 1/2 tsp kosher salt
  • 50g glucose or corn syrup
  • 100g egg yolks (about 5 large)
  • 700g infused dairy
  • 2 tsp vanilla extract

Instructions

  1. Infuse the dairy: In a medium saucepan, whisk together the milk, cream, and toasted milk powder. Cook over medium heat, whisking frequently to prevent scorching, until steaming. Remove from heat, cover, and cool to room temperature. Refrigerate and allow to infuse for at least 12 but preferably 24 hours. (You can transfer to a smaller container, if needed.)
  2. Strain the dairy: When ready to cook the custard, strain and measure the infused dairy. Weigh the container or large measuring cup into which you will be straining the dairy. Place a fine mesh strainer lined with a double layer of cheesecloth over the container. Strain the dairy, then carefully gather up the sides of the cheesecloth and gently squeeze the saturated milk powder solids to eke out as much of the infused dairy as you can without letting any solids pass through. Discard the milk powder solids.
  3. Weigh the dairy: Now weigh the container with the infused dairy. Subtract the weight of the empty container, which will tell you how much dairy you now have. Add additional cream if needed to total 700g.
  4. Make the custard base: In a medium saucepan, whisk together the sugar, xanthan gum, and salt. Add the glucose and egg yolks and whisk until well combined. Stream in the infused dairy and whisk until smooth. Cook over medium-low heat, frequently stirring and scraping the pot with a flexible heat-resistant spatula, until the custard is hot to the touch and thickens enough to coat the back of a spoon (170-180F). Strain the custard into a heat-safe container and stir in the vanilla extract.
  5. Chill the custard base: Cover the container and refrigerate the custard until well-chilled. at least 4 hours. (If you're in a hurry, you can chill the custard over an ice bath.)
  6. Churn the custard base: Before churning, place a freezer-friendly container in your freezer (a loaf pan works well). Churn the chilled base according to the instructions for your machine, until the mixture has the texture of soft serve (for my machine this is about 20-25 minutes). 
  7. Freeze the ice cream: Transfer ice cream to the chilled container. Cover with parchment paper, pressing it against the surface of the ice cream so it adheres, then cover with a lid. Freeze until firm and scoopable. Ice cream will keep for up to 3 months, but good luck with that.  

    Related recipes:

    Blood orange sherbet

    blood orange sherbet scoops

    I know, I know. Three kinds of dairy, fancy blood oranges, lots of bowls, and a few head-scratching ingredients; all for some blood orange sherbet?

    I understand, it’s a big ask. But if you are willing to commit, you’ll be rewarded with the best orange sherbet of your life — intensely fruity and tangy and refreshing. The perfect shade of peachy pink, too (though exact color will vary depending on your fruit!).

    The neglected world of sherbet

    But first, sherbet: if you’re like me, you may have grown up on those little cups of orange sherbet swirled with vanilla ice cream (the ones with the tiny wooden paddles), or perhaps the occasional scoop of rainbow sherbet. Neither tasted much like orange or rainbows, but they had their place as a refreshing poolside treat.

    Sherbet is actually a category of frozen dessert that sits between sorbet and ice cream. Basically, sherbets are fruit sorbets with some added dairy. Sherbets have the bright flavor of sorbet with just a touch of milky richness for body. They’re the perfect palate cleanser and such a fun, overlooked way to preserve the fruits of the season.

    If you’re interested in sherbet (or ice cream making in general), I highly, HIGHLY recommend Dana Cree’s book Hello, My Name is Ice Cream, the original source for this recipe. Of all the ice cream cookbooks I own, it’s my favorite in terms of technical knowledge and inspired flavor combos. Although Cree delves deep into the science of ice cream making, it’s all packaged in understandable language and is considerate of the average home churner. Although she has some favorite specialized ingredients, she offers accessible alternatives for those of us who can’t source them easily.

    Specialty ingredients and alternatives

    blood oranges

    Here’s the rundown of a few specialty ingredients needed for this blood orange sherbet and some alternatives if you can’t source them.

    • Blood oranges: Blood oranges are a variety of citrus known for their deep rosy color and extra-sweet flavor. They tend to taste a little less acidic than regular navel oranges, with undertones of raspberry. Read all about blood oranges at Ask the Food Geek. If blood oranges aren’t available or in season, you can replace the zest and juice with that of another orange-like variety (regular orange, tangerine, cara cara, clementine, etc.). For the amount of juice and zest in this recipe, I used about 5 smallish blood oranges.
    • Citric/malic acid: These are neutral tasting acids that come in powdered form. They definitely give the sherbet an extra refreshing zing, but you can either omit this if you prefer a less tart sherbet or replace with a squeeze of lemon juice. Citric acid is often available at the grocery store (look near the spices or in the jam/jelly making section); I found both at a beer-making shop; they are also available online.
    • Glucose or light corn syrup: Using an inverted sugar such as glucose or light corn syrup gives frozen desserts a more viscous, less icy texture. Check your local baking supply store for glucose; corn syrup is available in most grocery stores. In a pinch you can replace the inverted sugar with the same weight of granulated sugar, though the sherbet will be more sweet and icy. Read more about using inverted sugar in ice cream in this article on Serious Eats.
    • Xanthan gum: Don’t let the name scare you — xanthan gum is jut a natural gum that in this case works as a stabilizer, inhibiting the growth of ice crystals. Just a tiny bit drastically improves the texture and shelf life of homemade ice cream. I found mine at the local bulk store and online. If you can’t find xanthan gum, you can replace with 2 tsp of tapioca starch whisked with 2 Tbsp cold water. Stir this slurry into the dairy base after straining out the orange zest and before chilling over the ice bath. (Consult the book for even more alternatives.)
    blood orange sherbet

    Blood orange sherbet

    Barely adapted from Hello, My Name is Ice Cream | Makes about 1 quart

    Ingredients:

    • 250g blood orange juice, freshly squeezed (zest before juicing)
    • 100g buttermilk
    • 1/2 tsp malic or citric acid or 1 tsp lemon juice (optional)
    • 300g whole milk
    • 100g cream
    • 150g granulated sugar
    • 100g glucose or light corn syrup
    • 1 Tbsp packed blood orange zest
    • 1/4 tsp xanthan gum

    Method:

    • Make the blood orange-buttermilk mixture: In a small bowl, whisk together the blood orange juice, buttermilk, and acid or lemon juice (if using). Refrigerate.
    • Heat and infuse the dairy: In a medium saucepan, whisk together the whole milk, cream, sugar, and glucose. Cook, whisking frequently, over medium heat, until the sugar is dissolved and the mixture comes to a bare simmer. Remove from heat, stir in the orange zest, and cover. Infuse for 30 minutes.
    • Chill the dairy: Strain the infused base into a clean metal or glass bowl and discard the zest. Set over an ice bath and until the base is cool to the touch (50F), whisking occasionally.
    • Blend and chill: Whisk in the xanthan gum and blood orange-buttermilk mixture. Use an immersion blender (or transfer to a traditional blender) to blend until smooth. Cover and refrigerate for at least 4 hours, or up to 24.
    • Churn and freeze: Churn the chilled base according to the instructions for your machine, until the mixture has the texture of soft serve (for my machine this is about 25 minutes). Transfer to a freezer-friendly container (a loaf pan works well). Cover with parchment paper, pressing it to the surface of the ice cream so it adheres, then cover with a lid. Freeze until firm, at least 4 hours. Ice cream will keep for up to 3 months.
    blood orange sherbet scoops

    Chocolate-freckled coffee and rye whisky ice cream

    coffee rye whisky ice cream

    I’ve been obsessed with making ice cream for the past year or so, ever since one of our friends kindly gave us her ice cream maker. I grew up in an ice-cream loving household; birthday cakes were often boxes of ice cream decorated with candy (even though more than half of us are lactose intolerant).

    I’d hemmed and hawed for a couple summers about getting an ice cream maker — was it worth the space? Would I really use it? And now that I have one, I honestly can say I only regret not having one sooner!

    (Side note: Yes, there are lots of “no churn” ice cream recipes out there. And ways to get around not having an ice cream maker. If you can’t or don’t want to invest in a machine, might I suggest you explore semifreddo recipes? They have a beautiful smooth and mousse-like texture, and aren’t as sweet/heavy compared to typical no-churn recipes involving sweetened condensed milk and whipped cream.)

    Once you find some base recipes you like, homemade ice cream is all about experimenting and creating your own flavors. Try flavoring the base with an infusion or addition, add a mix-in or three, or both! For this chocolate-frecked coffee and rye whisky batch, I infused the dairy with whole coffee beans, mixed in a little rye whisky before churning, then added in some melted chocolate at the end of churning to create chocolate “freckles.” So. Delicious. I can’t wait to make this one again!

    A few notes:

    • The base here is adapted from my go-to Philadelphia-style (eggless) ice cream base from Salt and Straw. It’s super easy to make, but it does require xanthan gum, corn syrup/glucose, and milk powder. I don’t recommend skipping these ingredients because they work together to create a beautifully smooth, non-icy ice cream that lasts well in a home freezer. I can easily source all three ingredients at my local bulk food stores and supermarket.
    • There are a lot of ways to flavor ice cream with coffee, but what I particularly liked about this cold infusion method was that the coffee flavor is super clean and not bitter at all. (You also don’t end up with a brown-colored ice cream that screams “COFFEE” which I thought was kind of nice.) I recommend weighing out the coffee beans before you add them, and then weighing them after they’re strained out. The coffee beans will inevitably soak up some of the liquid, so you’ll want to replace it before churning. Weighing the coffee beans will tell you exactly how much liquid to add back.
    • For best results, use fresh coffee beans. They don’t need to be super fancy or single origin, but fresh beans will impart the most flavor. I like to use an espresso roast, but use whatever you like.

    One last note: my cookbook, Baked to Order, is now available for pre-order! It comes out November 17, 2020, and contains 60 sweet and savory recipes, with variations for every mood and craving. I can’t wait to tell you more about it in the coming months, but in the meantime please find more info on the Baked to Order cookbook page. Thank you so much for your support!

    Chocolate-freckled coffee and rye whisky ice cream

    Makes about 1 quart/liter

    Ingredients:

    • 100g (½ c) granulated sugar
    • 15g (2 Tbsp) milk powder
    • ¼ tsp xanthan gum
    • ¼ tsp kosher salt
    • 330g (1 1/3 c) whole milk, plus more as needed (divided)
    • 40g (2 Tbsp) corn syrup or glucose
    • 113g (1/2 c) whole coffee beans
    • 330g (1 1/3 c) heavy cream, plus more as needed (divided)
    • 30-45g (2-3 Tbsp) rye whisky
    • 90g (1/2 c) bittersweet chocolate, chopped
    • 1 1/2 tsp neutral vegetable oil

    Method:

    1. Make the coffee ice cream base: In a medium saucepan, whisk together the sugar, milk powder, xanthan gum, and salt. Whisk in 330g milk and the corn syrup.
    2. Heat over medium, whisking constantly, until the mixture is steaming and slightly thickened and the sugar is dissolved, about 3 minutes.
    3. Remove the saucepan from the heat, add the 113g whole coffee beans, and cover. Infuse in the warm milk for 5-10 minutes. Pour the milk mixture and coffee beans into a heatproof container and stir in the 330g heavy cream. Cover and transfer to the refrigerator to infuse for 12 hours.
    4. Churn the ice cream: When you are ready to churn your ice cream, strain out the coffee beans with a fine mesh sieve. Weigh the coffee beans and subtract 113g — this is how much liquid was absorbed by the beans, and how much liquid you need to add back to the strained base via the rye whisky and extra milk/cream. (My beans weighed 213g, so I needed to add about 100g of liquid back. I added 40g of rye whisky, 30g milk, and 30g cream.)
    5. Churn the base according to the instructions for your machine, until the mixture has the texture of soft serve (for my machine this is about 20-25 minutes). While the ice cream is churning, melt the chocolate and oil together in the microwave or over a double boiler. During the last minute of churning, drizzle in the melted chocolate in a thin, steady stream.
    6. Transfer ice cream to a freezer-friendly container (a loaf pan works well). Cover with parchment paper, pressing it to the surface of the ice cream so it adheres, then cover with a lid. Freeze until firm, at least 6 hours. Ice cream will keep for up to 3 months.  

    Mango ice cream

    mango ice cream

    Last week I asked my 4-year-old whether he preferred chocolate or vanilla, and he replied “mango.” This is coming from a kid who really likes chocolate, so you can imagine just how deep his mango love runs. At any rate, mango desserts reign supreme in this household — whether it be mango cake, mango pudding, or this creamy and delicious mango ice cream.

    This is a Philadelphia-style, or eggless ice cream. The base is super easy to make and comes together in under 10 minutes (assuming you use canned mango puree — more on that in a second). I gravitate towards Philadelphia-style ice cream when fruits are involved — as much as I love custard bases, the eggy richness tends to dull fruit flavors a bit. Not here — the mango is fresh and present!

    A couple of notes:

    • I am all about using canned mango puree (or pulp). It’s super smooth and relatively cheap, and the flavor is really consistent. I’ve made a lot of mango puree over the years and it’s just not my favorite thing to do — you have to strain it to get it super smooth, and if your mangoes are a bit “meh,” the flavor of your final dessert will be lacking as well. I get my mango puree from our local Asian supermarket. Alphonso and Kesar varieties are the most common here, and both work great. Make sure you’re getting pulp or puree, not juice.
    • Of course, if you’re swimming in fresh mangoes and want to make your own, that’ll work too — just dice, blend in a food processor, and make sure to strain it for the best texture. You might have to add a little sugar to taste if your mangoes are not super sweet.
    • This ice cream base is adapted from one of my favorite ice cream cookbooks from Salt & Straw. It does ask for a few “special” ingredients — namely milk powder, corn syrup, and xanthan gum. These all help create a nice, smooth texture and increase shelf-life. I can get all these ingredients from my local supermarket, but they are all fairly easy to find online as well.
    • Note that this recipe makes a good amount of ice cream, about the max my 1.5 quart Cuisinart ice cream maker can handle. If your ice cream maker has a smaller capacity, you may want to churn in two batches or reduce everything by 1/4 to 1/3.

    Mango ice cream

    Makes a generous 1 quart/liter / Base recipe adapted from Salt & Straw

    Ingredients:

    • 100g (½ c) granulated sugar
    • 15g (2 Tbsp) milk powder
    • ¼ tsp xanthan gum
    • ¼ tsp kosher salt
    • 330g (1 1/3 c) whole milk
    • 40g (2 Tbsp) corn syrup
    • 330g (1 1/3 c) heavy cream
    • 330g (1 1/3 c) mango puree (I prefer canned)

    Method:

    1. Make the mango ice cream base: In a medium saucepan, whisk together the sugar, milk powder, xanthan gum, and salt. Whisk in the milk and corn syrup.
    2. Heat over medium, whisking constantly, until the mixture is steaming and slightly thickened and the sugar is dissolved, about 3 minutes. Pour into a heatproof container and whisk in the heavy cream and mango puree. Refrigerate until cold, at least 4 hours or up to 3 days.
    3. Churn the ice cream: Churn the chilled base according to the instructions for your machine, until the mixture has the texture of soft serve (for my machine this is about 25 minutes). Transfer to a freezer-friendly container (a loaf pan works well). Cover with parchment paper, pressing it to the surface of the ice cream so it adheres, then cover with a lid. Freeze until firm, at least 6 hours. Ice cream will keep for up to 3 months.

    Peach Crisp Ice Cream

    peach crisp ice cream in container

    Before we round the corner into September (!!), I have one last ice cream recipe for you. Churning frozen treats has definitely been my summer 2019 obsession — I’ve been making frozen yogurt, sorbet, sherbet, eggless ice creams, and custard ice creams as fast as we can consume or share each batch. It’s just so addicting (and delicious)!

    I’ve especially enjoyed trying to incorporate various seasonal fruits into ice cream. While either sorbet or an eggless (“Philadelphia”) ice cream base has been my modus operandi when incorporating fruit — I find the lack of eggs helps the fruit flavor shine through better — this time I was going for a peaches and cream vibe and wanted a bit of extra richness. I used the same buttermilk custard base from the toast and jam ice cream, but added in a honey-sweetened roasted peach puree. Swirls of peach jam amp up the “peachiness” while sprinkles of crisp oat streusel add texture and nuttiness. It’s like eating a peach crisp a la mode!

    A few notes:

    • This makes a fairly large batch of ice cream — probably the largest amount my home ice cream maker can handle. If you have a smaller machine you will want to churn in two batches (or reduce the recipe by 25-30%).
    • The oat streusel recipe is adapted from Jeni’s Splendid Ice Creams at Home and makes way more than you need for this batch of ice cream. But! It freezes beautifully and I have absolutely loved having a big batch on hand to layer in other ice creams / sprinkle on sundaes / snack on. So I definitely recommend just making the full batch and patting yourself on the back later.
    • My favorite containers for storing ice cream are these Cambro 1-quart Poly Rounds. They don’t take up a lot of room in the freezer and they’re the perfect size for a typical home batch. But you can use a loaf pan, empty yogurt container, or similarly-sized freezer-safe vessel. Whatever container you choose, I recommend sticking it in the freezer while you are churning your ice cream to help minimize melting!
    peach crisp ice cream in cone

    Peach Crisp Ice Cream

    Makes a generous 1 quart | Inspired by Salt & Straw and Jeni’s Splendid Ice Creams at Home

    Ingredients:

    For the buttermilk custard base:
    • 1/2 c + 2 Tbsp / 125g granulated sugar
    • 2 Tbsp dry milk powder
    • 1/4 tsp xanthan gum
    • 4 large egg yolks
    • 2 Tbsp / 40g light corn syrup
    • 1 1/2 c heavy cream
    • 1 1/2 c buttermilk
    • 1/4 tsp kosher salt
    For the roasted peach puree:
    • 12 oz ripe peaches, pitted and chopped
    • 80g (1/4 c) honey
    For the crisp oat streusel:
    • 227g cold, unsalted butter, cut into 1/2″ cubes
    • 188g AP flour (swap in whole grain if you’d like)
    • Pinch of ground cinnamon
    • 150g light brown sugar
    • 1 tsp kosher salt
    • 135g old-fashioned rolled oats
    To finish:
    • ~1/2 c peach jam, homemade or store-bought

    Method:

    1. Make the buttermilk custard base: Combine the cream and buttermilk in a large measuring cup.
    2. Combine 100g (1/2 c) of sugar, dry milk powder, and xanthan gum in a small bowl and whisk well. In a large bowl, combine the egg yolks and remaining 25g (2 T) sugar and whisk until the yolks are lighter in color, about 1 minute.
    3. In a medium pot, combine the corn syrup and half (1 1/2 c) of the buttermilk/cream mixture. Add the sugar mixture and immediately whisk vigorously until smooth. Set the pot over medium heat and cook stirring often and adjusting the heat if necessary to prevent a simmer, until the sugar has fully dissolved (about 3 minutes). Remove the pot from the heat. Start whisking the yolk mixture and continue to whisk constantly while slowly drizzling the hot liquid into the yolks.
    4. Scrape the entire mixture back into the pot and cook over medium-low heat, whisking constantly, until the custard is thick enough to coat the back of a spoon (it should register ~170F on a digital thermometer). Strain into a heatproof and airtight container and whisk in the remaining buttermilk/cream mixture. Cover and refrigerate until well-chilled, at least 6 hours and up to 1 week.
    5. Make the peach puree: Preheat oven to 350F. Spread the chopped peaches in a single layer on a quarter-sheet baking pan lined with parchment paper. Drizzle with honey.
    6. Bake peaches for about 30-40 minutes, stirring every 10-15 minutes, until the released juices have thickened. (The peaches shouldn’t be browned at all.) Remove from oven and allow to cool to room temperature. When cool, scrape the peaches and all the syrupy juices into a food processor or blender. Blend until smooth. Transfer to an airtight container and refrigerate until cold.
    7. Make the crisp oat streusel: Preheat oven to 350F. Line a large baking sheet with parchment paper or a silicone mat.
    8. In a large bowl, whisk together the all dry ingredients except the oats. Add the cubed, chilled butter and rub it into the dry mixture with your fingertips until the mixture resembles coarse sand. Add the oats and stir to combine well. Spread the mixture in a single layer onto the prepared baking sheet, aiming for clumps about 1/4″-1/2″ in size.
    9. Bake for 30-35 minutes, stirring occasionally, until toasted and browned. Cool completely on a wire rack, then freeze in a ziplock bag or airtight container until ready to use.
    10. Churn the ice cream: Whisk 1/4 tsp kosher salt and chilled peach puree into the chilled buttermilk base. Churn according to the instructions for your machine, until the mixture has the texture of soft serve. Transfer to a freezer-friendly container, alternating with dollops of peach jam and generous sprinklings of oat streusel. Cover with parchment paper, pressing it to the surface of the ice cream so it adheres, then cover with a lid. Freeze until firm, at least 6 hours. Ice cream will keep for up to 3 months.

    Toast and Jam Ice Cream

    toast and jam ice cream in a bucket


    One of the questions I hear often is, “What do you do with all the bread you bake?” Truthfully, we normally don’t have a ton of leftovers; and if I know a loaf won’t be finished within a couple days I’ll usually freeze pre-cut slices. But every so often I wind up with a hunk of bread that’s just a little too stale for the freezer.

    Sure, that bread could make some pretty fine croutons or breadcrumbs. Or it could be tossed in brown butter and sugar, baked until deliciously golden and nutty, and spun into a quart of homemade ice cream. Add a swirl of jam, and you’ve got breakfast for dessert? Dessert for breakfast? Either way — delicious.

    This toast and jam ice cream starts with a creamy and slightly tangy buttermilk custard base. Once done churning, simply alternate layers of ice cream, brown butter crumbs and jam and freeze until firm. If you like toasty bits in every bite you can add the brown butter crumbs during the last minute of churning for more even distribution. You may not use all the crumbs, but save extras for sprinkling on top…if you can resist snacking on them beforehand!


    toast and jam ice cream

    Toast and Jam Ice Cream

    Makes about 1 quart / Inspired by Salt & Straw and Tartine

    Ingredients:

    For the buttermilk ice cream base:
    • 1/2 c + 2 Tbsp / 125g granulated sugar
    • 2 Tbsp dry milk powder
    • 1/4 tsp xanthan gum
    • 4 large egg yolks
    • 2 Tbsp / 40g light corn syrup
    • 1 1/2 c heavy cream
    • 1 1/2 c buttermilk
    • 1/4 tsp kosher salt
    For the caramelized bread crumbs:
    • 168g (~2 slices) day-old bread (I used sourdough)
    • 30g (2 Tbsp) butter
    • 67g (1/3 c) granulated sugar
    • 1/2 teaspoon ground cinnamon
    • Generous pinch of kosher salt
    To finish:
    • ~1/2 storebought or homemade jam

    Method:

    1. Make the buttermilk custard base: Combine the cream and buttermilk in a large measuring cup.
    2. Combine 100g (1/2 c) of sugar, dry milk powder, and xanthan gum in a small bowl and whisk well. In a large bowl, combine the egg yolks and remaining 25g (2 T) sugar and whisk until the yolks are lighter in color, about 1 minute.
    3. In a medium pot, combine the corn syrup and half (1 1/2 c) of the buttermilk/cream mixture. Add the sugar mixture and immediately whisk vigorously until smooth. Set the pot over medium heat and cook stirring often and adjusting the heat if necessary to prevent a simmer, until the sugar has fully dissolved (about 3 minutes). Remove the pot from the heat. Start whisking the yolk mixture and continue to whisk constantly while slowly drizzling the hot liquid into the yolks.
    4. Scrape the entire mixture back into the pot and cook over medium-low heat, whisking constantly, until the custard is thick enough to coat the back of a spoon (it should register ~170F on a digital thermometer). Strain into a heatproof and airtight container and whisk in the remaining buttermilk/cream mixture. Cover and refrigerate until well-chilled, at least 6 hours and up to 1 week.
    5. Make the caramelized bread crumbs: Preheat the oven to 350ºF and line a sheet pan with parchment paper or silicone mat.
    6. Crumble the bread into small, corn kernel-sized bits.
    7. In a skillet, heat the butter until it melts, then continue to cook until it starts to brown. Remove from heat and stir in the bread crumbs, sugar, cinnamon, and salt.
    8. Spread on the baking sheet and bake for 20 to 30 minutes, stirring a few times during baking, until the bread bits are well-toasted and a deep, dark brown.
    9. Cool completely then store in an air-tight container until ready to use. (They can be made a few days in advance and stored at room temperature.)
    10. Churn the ice cream: Whisk 1/4 tsp kosher salt into the chilled buttermilk base. Churn according to the instructions for your machine, until the mixture has the texture of soft serve. Transfer to a freezer-friendly container, alternating with dollops of jam and generous sprinklings of bread crumbs. (If you prefer, you can add the desired amount of bread crumbs during the last minute of churning.) Cover with parchment paper, pressing it to the surface of the ice cream so it adheres, then cover with a lid. Freeze until firm, at least 6 hours. It will keep for up to 3 months.
    toast and jam ice cream scoop

    Strawberry Swirl Frozen Yogurt

    strawberry swirl frozen yogurt cone

    I try to be a “kitchen stuff” minimalist. Don’t get me wrong: my eyes light up when I discover a new bakeware store, and my idea of a good time is browsing the kitchen-related aisles of HomeGoods or HomeSense. But I usually take my time when it actually comes to buying stuff, especially appliances that take up valuable counter or storage space.

    Case in point: ice cream makers. I’ve probably threatened to buy one for the past three summers. But I’ve never bit the bullet, sticking to semifreddos and extra trips to the ice cream parlor. (The texture of no-churn recipes have never really excited me.)

    But this year, the new Salt & Straw cookbook arrived in the mail; and between the mouthwatering pictures of flavors like Sea Salt and Caramel Ribbon and Strawberry Honey Balsamic with Black Pepper and pregnancy cravings for Wendy’s Frosties, I knew this had to be the Summer of Homemade Ice Cream. I mentioned to my husband that I was starting to research ice cream makers. And by the next day, with the help of a friend, he had procured a Cuisinart ICE-20 (I’ve mentioned he’s a keeper, right?). Predictably, I can’t stop churning.

    One of the great features of the Salt & Straw cookbook is that it starts out with three simple base recipes: one for regular ice cream, one for sorbet/frozen yogurt/sherbet/gelato, and one for coconut (dairy free) ice cream. Most of the remaining recipes build off one of these bases; and you can actually whip up large batches of the bases and refrigerate/freeze portions for later use so you can practically churn up a pint on a whim.

    I decided to start my churning journey with this strawberry swirl frozen yogurt. A ribbon of strawberry syrup adds a touch of sweetness and color to a creamy, tart fro-yo base. I can see having a pint of this deliciousness always on hand, changing up the fruit depending on the season.

    A few notes:
    • I’ve tried this with both regular 2% Greek yogurt, and full-fat regular yogurt (strained overnight in a cheesecloth-lined sieve set over a bowl). Both work well, though I slightly preferred the texture of regular Greek yogurt. Either way, do not use fat-free yogurt for this recipe.
    • You can also sub 1/2 cup sour cream for part of the yogurt for a little added tang and richness.
    • Straining the strawberry syrup is optional; if you like a more chunky frozen yogurt you can leave the fruit solids in. If you do strain the syrup, the remaining fruit can be refrigerated and used to spread on toast or top your fro-yo.


    strawberry swirl frozen yogurt in a scoop
    Marcus eating frozen yogurt

    Strawberry Swirl Frozen Yogurt

    Makes about 3 pints / Inspired by Salt & Straw and Serious Eats

    Ingredients:

    For the base:
    • 1 cup (200g) granulated sugar
    • 1/2 tsp xanthan gum
    • 1/4 c (80g) light corn syrup
    For the frozen yogurt:
    • 1/4 to 1/2 c strawberry syrup (recipe follows)
    • 1 1/2 cups base
    • 1 1/2 c (360g) super-tart Greek yogurt, very cold (see notes above)
    • 3/4 c whole milk
    • 1/4 tsp kosher salt
    For the strawberry syrup swirl:
    • 8 oz / 225g trimmed and chopped strawberries
    • 2 Tbsp / 30 g freshly squeezed lemon or lime juice
    • 6 oz / 175g granulated sugar
    • 1/4 tsp kosher salt

    Method:

    1. Make the base: Stir together the sugar and xanthan gum in a small bowl. Combine 1 1/4 c water and the corn syrup in a small saucepan. Add the sugar mixture and immediately whisk vigorously until smooth (but don’t fret over a few lumps). Set the pan over medium heat and cook, stirring often and adjusting the heat if necessary to prevent a simmer, until the sugar has fully dissolved, about 3 minutes. Take the pan off the heat and let the mixture cool completely.
    2. Transfer the mixture to an airtight container and store in the fridge until cold, at least 4 hours, or up to 2 weeks, or in the freezer for up to 1 year. (Just be sure to fully thaw it and stir well before using it.)
    3. Make the strawberry syrup: Combine strawberries, lemon/lime sugar, and salt in a medium pot. Note the pot’s weight at this stage so the reduction can be tracked on the scale (or you can use a digital thermometer). Mash the strawberries with a fork or metal spatula until swimming in juice.
    4. Place over medium heat and bring to a boil, continuously stirring and scraping along the bottom and sides of the saucier with a flexible, heat-resistant spatula. This should take about 5 minutes.
    5. Once the mixture begins to boil, continue cooking until reduced by 4 ounces (mixture should be 220°F) for a thin, saucy ribbon or 5 ounces (224°F) for a thick, gooey ribbon. This should take about 6 minutes.
    6. Strain the syrup into a heatproof container. Cover and refrigerate until completely chilled.
    7. Churn the frozen yogurt: Before churning, place a 1-quart container into the freezer, along with a spatula. Place the yogurt, milk, and salt into a bowl and whisk until combined. Add the base and whisk until smooth. (If you have an immersion blender, you can add all ingredients together and blend until smooth.) Pour the mixture into an ice cream maker and turn on the machine. Churn just until the mixture has the texture of a pourable frozen smoothie.
    8. Quickly transfer the fro-yo into the prepared container: Spoon in layers of fro-yo alternated by drizzles of strawberry syrup (I used about half of the syrup, but use as much as you want). You can use a knife to swirl the two occasionally, or leave as-is for more distinct strawberry ribbons.
    9. Cover with parchment paper, pressing it to the surface of the fro-yo-so it adheres, then cover with a lid. It’s okay if the parchment hangs over the rim. Store it in the coldest part of your freezer (farthest from the door) until firm, at least 6 hours. It will keep for up to 3 months.