Turkey and Sage Pot Pie

When it comes to pies, I’ve definitely been more on team sweet than team savory. But after watching Great British Bake Off and seeing those hand-raised hot water crusts, picnic pies, and pasties, I was itching to make some kind of savory pie. We ended up having a family Thanksmas dinner a bit early this year because a few of us are traveling over the holidays, so a fridge full of turkey leftovers presented the perfect opportunity for some pie-experimenting.

Pie fillings are quite adaptable; I think as long as you have the right consistency and amount, you can play around with the ingredients and flavorings. I really wanted to make a pot pie filling that didn’t contain milk or cream sort-of-not-really for health reasons (I’m lactose intolerant; I can handle butter and small amounts of dairy, but cream sauces generally don’t go over well). Originally I was going to use some leftover mashed potatoes for thickener, but someone ate them…so pureed squash it was! My family enjoyed this gravy, but if you prefer something more traditional you can sub some of the stock for whole milk or cream. Also, I know peas usually show up in these sort of pies but I am NOT a peas fan so none here! If you don’t have such aversions, feel free to stir some in with the sage at the very end.

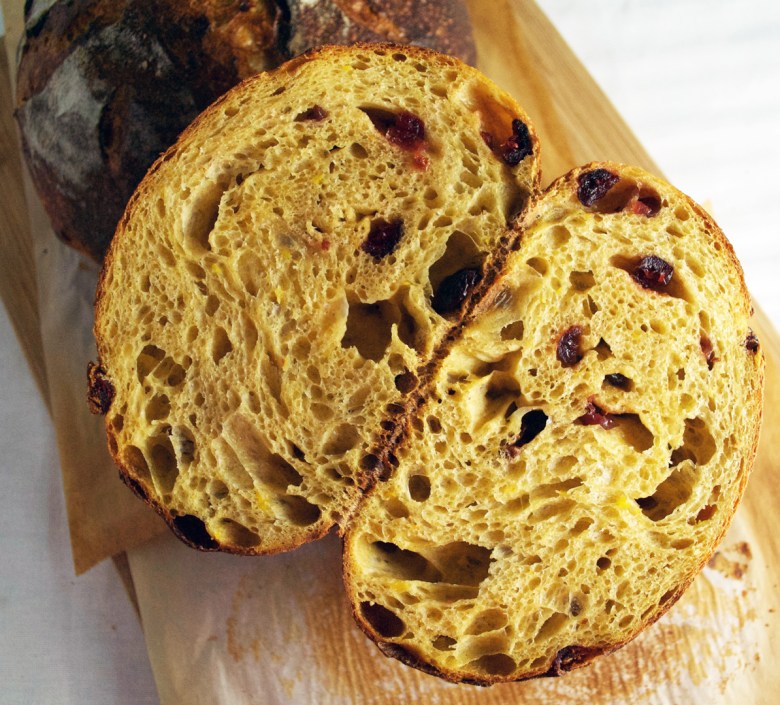
I used this sourdough crust adapted from Maurizio (subbing buttermilk for the vinegar and omitting the sugar; I also added a few healthy grinds of black pepper and the leaves of one thyme sprig), and it was perfect for this — sturdy yet flaky and packed with flavor! If you’ve got starter on hand I definitely recommend this route, but if you don’t your favorite pie crust recipe will do nicely. I added a couple of turns to the pastry which gives it extra flake and makes it easier to roll out, IMO — also totally optional. The filling is the perfect amount for my deep-ish pie dish; if you use a normal pie plate you’ll probably have some leftover for a baby pie or to eat over rice.

A few notes:

  • See this post for some general pie baking tips.
  • I think the trick to avoiding a soggy bottom crust is starting with chilled pastry AND filling. If you add the filling when it’s still warm, you’ll melt the butter in the bottom crust and likely end up with goop. I also baked the pie on a preheated stone in the lower third of the oven the entire time. If you don’t have a stone, preheat a sheet pan in your oven and bake your pie on that.
  • A few weeks ago I made a small batch of apple jelly and have been using it as a secret flavor ingredient in stews and marinades — I love it! That being said, I know it’s not a common ingredient to have around; so you could probably substitute 1/4 c of apple juice or cider for stock for a similar effect.

Turkey and Sage Pot Pie

Makes one deepish 9-inch pie

Ingredients

  • 1 recipe of your favorite double pie crust
  • 3 cups cooked turkey, shredded or diced
  • 2 medium carrots, diced
  • 2 celery stalks, diced
  • 1 c mushrooms, sliced
  • 1 large onion, diced
  • 2-3 cloves garlic, minced
  • 1/4 c flour
  • 1/4 c butter
  • 1 1/2 c turkey or chicken stock (I used low-sodium)
  • 1/2 c squash puree
  • 1 bay leaf
  • 1 T apple jelly (optional, see notes above)
  • 1/2 c leftover gravy
  • 2 T finely minced fresh sage leaves
  • Salt and pepper, to taste
  • Olive oil
  • 1 egg beaten with 1 tsp water or milk, for egg wash

Method

  1. In a medium saucepan over medium heat, saute the onion and garlic in olive oil until slightly softened, 2-3 minutes. Add the carrots and celery, season with salt and pepper, and saute until carrots are slightly softened but not mushy, about 5-7 minutes. Remove vegetables from saucepan and set aside.
  2. In the same saucepan over medium heat, melt the butter. Add the flour all at once, stirring constantly, and cook for 1-2 minutes until a golden paste forms. Slowly pour in the stock, stirring constantly to avoid clumping. When the gravy is slightly thickened, stir in the leftover gravy, squash, and optional jelly, followed by the bay leaf and mushrooms. Turn down to medium low and simmer for 3-4 minutes, or until the mushrooms are mostly cooked. Add the reserved vegetables and turkey. Cook for 3-4 minutes until the turkey is heated through, then remove from the heat and stir in the sage. Allow to cool for about 10 minutes, then cover and refrigerate until cooled completely (about an hour).
  3. Preheat your oven to 400F with a rack (and baking stone, if you have one) in the bottom third of the oven.
  4. While the filling is cooling, prepare the pie crusts. Roll out your bottom crust and transfer it to a greased pie plate. Trim crust so you have an overhang of about 1 inch. Cover with plastic and refrigerate while you roll out your top crust. Cut into strips for a lattice, if desired, or keep whole. Transfer to a sheet pan and refrigerate until ready to assemble.
  5. When your filling is chilled and oven is ready, spoon the filling evenly into the bottom crust (remove the bay leaf). Top as desired (with a lattice or not), and crimp the edges to seal. Refrigerate for about 10-15 minutes, or until the pastry is firm.
  6. When ready to bake your pie, gently brush the egg wash over the top, being careful not to drag the filling onto the crust. Cut a few steam vents in the top if baking a non-lattice pie. Bake for 20 minutes, then turn the oven down to 375F and bake for another 30-45 minutes, rotating halfway through for even baking. The filling should be bubbling and the pastry golden brown. (Note: if your pastry is browning too quickly, tent with foil.) Allow to cool slightly before serving.

How music taught me to bake bread

November 17th is Homemade Bread Day, so in honor of that I thought I’d share a bit about my bread-baking journey and offer some tips for those of you wanting to get started. I love learning new culinary skills, particularly those involving flour — but bread-baking, particularly with sourdough, is the first I consciously decided to take seriously. After being an occasional bread baker for several years, I took the plunge this past summer and made it my goal to be able to consistently turn out decent loaves by winter. I revived my two year old starter that had been hanging out in the fridge, and haven’t looked back since.

Although there have been failures and frustrations, I’ve definitely seen improvement in just a few short months; and bread baking has become something my family and I truly enjoy and make a part of normal daily life.

I’m a harpist and pianist by training and was for several years a private music teacher. In retrospect, I approached learning to bake bread much the same way I’d start a student or myself on a new piece of music.

fullsizerender-3

Practice.

One of the skills you obtain in music training is how to sit in a room by yourself for hours, concentrating on minute details. No joke, I’d have hour and a half lessons on a single page of music. Nothing can replace consistent and well-informed practice as a musician, and the same is true for any other skill you want to learn. In the context of bread baking, this first meant taking out my starter and feeding it twice daily at room temperature. This forced me to learn how my starter behaved and just the act of discarding and feeding made me more eager and likely to plan bakes. Are there ways of baking with sourdough that include less “wasting”? Sure, but for me the daily interaction was a key element to learning quickly and, I think, worth the price of a little flour.

Then there is also the practice of actually baking. You just have to start doing it. Once a week, twice a week — just do it consistently. You will have failures and bricks and you’ll probably drop a loaf here and there; dust the flour off your pants (and everywhere else in your kitchen) and try again.

Finally, the practice has to be informed. I spent way too much time in music school “massaging the strings” (i.e. aimlessly playing things over and over again hoping it’d get better). Turns out you can get a lot more done in a lot less time if you know what you’re striving for and tackle that problem head-on. Because I only bake once or twice a week as opposed to 40 hours / week of practicing while in school, the practice has to be that much more informed if I want to see improvement between loaves.

One thing I wish I’d started sooner is taking better notes on each bake — how long did I autolyse? How many folds? How long did the bench rest go? What temperature did I bake this at? This may seem a little obsessive, but it’s a lot easier to diagnose problems if you have some hard data and see where things may have gone wrong. It’ll also help others help you if you have that information ready — there are a lot of really generous, talented bakers out there who are more than willing to answer questions and help us newbies out!

batard3

Know the terms.

One of the first things I would make my students do was look up all the unfamiliar terms in their music. It’s an easy way to get the gist of how a piece should sound without even putting your fingers on the strings. Same thing with baking — a little technical knowledge helps a ton! Get a couple of good books on bread (I’ve listed a few at the end of this post) and familiarize yourself with the basic terms of bread baking. You’ll be able to understand recipes a lot faster; and again, when you ask people for help you’ll get a lot more out of their advice. I was never great at math or science; so if I can learn baker’s math so can you.

cut

Work within your abilities, but don’t forget to challenge yourself.

One of the fine balancing acts as a music teacher was keeping students motivated and challenged by choosing the right mix of music. If the pieces are too easy, everyone’s yawning through the lesson. If they’re too hard, everyone’s crying.

The fastest way to get frustrated with bread-baking? Start with a difficult recipe and fail hard at the get go. And/or don’t follow the recipe and wonder why your bread didn’t turn out. Choose a good, basic recipe and follow it as closely as possible. Once you’re fairly comfortable with that, then pick something harder and/or start changing the flours around in some tried-and-true formulas to make things your own. Personally I like to alternate between “easy” (breads I’ve successfully made before) and “challenging” bakes (my own creations / new flours / high hydration doughs), which keeps both my stomach and brain pretty happy.

Love and share.

In the end, both music-making and bread-baking have this in common: you have to love it. If you truly enjoy doing either, whether or not your end product is picture-perfect is less important — you’ll have gained something in the process. The process of both can seem boring and slow; to endure at either you need to learn to love the little things: the sound of a brand new string, the smell of fresh flour, the feeling of nailing a tough arpeggio, the sound of crust crackling. It takes five minutes to perform a piece that takes months to learn. That loaf of bread you spent 48 hours making is devoured in three minutes. The journey matters.

Finally, the love is augmented by sharing. The simple act of sharing a piece of music or a loaf of bread can do wonders for a person’s day; and seeing people enjoy my music or food makes mine.

fullsizerender-4

A few recommended sites / resources:

  • The Fresh Loaf — A great forum where you can ask questions and learn from some very talented amateur bakers. I’ve started posting some of my loaves there as a bread journal of sorts.
  • The Perfect Loaf — Maurizio’s sourdough posts are incredibly detailed and helpful, and he’s great at responding to questions. I’ve tried several of his recipes with good success (though the breads are a little on the more technically difficult side). Definitely recommend reading through his tutorials on sourdough creation / maintenance if you’re new to the game!
  • My Daily Sourdough Bread — Natasa’s blog is lovely and practical. She is a very sweet and generous person too!
  • Wild Yeast Blog — Not updated anymore, but there’s a lot of good information if you dig around the archives.
  • The Bread Baker’s Apprentice, 15th Anniversary Edition: Mastering the Art of Extraordinary Bread — the book that first got me hooked on bread baking several years ago.
  • Bread: A Baker’s Book of Techniques and Recipes — a classic; lots of interesting technical information.
  • Tartine Bread — a modern classic; the photography and storytelling are inspiring. Tartine-style bread is quite popular (though I wouldn’t necessarily recommend starting there…) and this is the original.
  • Sourdough: Recipes for Rustic Fermented Breads, Sweets, Savories, and More — I recently bought this book and have had good success with the breads. The flavor combinations are unique and I’m looking forward to trying some of the sweet recipes as well!

single

Pork and Apple Sausage Rolls

rolls-large

Both my husband and I are food nerds in our own ways. I’m into baking and he’s into meat. (For the past year he’s been curing his own bacon and once you’ve had that, there’s no going back.) The ultimate dream is to collaborate on some from-scratch charcuterie boards — he’ll provide the sausages and cheeses and I’ll do the breads/crackers/dips. We’ll get there eventually. But in the meantime, these tasty little sausage rolls are a team effort that will be showing up on our appetizer tables for the years to come — he made the sausage, and I wrapped them in pastry.

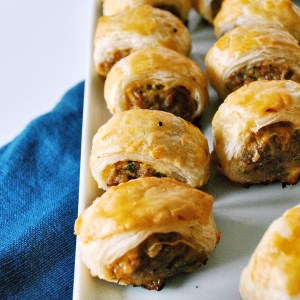
I’ve made sausage rolls in the past using store bought puff pastry and that works perfectly well. But lately I’ve been into making my own rough puff. I use this pastry recipe for the base and simply add 2-4 turns to the process, resting the pastry in the fridge as needed (for me this is typically for 10 minutes after the initial mixing and after the first two turns). For or this savory application, I reduce the sugar to 1 teaspoon.

Also, the filling is very adaptable — skip the apple if you want and add in some sauteed onion and garlic; and feel free to play with the spices. You can also use regular ground pork, seasoned to taste — in this case I would add a few tablespoons of breadcrumbs and an egg to help bind the mixture together.

Pork and Apple Sausage Rolls

Makes 24 two-bite rolls or 40-48 one-bite canapes

Ingredients:

  • 1 pound puff pastry, thawed (1 store bought box or homemade)
  • 1 pound pork sausage, casings removed
  • 1 baking apple, peeled and finely diced
  • 1 scallion, finely diced
  • 4 tbsp dijon mustard
  • 1 egg, whisked with 1 tbsp water
  • Flaky salt, to finish (optional)

Method:

  1. Preheat oven to 425 degrees F.
  2. Mix sausage, apple, and scallion in a medium bowl.
  3. In a small bowl, beat egg with 1 tbsp water.
  4. Roll out each sheet of puff pastry into a large square or rectangle (about 12″ x 12″ or 9″ x 13″) and cut each in half (for a total of four pieces).
  5. Spread a tablespoon of mustard down the center of each rectangle lengthwise.
  6. Divide the pork mixture into 4 equal parts and arrange on top of the mustard.
  7. Fold the bottom half of the pastry over the meat.
  8. Brush the top part of the pastry with egg wash and roll the puff pastry so the seam is facing down. Repeat with the other sheets. Refrigerate for about 10 minutes, or until pastry is firm.
  9. Cut each roll into the number of pieces desired (I like 6 per roll for a 2-bite snack — top photo or 10-12 for a one-bite canape — lower left photo). If making larger rolls, cut a couple steam vents on top; if making the one-biters, no vent is needed.
  10. Arrange about an inch apart on two parchment-lined baking sheets.
    Brush with remaining egg wash, followed by a pinch of flaky salt if desired.
  11. Bake 20-25 minutes, rotating halfway through, or until golden brown and cooked through.
  12. Serve warm or cold with ketchup and/or mustard.

sausage rolls