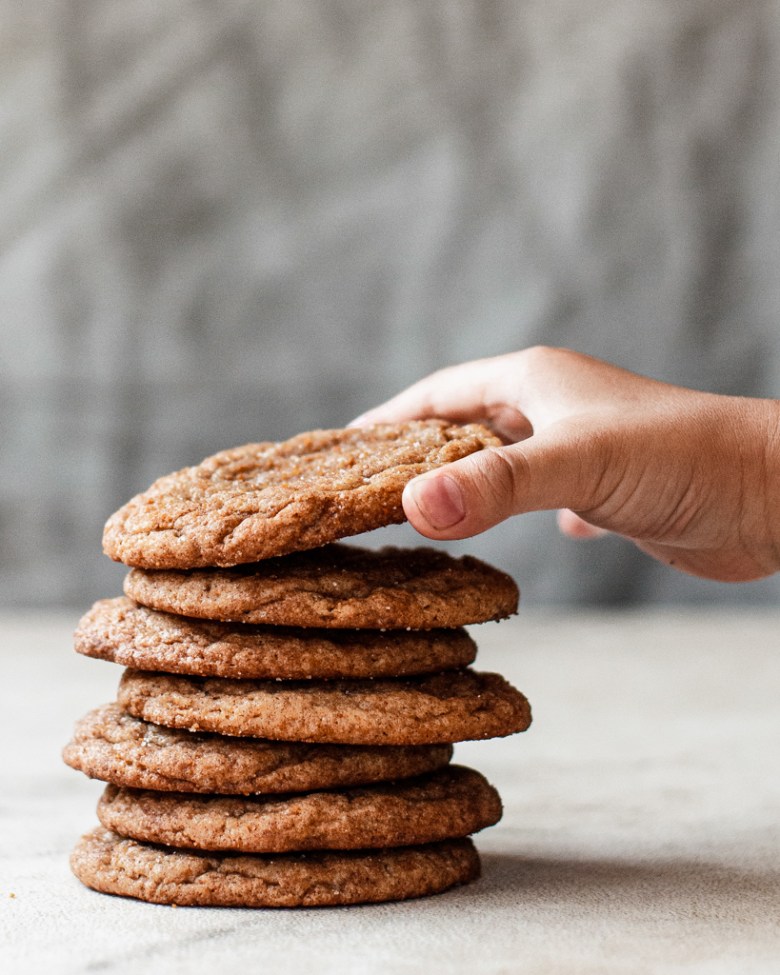
Cookies! Cookies! Cookies! (Plus a Christmas confetti cookie recipe)

We spent the past weekend packing up white bakery boxes filled with sweet treats. Dropping boxes off on doorsteps, ringing the doorbell, and waving enthusiastically from the car when the recipients opened the door — it was heartwarming to continue a holiday tradition with a 2020 twist.

We gift about two dozen of these boxes each year, so I’m always looking for simple, non-time-intensive ways to add sparkle, texture, and color to our treat selection. Christmas confetti cookies fit the job perfectly — they’re a humble sugar/snickerdoodle at heart, but are loaded with festive flair (aka sprinkles). I make sure to whip up an extra batch of this dough because my family can’t get enough of these cookies — they’re just so good! (I’ve included a list of all the other treats we included at the bottom of this post, with recipe links where available.)

A couple other tidbits:
Tips for baking Christmas confetti cookies:
  • You can prep Christmas confetti cookie dough in advance and refrigerate it for up to 5 days (or freeze for longer storage). I like to bring the dough out to room temperature while the oven is preheating, then roll in sugar right before baking.
  • I like to use jimmies, or the long rod-shaped sprinkles, in this recipe. The color doesn’t bleed, unlike non-pareils and other sprinkle shapes. Feel free to sub in rainbow jimmies for non-holiday-themed confetti cookies!

Christmas Confetti Cookies

Makes about 12 cookies

Ingredients:

  • 113g unsalted butter, at room temperature
  • 120g granulated sugar
  • 30g light brown sugar
  • 1 tsp cream of tartar
  • 1/2 tsp baking soda
  • 3/4 tsp kosher salt (Diamond Crystal)
  • 1 large egg, at room temperature
  • 1 tsp pure vanilla extract
  • 175g all-purpose flour
  • 50g red and green sprinkles (I use jimmies — the rod-shaped kind)

To finish:

  • 40g granulated sugar

Method:

  1. In the bowl of a stand mixer fitted with the paddle attachment, combine the butter, sugars, cream of tartar, baking soda, and salt. Mix on low to combine, then increase the speed to medium and cream until light and fluffy, about 3-4 minutes. Scrape down the sides of the bowl and the paddle a couple times during this process to ensure even mixing.
  2. Reduce the mixer speed to low and add the egg and vanilla. Increase the speed to medium and mix until smooth, about 30 seconds. Scrape down the bowl and paddle.
  3. With the mixer on low, add the flour. Mix just until a few streaks of flour remain, then add the sprinkles. Use a flexible spatula to stir from the bottom of the bowl a few times to make sure everything is well-mixed and there are no pockets of unincorporated flour. Cover and chill until firm but still scoopable, about 45 minutes.
  4. While the dough is chilling, preheat the oven to 375°F with a rack in the middle and line two baking sheets with parchment paper.
  5. Portion the dough into twelve ping-pong sized balls, about 45 grams (3 tbsp) each. Toss each in granulated sugar, coating completely. Place the cookies on the prepared baking sheets about 2½ inches (6 cm) apart.
  6. Bake the cookies one sheet at a time until the edges are set but the centers are still soft and pale, about 10 to 12 minutes. Rotate the sheet in the oven halfway through baking. Cool the cookies on the baking sheets for about 5 minutes, then transfer to a wire rack to cool completely. Store leftovers in an airtight container.
treat boxes

Other treats included in our boxes:

Caramel-stuffed ginger molasses cookies

Ginger molasses cookies are always at the top of my holiday must-bake list. My favorite recipe is generously spiced, chewy, and instantly makes the house smell like Christmas. On a whim I stuffed a batch with some salted butter caramels I had leftover from some recipe testing. Best/worst idea ever: best because the caramel levels up a cookie I thought couldn’t be improved — the caramel adds another level of chew in addition to a surprise hit of sweetness. Worst because these have sort of ruined me for the “regular” version.

A couple of notes:

  • You can use any kind of chewy caramel candy for stuffing, though I like to an extra dark one that has just a hint of bitterness.
  • You can refrigerate the dough (stuffed or unstuffed) for up to 5 days. I like to bring the dough to room temperature while the oven is preheating and toss in sugar right before baking. I haven’t yet tried freezing this dough with the caramel stuffing but will update this post when I do.

Caramel-stuffed Ginger Molasses Cookies

Makes about 13 large cookies | Adapted from Bon Appetit

Ingredients:

  • 125g all purpose flour
  • 75g bread flour
  • 50g rye flour
  • 2 tsp baking soda
  • 1 1/2 tsp ground cinnamon
  • 1 tsp ground ginger
  • 3/4 tsp freshly ground cardamom
  • 1/4 tsp freshly ground black pepper
  • 1/2 teaspoon kosher salt (Diamond Crystal)
  • 65g granulated sugar
  • 50g dark brown sugar
  • 2 tsp freshly grated ginger
  • 113g unsalted butter, melted
  • 1 large egg, at room temperature
  • 113g fancy molasses (not blackstrap)

To finish:

  • 40g turbinado sugar
  • 40g granulated sugar
  • 13 chewy caramel candies, storebought or homemade (mine were roughly 3/4″ squares)

Method:

  1. In a small bowl, whisk together the flours, baking soda, spices (except for the fresh ginger), and salt.
  2. In a medium bowl, whisk together the granulated sugar and dark brown sugar. Add the grated ginger and rub it into the sugar with your fingers to distribute.
  3. Whisk in the melted butter, molasses, and egg to combine.
  4. Add the dry ingredients and mix just to combine. Cover with plastic wrap and refrigerate for 30 minutes to firm the dough up slightly to make it easier roll. (If refrigerated longer than an hour, let stand at room temperature for 15-20 minutes to soften slightly.)
  5. While the dough is chilling, preheat the oven to 375F with a rack in the center, and line two large baking sheets with parchment paper. Combine the turbinado and granulated sugar in a small bowl.
  6. Divide the chilled dough into 26 equal portions (25g each).
  7. To stuff the cookies, take two portions of dough and flatten each into a thick disc. Take a caramel and press it gently into the middle of one piece of dough (trim or squish the caramel to fit, if needed), then place the other piece of dough on top. Pinch the edges of the two pieces of dough together to seal in the caramel, then roll gently between your hands to form a ball. Repeat the process with the remaining dough.
  8. Roll each ball in sugar and place on the prepared baking sheets about 2.5 inches apart. (Cookies will spread a bit so leave plenty of room!)
  9. Bake sheets one at a time for about 9-11 minutes, rotating halfway through, until cookies are puffed and starting to crack and the edges are set. Cool on the sheet for 5 minutes before transferring to a wire rack to cool completely.

Triple Chocolate Peppermint Cookies

triple chocolate peppermint cookies

Apologies to the half can of pumpkin still sitting in my fridge: I have moved on to candy canes and gingerbread. We’re normally a “Christmas starts in December” family, but it’s 2020 and anything goes. We picked out our tree and hung the stockings; the kids are busying themselves cutting snowflakes and making garlands.

These triple chocolate peppermint cookies made their first appearance in our annual treat boxes last year, and I think they’ve earned a permanent spot in the holiday baking rotation. They’re simple but festive — a great option for making with kids and for munching on during tree trimming or a favorite holiday movie.

A few notes:

  • If you’ve hung around here much you’ll know I like a bit of rye in my chocolate baked goods — its earthiness helps enhance the chocolate flavor. You could also swap out the rye for buckwheat — also delicious! But if you don’t have those flours on hand, just replace the rye with an additional 50g all purpose flour.
  • These cookies do best after a rest in the fridge to help hydrate the dough and prevent excessive spread. But I understand the need for instant gratification — if you just HAVE to have a cookie right away, stick the preformed dough in the freezer while you preheat the oven to quicken things along. They’ll likely still spread a little more than if you wait the full 3 hours, but it’s not the worst thing ever.
  • While I’m typically a dark chocolate lover, I really enjoy the mix of chocolates in this cookie. Using all dark chocolate can be a little intense — the pops of milk and white bring a little hit of extra sweetness. But as always, adjust the ratios to your tastes!
  • Peppermint extract varies in intensity from brand to brand, and too much can make your baked goods smell and taste like toothpaste. I used Club House pure peppermint extract here and this level was perfect for me, but if you have an especially potent brand you may want to start with a little less.
triple chocolate peppermint cookies hand

Triple Chocolate Peppermint Cookies

Makes about 12 cookies | Adapted from Baked to Order

Ingredients:

  • 113g (1/2 c) unsalted butter, cubed
  • 4g (1 Tbsp) finely ground espresso (or 1 tsp espresso powder)
  • 80g chopped bittersweet/dark (70%) chocolate, divided
  • 100g (3/4 c plus 1 Tbsp) AP flour
  • 50g (1/2 c) whole rye flour
  • 25g (scant 1/4 c) Dutch processed cocoa powder
  • 1/2 tsp baking powder
  • 1/2 tsp baking soda
  • 3/4 tsp kosher salt (Diamond Crystal)
  • 90g (scant 1/2 c) light brown sugar
  • 68g (1/3 c) caster sugar
  • 1 large egg, cold
  • 1 large egg yolk, cold
  • 1/2 tsp vanilla
  • 1/2 tsp peppermint extract
  • 30g (1 oz) chopped semisweet/milk chocolate
  • 30g (1 oz) chopped white chocolate
  • Crushed peppermint candies/candy canes, for garnish

Method:

  1. In a small saucepan, melt the butter over low heat. You’re not trying to brown it or drive off any moisture, so don’t let it boil — pull it off when there are still a couple unmelted bits left and let the residual heat finish the job.
  2. While the butter is melting, place the espresso powder and 50g of the chopped bittersweet chocolate in a large bowl. Once the butter has melted, pour it over the espresso-chocolate mixture. Whisk until the chocolate has melted. Let cool for about 5 minutes.
  3. Whisk the sugars into the butter until smooth and combined, followed by the egg and egg yolk. Whisk in the vanilla and peppermint extracts.
  4. In a separate bowl, whisk together the flours, cocoa powder, baking powder, baking soda, and salt. Add the dry ingredients to the wet and fold together until just combined. When just a few streaks of flour remain, add the remaining 30g dark chocolate, milk chocolate, and white chocolate. Mix just until evenly distributed.
  5. Portion the dough into ping-pong sized balls, about 55 grams (3 tbsp) each, onto a parchment-lined baking sheet. (If the dough is too soft, cover and chill for about 30 minutes before scooping.) Cover and chill at least 3 hours, or up to 3 days.
  6. When ready to bake, preheat the oven to 350°F (175°C) with a rack in the middle and line two large baking sheets with parchment paper. Place the cookies on the prepared baking sheets about 2½ inches (6.4 cm) apart and sprinkle the tops with crushed peppermint candies.
  7. Bake the cookies one sheet at a time until the edges are set but the centers are still soft and barely set, about 11 to 14 minutes. Rotate the sheet in the oven halfway through baking. Cool the cookies on the baking sheets for about 5 minutes, then transfer to a wire rack to cool completely. Store leftovers in an airtight container.

Salted Malted Oatmeal Cookies

salted malted oatmeal cookies

As the mornings and evenings begin taking on a chill, I inevitably find myself adding an extra shake of cinnamon to my banana bread and searching out my jewel-toned sweaters. It’s fall, y’all — my favorite season! Even though this year continues to perplex in so many ways, I take comfort in the constants: crimson-colored leaves, fresh apples, slowly simmered soups, pumpkin patches.

There will be apple and pumpkin pies, for sure, but first — these salted, malted oatmeal cookies! These cookies are inspired by the spelt and honey oatmeal raisin cookies in my upcoming cookbook, Baked to Order — consider it a bonus variation! If you’d like to learn more about Baked to Order or to pre-order (incredibly helpful for authors these days!), please head over to my dedicated cookbook page — it has more information specifically about the book along with a list of places you can purchase all over the world. Also, I’ve got some some previews and giveaways planned closer to the launch date, so follow along on Instagram to get in on the fun!

OK, back to this recipe! To inject fall vibes into these cookies, I reached for malted milk powder, a mix of grain extracts and milk powder. (For a more detailed description, read this excellent article by Stella Parks.) Adding malted milk powder to baked goods imparts a roasty, toasty caramelized flavor — perfect for fall!

I like these cookies with lots of toasted nuts (I used pecans, but walnuts would be excellent too) and a hint of milk chocolate. Substitute a different type of chocolate if you prefer, but I enjoyed how the sweetness of the milk chocolate complemented the robust malty flavor. But your cookies, your choice!

A couple of notes:

  • A little inverted sugar gives these cookies the perfect amount of chew. I used golden syrup here — its caramel notes work so well with malt. Find golden syrup at your local British food store (many major supermarkets also carry it), or online. In a pinch you can substitute honey.
  • Malted milk powder increases browning, so it can be a little tricky to judge when these cookies are done. You want the edges to be set but the centers should be a little soft and lighter in color — the cookies will continue to set up outside the oven. Whenever I make a new cookie recipe, I like baking a single test cookie to test the perfect amount of time in my oven; that way you avoid an entire batch of over or under-done cookies.
  • A couple tips for beautiful looking cookies: first, for perfectly round cookies, use a round cookie cutter, offset spatula, or spoon to nudge the cookies into shape right after you take them out of the oven (do this right away before they completely set). Second, hold back a little bit of the mix-ins (nuts and chocolate) and stick a few pieces on top right before baking to give each cookie some visual interest. (And don’t forget the flaky salt!)
  • You can chill unbaked dough in the fridge for up to 5 days, or freeze for longer storage. For oatmeal cookies in general, I prefer letting the chilled dough soften at room temperature before baking (I take them out 30-60 minutes before baking, or at least while the oven is preheating if I forget to do it sooner). I find they spread better that way.
salted malted oatmeal cookies

Salted Malted Oatmeal Cookies

Makes about 15 cookies

Ingredients:

  • 113 g (½ cup) unsalted butter, at room temperature
  • 70 g (⅓ cup plus 1 tsp) light brown sugar
  • 70 g (⅓ cup plus 1 tsp) granulated sugar
  • 40 g (2 tbsp) golden syrup
  • ¾ tsp baking soda
  • ¼ tsp baking powder
  • 1 tsp ground cinnamon
  • 1 tsp espresso powder
  • 40 g (⅓ cup) malted milk powder
  • ¾ tsp kosher salt (Diamond Crystal; use 2/3 the amount for another brand of kosher salt or half the amount for table salt)
  • 1 large egg, at room temperature
  • 1½ tsp pure vanilla extract
  • 125 g (1 cup) all purpose flour
  • 150 g (1⅔ cup) rolled oats (not quick)
  • 120 g (1 cup) toasted pecans, chopped
  • 85 g (½ cup) chopped milk chocolate
  • Flaky salt, for garnish

Method:

  1. In the bowl of a stand mixer fitted with the paddle attachment, combine the butter, sugars, golden syrup, baking soda, baking powder, cinnamon, espresso powder, malted milk powder, and salt. Mix on low to combine, then increase the speed to medium and cream until light and fluffy, about 5 minutes. Scrape down the sides of the bowl and the paddle a couple times during this process to ensure even mixing.
  2. Reduce the mixer speed to low and add the egg and vanilla. Increase the speed to medium and mix until smooth. Scrape down the bowl and paddle.
  3. With the mixer on low, add the flour. When there are just a few streaks of flour remaining, add the oats, followed by the pecans and milk chocolate. Mix just until combined. Use a flexible spatula to stir from the bottom of the bowl a few times to make sure everything is well-mixed and there are no pockets of unincorporated flour. Cover and chill until just firm, about 45 minutes.
  4. While the dough is chilling, preheat the oven to 350°F (175°C) with a rack in the middle and line 2-3 baking sheets with parchment paper.
  5. Portion the dough into ping-pong sized balls, about 55-60 grams each. Place the cookies on the prepared baking sheets about 2½ inches (6 cm) apart.
  6. Bake the cookies one sheet at a time until the edges are set and golden but the centers are still soft and pale, about 13 to 15 minutes. Rotate the sheet in the oven halfway through baking. Cool the cookies on the baking sheets for about 5 minutes, then transfer to a wire rack to cool completely. Store leftovers for up to 3 days in an airtight container.
salted malted oatmeal cookies

Raspberry Lemonade Snickerdoodles

raspberry lemonade snickerdoodles

The idea for these raspberry lemonade snickerdoodles has been brewing in the back of my brain for awhile. I love a good snickerdoodle riff, starting with these gingerbread latte snickerdoodles a couple years back. After working on a classic snickerdoodle recipe + variations for my upcoming book, I’m now revisiting a few ideas that I didn’t have room to include (like these graham cracker snickerdoodles from earlier this summer). The beautiful multi-colored sugar cookies from Amy and Sarah inspired the look for this zesty and cheerful raspberry lemonade version!

Making these cookies is fairly straightforward, but for the full raspberry lemonade experience you’ll need a few special ingredients:

  • Cream of tartar: Cream of tartar is an acid (in powder form; find it in the baking/spices aisle of your grocery store). Combined with baking soda, cream of tartar leavens these snickerdoodle cookies and produces the classic snickerdoodle tang. While there are a lot of suggested substitutions for cream of tartar on the internet, I have not tried them in this particular recipe.
  • Freeze-dried raspberries: To get a concentrated amount of raspberry flavor in these cookies, I use ground freeze-dried raspberries. Freeze-dried fruit is an amazing way to amp up your baked goods as it brings intense flavor without extra moisture. I ground up whole freeze-dried raspberries into a powder and added it directly to the cookie dough. Freeze-dried fruit is available online and in many grocery stores.
  • Citric Acid: To give these cookies an extra tangy zing, I use a small amount of citric acid in the sugar sprinkle. Citric acid occurs naturally in citrus fruits (like lemons!) and is also artificially made and used as a flavoring agent and preservative. Citric acid is commonly found in the baking/spices aisle of the supermarket or in bulk food stores. Can you omit it? Sure, but your cookies will not be nearly as punchy. (You could try sprinkling a little lemon zest onto the cookies right after baking, but the flavor will be less potent.) Citric acid keeps well and can be used in many other recipes that might benefit from a little pucker!

Anyways, enjoy these summery snickerdoodles! They really put a smile on my face!

raspberry lemonade snickerdoodles unbaked
raspberry lemonade snickerdoodle stack

Raspberry Lemonade Snickerdoodles

Makes 12 cookies

Ingredients:

For the raspberry lemonade snickerdoodle base:

  • Zest of one medium lemon
  • 120g (scant 2/3 c) granulated sugar
  • 30g (2 1/2 Tbsp) light brown sugar
  • 113g (1/2 c) unsalted butter, at room temperature
  • 1 tsp cream of tartar
  • 1/2 tsp baking soda
  • 3/4 tsp kosher salt (I use Diamond Crystal; use 1/2 tsp if using another brand of kosher salt or 1/4 tsp table salt)
  • 1 large egg, at room temperature
  • 175g (1 1/3 c plus 2 tsp) all purpose flour
  • 6g finely ground freeze dried raspberries (1 Tbsp ground, from about 1/4 c whole freeze dried raspberries), plus extra for sprinkling (optional)
  • 1-2 drops pink/fuschia food coloring (optional, for more intense color)

For the lemonade sugar sprinkle:

  • 25g (1/8 c) granulated sugar
  • 1/2 tsp citric acid

Method:

  1. In the bowl of a stand mixer fitted with the paddle attachment, combine lemon zest and sugars. Use your fingertips to rub the zest into the sugars until fragrant — this releases the essential oils from the zest and intensifies the lemon flavor of the cookies.
  2. Add the butter, cream of tartar, baking soda, and salt to the zest-sugar mixture. Mix on low to combine, then increase the speed to medium and cream until light and fluffy, about 3-4 minutes. Scrape down the sides of the bowl and the paddle a couple times during this process to ensure even mixing.
  3. Reduce the mixer speed to low and add the egg. Increase the speed to medium and mix until smooth. Scrape down the bowl and paddle.
  4. With the mixer on low, add the flour. Mix just until combined. Use a flexible spatula to stir from the bottom of the bowl a few times to make sure everything is well-mixed and there are no pockets of unincorporated flour.
  5. Remove half the dough and wrap in plastic. Add the ground freeze-dried raspberries and food coloring (if using) to the remaining half of the dough and mix until combined. Wrap in plastic. Chill both pieces of dough until firm but still pliable, about 30-45 minutes.
  6. While the dough is chilling, preheat the oven to 375°F with a rack in the middle and line two large baking sheets with parchment paper.
  7. In a small bowl, whisk together the granulated sugar and citric acid for the lemonade sugar sprinkle.
  8. Divide each half of dough into twelve acorn-sized balls. You should end up with a total of 24 balls, 12 of each color (about 20g each). Gently press one ball of each color together to form 12 cookies total — don’t roll them too tightly so the colors remain distinct. Toss each in the lemonade sugar sprinkle, coating completely. Place the cookies on the prepared baking sheets about 2½ inches apart.
  9. Bake the cookies one sheet at a time until the cookies have puffed and edges are set but the centers are still soft, about 10 to 12 minutes. Rotate the sheet in the oven halfway through baking. Immediately after removing the cookies from the oven, sprinkle a little more ground freeze-dried raspberries on the berry half of the cookie, if desired. Cool the cookies on the baking sheets for about 5 minutes, then transfer to a wire rack to cool completely. Store leftovers in an airtight container for up to 3 days.

Graham Cracker Snickerdoodles

graham cracker snickerdoodle

People often ask how I come up with ideas of what to make. I have many sources of inspiration — cookbooks, Instagram, the supermarket (moreso when it was normal to go there and just browse…one day, one day) — but perhaps the most common one is that I need to use something up. In this case, it was a small bag of graham cracker crumbs that wasn’t enough for making a pie crust or anything else semi-useful. I happened to be in a cookie-making mood (pretty common these days), so I figured I’d just chuck them in my snickerdoodle dough and see what happened.

Well, the cookies were good but not quite right; but now of course the idea of graham cracker snickerdoodles was stuck in my head. So yes, I had to go get more graham crackers to continue testing and tweaking the proportions of this recipe. And yes, now I have another small bag of graham cracker crumbs just waiting to be the muse for another recipe. Vicious cycle, tough job, someone’s gotta do it!

Anyways, about these graham cracker snickerdoodles. These cookies combine the soft chew and slight tang of a classic snickerdoodle with the pleasant wheatiness and honey-cinnamon vibes of a graham cracker. They’re the perfect mid-afternoon snack, though one of these days I’m going to test the theory that they’d make pretty fine ice cream sandwiches as well.

A few notes:

  • In the spirit of graham crackers, I use a whole wheat flour for the cookie dough. Traditionally graham flour is coarse and unsifted wheat flour, but here I’ve gone with my favorite sifted red fife flour from Flourist. It has a lovely flavor and texture, and works very well as a 1:1 swap for all-purpose flour in baked goods. I think any soft white wheat flour would work nicely here, or simply use all-purpose.
  • There are also actual graham crackers inside and out — some mixed into the cookie dough, and some in the sugar sprinkle used to roll the cookie dough balls in before baking. Don’t go overboard and add too many graham cracker crumbs to the actual dough — the dough will be too overloaded and won’t spread properly (I speak from experience). A digital scale is (and always is) your friend here.
  • If you don’t want to bake all the cookies off at once, you can refrigerate the dough up to 5 days or freeze for longer storage (in both cases, wait until right before baking to toss in the sugar sprinkle). It’s difficult to get the sugar sprinkle to stick to dough that is too cold, so I suggest taking the dough out of the freezer/fridge while preheating the oven. Roll the dough balls in your hands to slightly warm up the dough before rolling in the sugar sprinkle and baking.
graham cracker snickerdoodle stack

Graham Cracker Snickerdoodles

Makes about 12 cookies

Ingredients:

For the snickerdoodle dough:
  • 113g (1/2 c) unsalted butter, at room temperature
  • 66g (1/3 c) granulated sugar
  • 66g (1/3 c) light brown sugar
  • 20g (1 Tbsp) honey 
  • 1 tsp cream of tartar
  • 1/2 tsp baking soda
  • 1/2 tsp ground cinnamon
  • 1/2 tsp kosher salt
  • 1 large egg, at room temperature
  • 1 tsp vanilla extract
  • 170g (1 1/3 c) white whole wheat flour or sifted wheat flour (I like Flourist sifted red fife)
  • 50g (1/2 c) finely ground graham cracker crumbs
For the sugar sprinkle:
  • 15g (1 Tbsp) finely ground graham cracker crumbs
  • 15g (heaping 1 Tbsp) granulated sugar
  • 1/4 tsp ground cinnamon

Method:

  1. In the bowl of a stand mixer fitted with the paddle attachment, combine the butter, sugars, honey, cream of tartar, baking soda, cinnamon, and salt. Mix on low to combine, then increase the speed to medium and cream until light and fluffy, about 3-4 minutes. Scrape down the sides of the bowl and the paddle a couple times during this process to ensure even mixing.
  2. Reduce the mixer speed to low and add the egg and vanilla. Increase the speed to medium and mix until smooth. Scrape down the bowl and paddle.
  3. With the mixer on low, add the flour and graham cracker crumbs. Mix just until combined. Use a flexible spatula to stir from the bottom of the bowl a few times to make sure everything is well-mixed and there are no pockets of unincorporated flour. Cover and chill until firm but still scoopable, about 45 minutes.
  4. While the dough is chilling, preheat the oven to 375°F with a rack in the middle and line two baking sheets with parchment paper. In a small bowl, whisk together the graham cracker crumbs, granulated sugar, and cinnamon for the sugar sprinkle.
  5. Portion the dough into twelve ping-pong sized balls, about 45 grams (3 tbsp) each. Toss each in the sugar sprinkle, coating completely. Place the cookies on the prepared baking sheets about 2½ inches (6 cm) apart.
  6. Bake the cookies one sheet at a time until the edges are golden but the centers are still soft and pale, about 10 to 12 minutes. Rotate the sheet in the oven halfway through baking. Immediately after baking, sprinkle on a bit more sugar sprinkle if desired. Cool the cookies on the baking sheets for about 5 minutes, then transfer to a wire rack to cool completely. Store leftovers in an airtight container.

Linzer cookies

Linzer cookies are one of those classic Christmas cookies I’d never gotten around to making until recently. I love sandwich cookies, but to be honest they can be time-consuming with all the chilling / rolling / stamping / filling. I recommend making them on an afternoon when you don’t have a ton of other baking to do; just throw on your favorite tunes and enjoy the process.

A couple notes:
  • This dough contains a high proportion of nuts, which makes it very delicious but also extremely delicate. I found it easiest to roll between pieces of plastic and chill overnight before cutting and baking. I also recommend using simple cookie cutter shapes (i.e. circles and squares) for best results (I used this set).
  • Linzers are traditionally made with almonds and raspberry jam; I used walnuts because I had a lot on hand and filled them with the ends of jam jars I always have lurking around in the fridge.
  • You can bake these cookies several days in advance (store them at room temperature in an airtight container), but I recommend filling them on the day you plan to serve them as the cookies will gradually soften once they’re filled.
  • If you don’t want to bother rerolling the scraps, you can shape leftover dough into thumbprint cookies instead. Just roll into balls, indent with your thumb or the back of a wooden spoon, and bake until golden. Fill indents with jam once cooled.

Linzer Cookies

Makes about thirty 2-1/2″ sandwich cookies

Ingredients:

  • 105g (scant 1 c) toasted walnuts, chopped
  • 75g granulated sugar
  • 75g light brown sugar
  • 1 teaspoon kosher salt (Diamond Crystal)
  • 281g all purpose flour
  • 225g unsalted butter, cold and cubed
  • 1 large egg plus 1 large egg yolk, cold
  • 2 teaspoons pure vanilla extract
  • 1/2 – 3/4 c jam or preserves
  • Icing sugar, for dusting

Method:

  1. In the bowl of a food processor, combine the walnuts, sugars, and salt. Pulse together until the nuts are finely ground and the mixture is the texture of damp sand.
  2. Add the flour and pulse to combine.
  3. Scatter the butter cubes over the top and pulse until the butter is well incorporated, with no large pieces remaining. Scrape down the sides of the food processor a couple times during this process.
  4. Whisk together the egg, egg yolk, and vanilla. Add to the flour mixture and pulse just until a dough starts to form.
  5. Transfer about half of the dough to a piece of plastic wrap. Pat into a square about an inch thick. Place another piece of plastic wrap on top and roll the dough to about 3/16″. Lift and replace the top piece of plastic occasionally to avoid creases in the dough. Repeat with other half of dough. Slide one sheet of dough onto a baking sheet (still sandwiched between pieces of plastic) and slide the second sheet of dough on top. Refrigerate until cold, about 3 hours or up to 24.
  6. When ready to bake, preheat the oven to 350F and line two large baking sheets with parchment paper. Remove one sheet of dough from the fridge. Peel off the top piece of plastic, invert the dough onto one of the parchment-lined baking sheets, and peel off the other piece of plastic. Use a 2 1/2″ round cookie cutter to punch out as many rounds as possible. Remove the excess dough and set aside. Repeat with the second sheet of dough. Use a small round or other decorative cutter to punch out the centers of half the circles. Reroll and repeat process with dough scraps until you’ve used up all the dough (follow rolling process in step 5, chilling as necessary). If the dough is still firm, proceed straight to baking; otherwise, chill first until firm, about 15 minutes.
  7. Bake sheets one at a time for about 15 minutes, or until cookies are just barely golden on the edges. Cool cookies on the sheet for 5 minutes before transferring to a wire rack to cool completely.
  8. Sift icing sugar over the cookies with the center cutouts. Using a small spoon or offset spatula, spread about a teaspoon of jam on the flat sides of the bottom cookies. Top each with a sugared cookie. Serve immediately, or store in an airtight container between layers of parchment or wax paper until serving. I recommend filling cookies the day you plan to serve them (see notes above).

Oatmeal Raisin Pretzel Cookies

oatmeal raisin pretzel cookies

One of the questions I get most often is, “How do you find time to bake?” I’ll admit, it can be a bit of a juggling act. Since starting this blog, we’ve gone from zero to three children, ages 4 and under. Baking projects that I used to finish in an evening are now slo-o-o-o-wly pieced together over the course of several days. I could write a book about it, but thankfully, I don’t have to — Michelle Lopez’s new cookbook, Weeknight Baking will teach you everything you need to know about baking to fit your schedule.

weeknight baking and cookies

I received Michelle’s book as a literal birth day present — it arrived the same day our third child, Isabelle, did! Weeknight Baking was actually the perfect cookbook to help ease me into the new reality of baking with another tiny human around, because each recipe is either quick to make OR broken down into 15-to-30 minute tasks that you can piece together over a few days. And, as my family will attest, the recipes are delicious! So far, we’ve easily polished off a pan of her cheesecake bars and a batch of these oatmeal cookies.

I have always been partial to a good old fashioned oatmeal cookie, and I’m delighted to add this recipe to our rotation. These babies take about half an hour from start to finish — no chilling required! I made a couple small changes — first, I used sifted spelt flour instead of all purpose; and second, I popped a mini pretzel on each cookie (before baking) because I’m all about that salty-sweet combo. Feel free to go traditional with just raisins, or play around with the mix-ins — Michelle gives several fantastic sounding options. Whatever you do, make these cookies! And congrats, Michelle, on your new book!

Oatmeal Raisin Pretzel Cookies

Makes 20 cookies | Adapted from Weeknight Baking

Ingredients:

  • 1 recipe Oatmeal Cookie Mix-In of your choice (I used raisins and mini pretzels)
  • 1 1/4 c (5.65 oz) all-purpose flour (I used sifted spelt)
  • 1 1/2 tsp ground cinnamon
  • 1 1/2 tsp baking soda
  • 3/4 tsp kosher salt
  • 2/3 c (5 oz) tightly packed dark brown sugar (I used light)
  • 1/3 c (2.35 oz) granulated sugar
  • 3/4 c (6 oz) unsalted butter, at room temperature
  • 1 large egg
  • 1 1/2 tsp pure vanilla extract
  • 1 3/4 c (6.15 oz) old-fashioned rolled oats
Oatmeal cookie mix-ins
  • Classic oatmeal raisin: 1 c (5.5 oz) raisins
  • Oatmeal chocolate chip: 8 oz dark chocolate (at least 70% cocoa), from whole feves or a high-quality chocolate bar, chopped into 1/2-to-1-inch pieces
  • Oatmeal, Cranberry, and White Chocolate: 1 c (6 oz) dried cranberries and 3 oz white chocolate, from whole feves or a high-quality chocolate bar, chopped into 1/2-to-1-inch pieces
  • Oatmeal, cherry, and pistachio: 1 c (5 oz) dried cherries and 1/2 c (2.5 oz) shelled pistachios
  • Oatmeal and crystallized ginger: 1/2 c (3.5 oz) crystallized ginger, chopped into 1/4-to-1/2-inch pieces

Method:

  1. Position a rack in the center of the oven and preheat the oven to 350F. Line two half-sheet pans with parchment paper.
  2. Place the mix-in of your choice in a shallow bowl and toss to combine.
  3. In a medium bowl, whisk together the flour, cinnamon, baking soda, and salt.
  4. In the bowl of a stand mixer fitted with the paddle attachment, combine the sugars and butter. Beat on medium-high until light, fluffy, and doubled in volume, 2-3 minutes, using a rubber spatula to scrape down the bottom and sides of the bowl as necessary. Reduce the mixer to low, add the egg and vanilla, and beat until combined. Scrape down bottom and sides of the bowl. With the mixer on low, gradually add the dry ingredients and beat until just combined. Add the oats all at once and beat on low until combined, scraping down the bottom and sides of the bowl as needed to fully incorporate oats. Add the mix-in all at once and beat on medium-low until the mix-in is evenly distributed throughout, about 1 minute.
  5. Use a 3-tablespoon cookie dough scoop to portion the cookie dough into 20 balls (about 45 g each, but may vary depending on mix-ins), placing them at least 3 inches apart on the prepared sheet pans. Bake one pan at a time for 15 minutes, or until the edges have set but the centers are still gooey. Cool the cookies on the pan on a wire rack for 20 minutes, or until the edges and bottoms of the cookies have set and feel firm to the touch. Repeat with the remaining cookie dough (or freeze it to bake later). Serve warm or at room temperature. The cookies can be stored in an airtight container or zip-top bag at room temperature for up to 3 days.

Brownie Cookies

brownie cookies

This is one of those cookies that ticks all the boxes for me: it’s intensely chocolatey, fairly simple to make (with minimal chilling time), and bakes up with the most beautiful shiny, crackly tops. The original recipe comes from Tartine No 3. I make just a few changes — mixing light and dark brown sugars as muscovado is hard for me to source, and adding a little cocoa and espresso powder for even more chocolate punch. The finishing salt really is essential on these guys — it tempers the sweetness and intensity of the chocolate and adds a touch of crunchy texture.

A few notes:

  • I find the best way to get those coveted shiny, crackly tops is to bake the cookies as soon as the dough is firm enough to scoop. If you wait too long the dough dries out a bit and the tops aren’t quite as shiny.
  • I like to scoop the dough using an OXO 1.5 Tbsp cookie scoop. Once all the dough is portioned, I go back and roll the each until they’re perfectly round. This helps the cookie bake into nice, uniform circles. If any are a little wonky after baking, you can nudge them into shape right when they come out of the oven using a small offset spatula. Or not. They’ll still be delicious.
  • When eaten warm, the cookies will be very soft and molten inside. Let them cool and they’ll be a bit more chewy and brownie-like (which is what I prefer). Cookies keep well for a few days in an airtight container.
brownie cookies 2

Brownie Cookies

Makes about 15 cookies / Barely adapted from Tartine No. 3

Ingredients:

  • 227 good quality dark (70%) chocolate, chopped (I use Callebaut 70%)
  • 30g unsalted butter
  • 2 large eggs, at room temperature
  • 60g light brown sugar
  • 60g dark brown sugar
  • 1/2 tsp baking powder
  • 1 1/2 tsp vanilla extract
  • 1/2 tsp fine sea salt
  • 1 tsp espresso powder
  • 43g whole rye flour
  • 6g (1 Tbsp) dutch processed cocoa powder
  • Flaky or smoked salt, to finish

Method:

  1. Bring a saucepan with an inch of water to a simmer. Combine the chocolate and butter in a heatproof bowl. Place the bowl on top of the simmering water (making sure the bottom of the bowl doesn’t touch the water) and melt, stirring occasionally. Once melted, remove from water and set aside.
  2. Whisk together rye flour and cocoa powder in a small bowl.
  3. In the bowl of a stand mixer fitted with the whisk attachment, combine the eggs, sugars, baking powder, salt, espresso powder, and vanilla. Turn the mixer on low to combine, then turn the speed up to medium-high and whip until the mixture is thick, foamy, and roughly tripled in volume (about 6 minutes).
  4. Turn the mixer speed to low and slowly drizzle in the chocolate-butter mixture, mixing just to combine. Scrape down the sides of the bowl, then add the flour mixture and mix just to combine. Use a spatula to scrape up and over a couple times from the bottom to make sure the batter is well-mixed.
  5. Cover the bowl and refrigerate for about 20-30 minutes, until the dough is firm enough to scoop but not hard.
  6. Meanwhile, preheat the oven to 350F and line two baking sheets with parchment paper.
  7. Once the dough is sufficiently chilled, use a 1 1/2 Tbsp cookie scoop or spoon to portion the batter into about 15 even balls. Roll each one between your hands to make perfectly round — this will help them bake into lovely, perfect circles. Place the balls about 2 inches apart on the prepared baking sheets and sprinkle with a generous pinch of flaky or smoked salt.
  8. Bake one sheet at a time for about 9-11 minutes, until the cookies are puffed and beginning to crack. Cool on the sheets for 5-10 minutes before transferring to a wire rack to cool completely.

Mushroom Meringues

mushroom meringues
These mushroom meringues may well be the most magical things I’ve made all year. I honestly couldn’t stop smiling after making a batch of these because they just looked so….mushroomy! These fungi confections are a traditional decoration for Buche de Noel (I used them to decorate a “Yule Log” cake), but they would also make a quirky addition to a cookie box or a sweet little stocking stuffer. They aren’t difficult to make, but they do take a bit of time. However, you can easily break up the work over a few days — just bake the meringues one day, and decorate while watching your favorite cheesy holiday movie!

A few notes:

  • This recipe is easily scalable. The basic proportion I used is 1 part egg whites to 1.5 parts sugar. (You can use 1:2 if you want them sweeter, but honestly they were plenty sweet for me.)
  • If you want your mushrooms to stand on their own, keep the caps on the smaller side (maybe 1-2 inches across) and the stems on the shorter, squatter side.
  • If you’re using these mushrooms to decorate a buche de noel or something of that sort, it’s perfectly fine (and even desirable) to have caps and stems of different sizes and lengths — it adds to the whimsy and realism! You can always use a dab of frosting to stick them down so you don’t have to worry if they don’t stand on their own.
  • If you make a mistake piping, just use a spatula to scoop up the meringue and put it back into the piping bag.

mushroom meringues 2
mushroom meringues in egg carton

Mushroom Meringues

Makes 20-24 medium mushrooms

Ingredients:

  • 70g egg whites (about 2 large)
  • 105g caster sugar
  • Large pinch of salt
  • Pinch of cream of tartar
  • Seeds of half a vanilla bean or 1/2 tsp vanilla extract
  • 50g white chocolate or white candy melts
  • Cocoa powder for dusting

Method:

  1. Preheat oven to 225F. Line one large (or two medium) sheet pans with parchment paper. Prepare a pastry bag fitted with a large round tip (I used a 1/2″ one).
  2. Put the egg whites in the bowl of a stand mixer fitted with a whisk attachment. Beat on medium low until frothy, then add the salt and cream of tartar.
  3. Turn the speed up to medium and continue beating until the meringue holds soft peaks. Add the sugar a spoonful at a time, waiting about 10-15 seconds between additions.
  4. When all the sugar has been added, turn up the speed to medium high and continue beating until the meringue is glossy and holds very stiff peaks. Add the vanilla bean seeds (or vanilla extract) and whip until combined.
  5. Transfer half the meringue to the prepared pastry bag. Use a dab of meringue in each corner of the sheet pan to “glue” the parchment paper down. To pipe the caps, hold the pastry bag vertically about 1/2 an inch above the baking sheet and squeeze (without moving the bag) to form a round. When the cap is your desired size, stop squeezing and flick your wrist to complete the cap. Continue piping rounds until you’ve used up all the meringue in the bag. They won’t spread or puff much so you can pipe them quite close. If you have any peaks of meringue, use a damp finger to flatten and smooth out the caps.
  6. Fill the bag with the remaining meringue and pipe stems. Again, hold the bag vertically about 1/2 an inch above the baking sheet. Squeeze and slowly lift the bag, then stop squeezing but continue lifting to form “kisses”. Continue piping until you’ve used up all the meringue. (You’ll want to pipe a few more stems than caps as they’re more likely to topple or break.)
  7. Bake the meringues until they’re completely dry and release easily from the parchment, about 80-90 minutes. Turn the oven off and let the meringues cool down completely (a few hours or overnight).
  8. When the meringues are completely cool, use a microplane to shave down the tops of the stems so they’re flat. Dust some cocoa powder over the mushroom caps if desired. Smudge the cocoa with your finger to get your desired “dirty” look. Smudge a little on the stems as well if you like. (I used different cocoa powders — natural, Dutch processed, and black — to get a variety of looks, but use whatever you have or like.)
  9. Melt the white chocolate or candy melts. Use a small paring knife or flower nail to make a small hole in the bottom of a cap. (Work gently so you don’t pierce all the way through!).* Use a chopstick to widen the hole so the end of the stem will fit inside. Dip the end of the stem in melted chocolate, then stand the stem up. Carefully but firmly push the stem through the hole. Using a small brush, dab a little extra white chocolate around the join to seal. Set the mushroom in the well of an egg carton to allow the chocolate to set. Store in an airtight container for 1-2 weeks.
  • *Note: you can also just “glue” the stems to the caps without making a hole. I tried both ways and found the hole method to be a little more secure and realistic-looking, though more time consuming…