

If you’ve hung around this site much, you probably know that I’ve got a thing for sourdough. Most often I use my sourdough starter to make bread — both crusty and soft — but I’ve been known to sneak it into things like chocolate cake and crackers. Repurposing “discard” (the portion of starter that is typically thrown away at each feeding) into something delicious is a challenge I really enjoy — not just because it reduces waste, but also because starter can add deeper flavor to so many baked goods! And pie crust is no exception.
Adding sourdough starter to pie dough is fairly straightforward. I’ve based this recipe on my go-to all-butter pie crust (which is in my book) by replacing all the liquid and part of the flour with ripe/discard starter. Since this recipe calls for a decent amount of starter, I usually save up a few days’ worth of discard in the fridge before making this crust. Since the starter isn’t for leavening, it doesn’t need to be at peak readiness as if you were mixing bread dough. As long as it still looks bubbly and isn’t overly soupy or acrid-smelling, it should work just fine. (I generally try to use my discard within 5-7 days.)
I’ve used sourdough pie crust for both sweet and savory pies and galettes. The starter adds a lovely depth of flavor. I don’t find it sour at all (though this will depend on the health/taste of your own starter!). It bakes up a little more tender than my regular pie dough, but is still plenty flaky as long as you handle it correctly (namely keep your ingredients cold and don’t overwork the dough!).

A few notes:
- I keep a 100% hydration (equal parts flour and water) starter, which is what I use for this recipe. I’ve never had to add any extra liquid, but if you keep a stiffer starter (or live in a drier climate) you might need a touch of ice water or milk to help bind your dough together.
- Make sure your starter is well-chilled before using it to make pie dough. I like to measure it out and refrigerate it for at least a couple hours before mixing.
- In general, I like to keep my butter pieces fairly large when making pie dough, especially if I’m going for maximum flake. I find it’s especially helpful when making sourdough pie crust since you have to work the dough a little more than normal to incorporate the starter.
- When you first add the starter to your dough it may seem like it won’t incorporate. Avoid the temptation to add liquid or knead — just fold the mixture over itself and it should eventually start coming together.
- The folding in step 4 is optional, but I almost always do it for extra-flaky and easy-to-handle dough.
- You can halve all the ingredients to make a single 9″ pie crust, but I always make a double batch to maximize my time in the kitchen. Pie dough freezes incredibly well, and having a couple batches in the freezer stash makes me feel like a baking ninja: I’m already halfway to an awesome galette or pie!
Have crust, make pie!
Once you’ve made this sourdough pie crust, use it your favorite sweet or savory pie or try it in one of these recipes:
- Fig, onion, and labneh galette
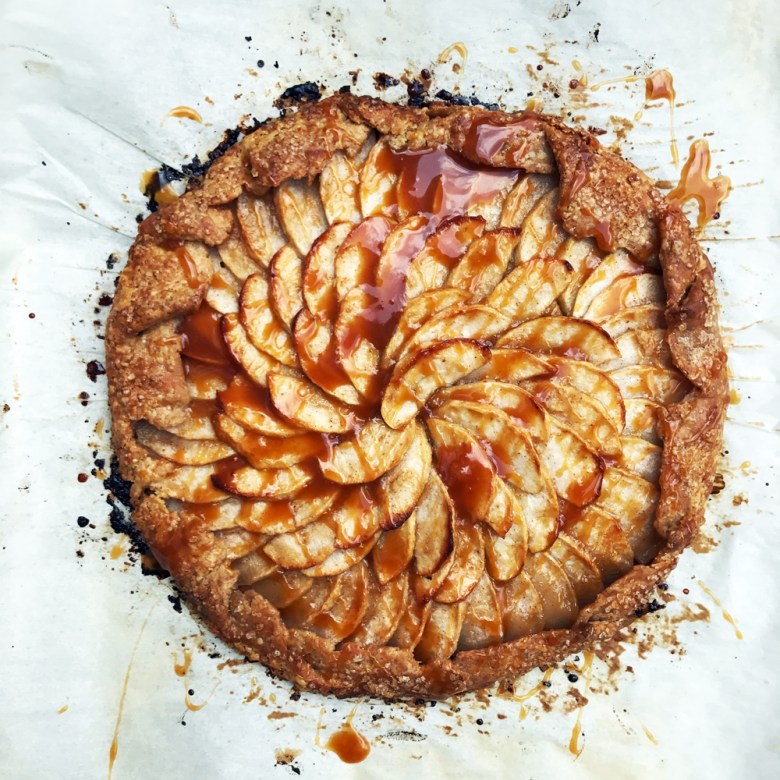
- Apple frangipane galette with salted caramel
- Turkey and sage pot pie
- Berry balsamic pie
- Salted caramel pear pie
- Late summer galette
- Summer fruit pie with spiced streusel
Sourdough pie crust
Makes enough for one double-crust 9″ pie | Adapted from Baked to Order
Ingredients:
- 250g flour (I typically use 125g all purpose and 125g whole grain such as spelt, whole wheat, einkorn, or rye)
- 1 1/2 tsp (6 grams) kosher salt (I use Diamond Crystal brand)
- 2 Tbsp (25 grams) granulated sugar
- 250g unsalted butter, cold and cut into 1/2″ cubes
- 250g ripe or discard 100% hydration sourdough starter, cold (see notes above)
Method:
- In a large bowl, whisk together the flour, salt, and sugar. Scatter the butter over the top. Use the pads of your fingers to flatten the butter pieces, tossing them with the flour mixture so each piece is coated on all sides. The butter pieces should remain fairly large, about the size of walnut halves. Work quickly so the butter remains cold.
- Scrape the sourdough starter over the flour-butter mixture. Use a flexible spatula to fold and mash the starter into the flour-butter mixture. Once the starter is well dispersed, use your hands to continue folding the dough over itself, giving the bowl a quarter-turn between folds, until there aren’t any dusty bits of flour remaining on the bottom of the bowl and the dough just holds together when you squeeze a bit in your hand. (Depending on the consistency of your starter and the humidity of your environment, you may need to add a drizzle of cold water or milk to bring the dough together; but I usually don’t need any.) You should still see visible pieces of butter—this is a good thing! Fold the dough over itself several more times, giving the bowl a quarter turn after each fold, to make a cohesive but ragged mass.
- If the dough is still cool to the touch at this point, continue on; if it feels at all soft or sticky, cover and refrigerate for 20-30 minutes before continuing.
- Transfer the dough to a lightly floured surface. Using a floured rolling pin, roll the dough into a roughly 13-inch (33-cm) square. Brush off any extra flour and fold the dough into thirds like a letter. Fold into thirds again so you end up with a roughly 4.-inch (11-cm) square. Roll into a 3/4-inch (2-cm)-thick rectangle twice as long as it is wide and cut in half. Wrap each half and refrigerate for at least 2 hours, or up to 1 day. (The dough can also be frozen at this point and defrosted in the fridge overnight before using.)


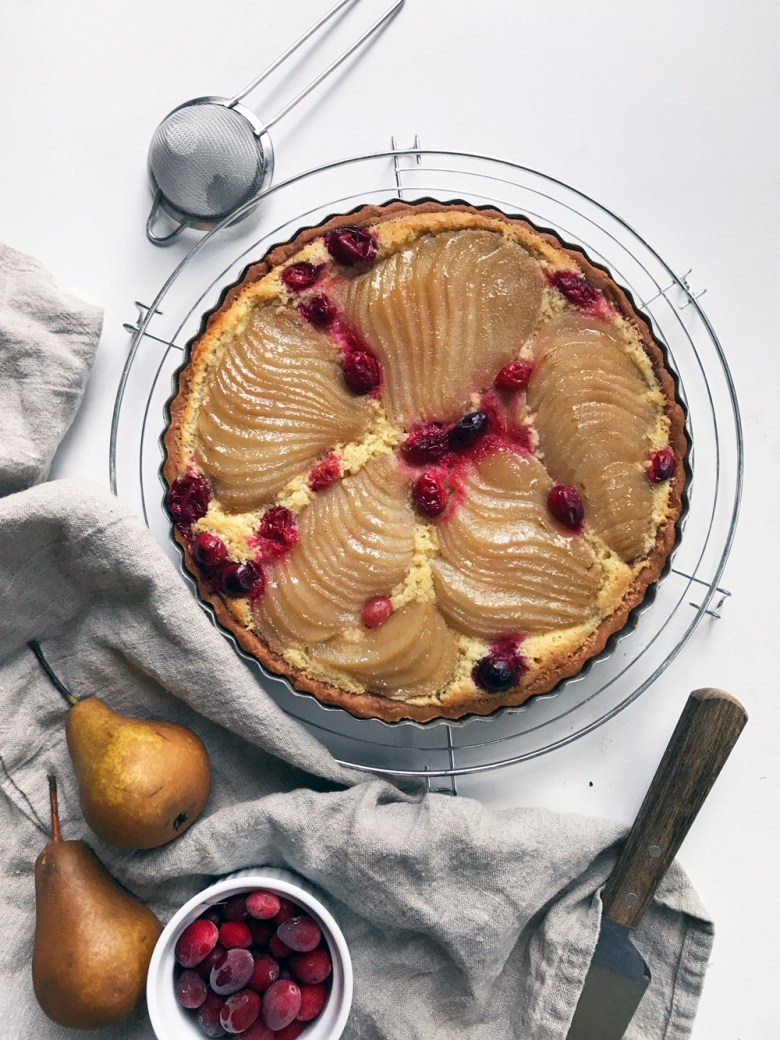


 I adapted this recipe from Yossy Arefi’s
  I added one step to the filling, which is to macerate the fruit with the sugar and lemon juice and reduce the resulting liquid down to a syrup. (I frequently do this with other fruit pies to concentrate the flavors and avoid a soggy bottom crust.) My pears didn’t give off a ton of liquid so you can probably skip this step if you’re pressed for time or don’t want to bother.


 When it comes to baking, I’m a bit of a control freak. I weigh my ingredients, temper my ingredients, mise en place as best as possible, etc. But when it comes to cooking, it’s a different story. Recipes are rough guidelines. “Seasoned to taste” is how I like to roll (i.e. the name of this blog, “cook til delicious”), with many meals being inspired by the contents of the fridge.

 And just like that, it’s mid-August.
 My favorite pie crust recipe these days is half all-purpose flour, one quarter spelt, and one quarter rye. The whole grains really pair well with fruit and lend a depth of flavor. I’ve also started adding a couple of turns to my pie dough right after mixing (like making puff pastry) — it makes the final rolling out a lot easier and adds some nice flaky layers. The crust recipe below will make enough for one double crusted pie, or two medium-sized galettes. It keeps in the fridge for a few days, or in the freezer for a few months (well-wrapped).

 Follow the recipe for the