Strawberry Buttermilk Layer Cake

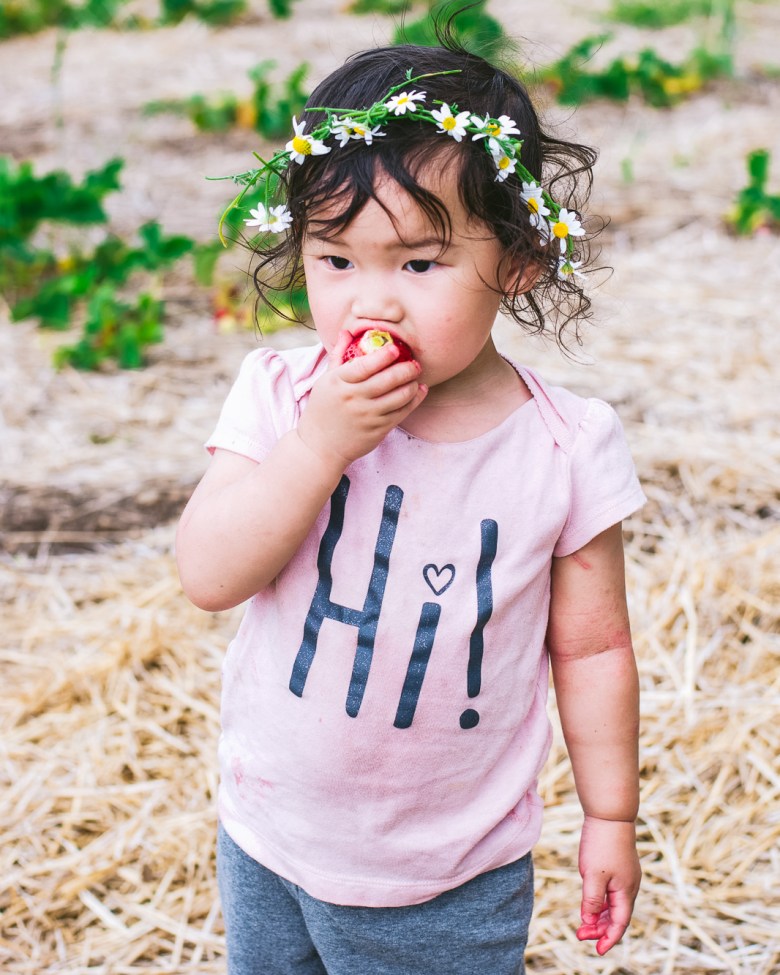
We celebrated my older girl’s third birthday last week — how did that happen? It seems not that long ago that we were celebrating her impending arrival — and now she’s a happy, rambunctious child who loves kimchi, unicorns, pickles, rainbows, and berries.

Unlike her older brother, Hannah didn’t have too many requests regarding her birthday cake: just “strawberries.” So here we are with strawberry cake! I am happy to report it was a huge hit with the birthday girl, who usually isn’t too much of a cake person — she gasped with delight when she saw the cake, asked for seconds, and gobbled up the leftovers the next day. I think I know what her birthday cake tradition will be now.

A few notes:

  • The main challenge when baking with strawberries is that strawberries contain a lot of moisture. I chose to cook down the strawberries until they were reduced in half by weight — this concentrates the flavor beautifully. The reduction is easy to track if you use a kitchen scale. For this recipe, you’ll want to start with 240g strawberries (either fresh or frozen works), which is double the weight of the needed reduced puree. Add the strawberries to your saucepan (halved if large) and weigh the entire pan with the strawberries inside. Then subtract 120g from that number: this is how much your pan should weigh when your strawberries have reduced enough.
  • For this particular cake, I wanted a small but tall cake so I could do a rainbow effect. I divided the batter among three 4-inch pans (filled about 2/3 of the way, about 225g each), and baked off the rest of the batter as cupcakes. Pro tip: if you’re just baking a cupcake or two, pop your cupcake liners in individual ramekins so you don’t have to take out your entire cupcake pan!
  • The 4″ cake layers are thick, so I cut each in half for a total of 6 layers. You can do this with 6″ layers as well if you prefer more frosting and filling. Note that you’ll need a little extra frosting and filling if you go for additional layers.
  • For the rustic rainbow effect, I divided about a cup of swiss meringue buttercream (recipe from my book) into 5 equal parts, then tinted using gel food coloring (I mixed the colors individually, so sorry — no specific colors here). After crumb-coating and chilling the cake, I used a small offset spatula to swipe on equal bands of color, starting at the bottom. I placed Callebaut crispearls around the top edge for the gold “crown.”
  • Boxed strawberry cake has something of a cult following, but isn’t something I grew up eating. One of these days I’ll try the boxed version to see if this bears any similarities! My main objective for this cake was that it should taste like real strawberries and use real strawberries, preferably without fake extracts or difficult-to-find ingredients. I did use a tiny (1-2 drops) of red gel food coloring for a lovely pink hue — if you omit this, your cake will be tinted mauve/purple.
  • I wasn’t originally planning to blog about this cake, so sorry — I don’t have any great interior shots. The next time I make this cake I’ll update this post with more photos!

Strawberry Buttermilk Layer Cake

Makes one 2-layer, 6-inch cake

Ingredients:

For the reduced strawberry puree:

  • 240g strawberries, halved if large, fresh or frozen (but defrosted)
  • A couple pinches of granulated sugar, if needed

For the strawberry buttermilk cake:

  • 100g all-purpose flour
  • 100g cake flour
  • 120g reduced strawberry puree (see notes above)
  • 70g buttermilk, at room temperature
  • 1-2 drops of red food coloring (optional, for more intense color)
  • 85g unsalted butter, at room temperature
  • 200g granulated sugar
  • 1 1/2 tsp baking powder
  • 3/4 tsp kosher salt (Diamond Crystal; use 2/3 the amount for another brand of kosher salt or 1/2 the amount for table salt)
  • 30g neutral vegetable oil (I use grapeseed)
  • 2 large eggs, at room temperature
  • 1 tsp pure vanilla extract
  • 1/4 tsp pure almond extract

To assemble:

  • 2-3 cups of frosting, depending on your design (see notes above)
  • Strawberry jam, if desired

Method:

  1. Make the reduced strawberry puree: Place the 240g strawberries and sugar, if using, in a medium saucepan. Weigh the entire pan with the strawberries inside. Subtract 120g from this weight and write this number down — this is how much the pan should weigh when your berries are sufficiently reduced. Heat the berries over medium, stirring frequently, until the berries break down and come to a boil. Turn the heat down to medium-low and continue simmering and stirring until the mixture is thick like tomato sauce and the pan hits the target weight — about 25-30 minutes, but will depend on the size of your pan and heat of your stove. Scrape the bottom and the sides of the pan frequently to avoid scorching. When the berries are sufficiently reduced, transfer to a heatproof container and cool to room temperature before using.
  2. Make the strawberry buttermilk cake: Preheat the oven to 350°F (175°C) with a rack in the middle. Line the bottoms of two 6-inch (15-cm)-round cake pans with parchment paper, then grease the pans and dust them with flour.
  3. In a small bowl, sift together the all purpose and cake flours and whisk together thoroughly.
  4. In a glass measuring cup, whisk together the reduced strawberry puree, buttermilk, and food coloring (if using).
  5. In the bowl of a stand mixer fitted with the paddle attachment, combine the butter, sugar, baking powder, and salt. Mix on low to combine, then increase the speed to medium and cream until light and fluffy, about 5 minutes. Use a flexible spatula to scrape down the sides of the bowl and the paddle a couple of times during this process. Add the oil and mix well to combine. Scrape down the bowl and the paddle.
  6. Add the eggs one at a time, making sure each is well incorporated before adding the next. Add the vanilla and almond extracts and mix well to combine. Scrape down the bowl and the paddle.
  7. With the mixer on low, add the flour and strawberry-buttermilk mixture in five additions, beginning and ending with the flour. Use a flexible spatula to fold from the bottom of the bowl a few times to make sure the batter is well-mixed.
  8. Divide the batter equally between the prepared cake pans, about 385 grams of batter each. Use an offset spatula to smooth the tops.
  9. Bake until the cakes are puffed and set and a skewer inserted into the center comes out clean or with a few moist crumbs, about 25 to 32 minutes. Transfer to a wire rack to cool. Once the pans are cool enough to handle, run an offset spatula around the edges and turn the cakes out to finish cooling completely. For easiest assembly, wrap and chill the cakes in the fridge before filling and frosting.
  10. Assemble the cake: Trim the tops of the cakes to level if needed and peel the parchment paper off each one. Fill a piping bag fitted with a plain round tip with about 1 cup of buttercream. Place a dollop of frosting on a cake board, plate, or cake stand and place the first cake round on top. Pipe about ⅓ cup of buttercream onto the first cake round and spread it on smoothly using a small offset spatula. Pipe a ring of buttercream around the edge of the cake to create a dam. Fill the center with an even layer of strawberry jam. Finish by placing on the last cake round, top side down (this keeps the crumbs in while also ensuring a flat top). Use an offset spatula to spread a thin layer of buttercream over the entire cake to lock the crumbs in. Refrigerate for about 10 minutes, until set. After the cake has chilled, frost and decorate as desired. Serve at room temperature. Refrigerate leftovers in an airtight container for up to 3 days.

Buttermilk Chiffon Cake with Berries and Cream

buttermilk chiffon cake

I love a good chiffon cake — honestly, I’d probably eat it over a regular butter cake 95% of the time. Chiffon cake is light and fluffy but still moist, thanks to a bit of oil in the batter. It’s also best served simply. Regular buttercreams are too heavy for this style of cake, so I prefer to top chiffon cakes with some good old whipped cream and a handful of summer’s best berries.

A couple of notes:
  • This cake is a simple one-layer affair, though you could easily double everything and turn this into a naked 2-layer cake as well.
  • I used buttermilk in both the cake and whipped cream for a lovely tang that complements the berries. If you don’t have any on hand, substitute the buttermilk in the cake with water or regular milk (or try half water, half lemon juice plus the zest of a lemon for a lemon-flavored chiffon). You can substitute sour cream or Greek yogurt for the buttermilk in the whipped cream, or just use more heavy cream.

Buttermilk Chiffon Cake with Berries and Buttermilk Whipped Cream

Makes one single-layer 8-inch cake

Ingredients:

Buttermilk chiffon cake:

  • 75 g cake flour
  • 90 g granulated sugar (preferably caster), divided
  • ¾ tsp baking powder
  • ¼ tsp kosher salt
  • 60 g buttermilk
  • 40 g neutral vegetable oil, such as grapeseed or canola
  • ½ tsp pure vanilla extract
  • 2 large egg yolks, at room temperature
  • 3 large egg whites, at room temperature
  • ¼ tsp cream of tartar

For the buttermilk whipped cream:

  • 180g heavy cream, cold
  • 60g buttermilk, cold
  • 1-2 Tbsp granulated sugar (optional)

To assemble:

  • 1 1/2 to 2 cups (250-300 g) fresh berries, rinsed and cut if large
  • 1-2 Tbsp granulated sugar

Method:

For the buttermilk chiffon cake:

  1. Preheat the oven to 350°F (175°C) with a rack in the lower third. Line an 8-inch (20-cm)-round cake pan with parchment and lightly grease the parchment, but otherwise do not grease the pan. (I like to use a pan with 3-inch sides as this helps the cake top stay nice and flat, but one with 2-inch sides should work as well.)
  2. Sift together the cake flour, 65 grams sugar, baking powder, and salt in a large, wide bowl. Whisk to combine. Make a well in the center of the dry ingredients. Add the buttermilk, oil, vanilla, and egg yolks to the well, and whisk until smooth.
  3. In a separate bowl, beat the egg whites and cream of tartar on medium-low speed until foamy. Increase the speed to medium, and whisk until soft peaks. With the mixer still on medium, slowly add the remaining 25 grams caster sugar. Increase the mixer speed to medium-high and beat until you have glossy, firm peaks.
  4. Using a flexible spatula or whisk, carefully fold the egg whites into the egg yolk batter one third at a time. Mix just until the batter is homogeneous and no white streaks remain.
  5. Scrape the batter into the prepared pan and smooth the surface with an offset spatula. Give the pan a couple raps on the counter to dislodge any big air bubbles.
  6. Bake until the cake is puffed and golden and a skewer inserted in the center comes out clean, about 25 to 30 minutes. Cool completely in the pan on a wire rack. Once cooled, run a thin spatula around the edge of the cake to loosen, then carefully turn out of the pan and remove the parchment. Use immediately, or wrap in plastic and refrigerate for up to 3 days.

For the buttermilk whipped cream:

  1. Combine all ingredients in a medium bowl. Whisk to medium peaks. Use immediately.

To assemble:

  1. Mix together the berries and sugar and allow to macerate for about 10 minutes.
  2. Place the cake on a serving platter. Dollop on the whipped cream and use a spoon or offset spatula to spread over the top. Top with macerated berries (leave the juices behind). Serve immediately.
buttermilk chiffon cake top down

Berry Basil Fraisier

berry basil fraisier

To me, the unofficial start of summer is the arrival of fresh strawberries. To be honest, I’m not much of a summer person — I don’t like hot weather and the mosquitoes that come with it. But I love summer produce, and our family definitely looks forward to berry picking every year.

freshly picked strawberries

For the past several years, I’ve made a fraisier to celebrate fresh strawberries. A fraisier is a traditional French strawberries and cream cake, and to me it’s the best way to enjoy candy-sweet, ripe strawberries (after eating them straight off the plant).

hannah eating strawberry

With these fraisiers I tend to be a bit casual — I usually make them a little differently every time. Sometimes I use a Japanese genoise as the cake; I’ve also made a matcha sponge version that was delicious. Sometimes I make a gelee layer for the top. I’ve also learned a few things over the years — like the need for gelatin to set the cream, and to keep the cake layers on the thin side to let the strawberries really shine through.

For my 2019 fraisier, I used some fresh basil from our garden to infuse the cream. And because the spring here was quite cool and strawberries didn’t show up until practically July, I added in a few blueberries to make this a fourth of July appropriate cake. (You could definitely just use all strawberries too, though.) The sponge is a lemon-scented chiffon, which is light and fluffy and pretty simple to whip up. The result: summer in every bite.

A few notes:
  • For easiest assembly, I recommend a 6×3 cake ring and acetate strips. You could also use a springform pan and plastic wrap, but you’ll get the cleanest results from the ring and acetate. (I use these same tools to make Momofuku-style cakes.)
  • You can make the basil pastry cream base up to 5 days in advance, but wait to add the gelatin and whipped cream until you are ready to assemble the cake.
  • For the cake, I used a half recipe of this lime chiffon cake and baked it in a 6×3 cake pan (total baking time was about 35 minutes). Don’t use a shorter pan; it will overflow. You could probably also bake this in a quarter sheet pan and cut out two 6″ rounds, but you would need to adjust the baking time.
berry basil fraisier top down

Berry Basil Fraisier

Makes one 6-inch cake

Ingredients:

  • Half a recipe of this chiffon cake, baked in a 6×3 cake pan (I subbed lemon zest and juice for lime)
  • 1 recipe basil cream diplomat (recipe below)
  • Simple syrup
  • ~1 c chopped strawberries, mixed with a spoonful of strawberry puree or jam; plus about 10-12 strawberries, halved (try to choose ones that are the same height, or trim to match) and 10-12 blueberries
  • More berries and basil leaves, to decorate
For the basil cream diplomat:
  • 1 c whole milk
  • 50g sugar (1/4 c), divided
  • 20g cornstarch or custard powder
  • 2 large egg yolks
  • Pinch of salt
  • 3-4 sprigs of fresh basil
  • 14g (1 Tbsp) unsalted butter
  • 1/2 – 3/4 tsp gelatin*
  • 1/2 tbsp cold
  • 1/2 – 1 c heavy whipping cream*

*Use 1/2 c for a thicker filling and up to 1 c for a lighter filling (I usually use 1/2-3/4 c). If you use more than 1/2 heavy cream, use 3/4 tsp gelatin. 

Method:

  1. To make the basil cream diplomat: Bring the milk and basil sprigs to a simmer in a medium saucepan over medium low heat. Simmer for about 15 minutes, stirring occasionally, then remove from heat and cover. Allow basil to steep for about 45 minutes.
  2. Strain the milk (add more to reach 1 cup if necessary) and return to the saucepan along with 40g sugar and a pinch of salt. Place a strainer over a heat-safe jug or container.
  3. In a medium bowl, whisk together the remaining 10 g sugar and the cornstarch. Pour in a tablespoon or so of the milk mixture and whisk until smooth. Add the egg yolks and whisk until smooth.
  4. Heat the milk over medium heat until steaming. Remove from heat. Pour the milk in a slow, steady stream into the egg yolk mixture, whisking constantly. Scrape the custard mixture back into the saucepan and return to medium heat. Cook, whisking constantly, until the mixture thickens and large bubbles appear on the surface. Once the bubbles appear, continue whisking on the heat for two minutes.
  5. Strain the pastry cream into the prepared jug or container. Whisk in the butter until combined. Place a piece of plastic wrap over the top and allow to cool to room temperature, then refrigerate until cold (at least 2 hours).
  6. When you are ready to assemble the cake, finish preparing the cream diplomat. In a small bowl, sprinkle the gelatin evenly over the cold water and allow to sit for about 5 minutes. Meanwhile, put two inches of water into a small sauce pan and bring to a simmer over a medium heat. Measure 1/4 cup (60g) of the chilled pastry cream into a small stainless steel bowl that will sit across the saucepan with the simmering water, without touching the water.
  7. Heat the cream until it is 120F. Add the gelatin and whisk until smooth. Remove from the water bath, and whisk the remaining cold pastry cream in to incorporate in two batches.
  8. Whip the heavy cream until it holds medium-stiff peaks. Immediately fold the whipped cream into the pastry cream with a rubber spatula. Transfer to a piping bag and refrigerate while you continue assembling the cake.
  9. To assemble the berry basil fraisier: Line a 6×3 cake ring (or same-sized springform pan) with acetate (or plastic wrap) and place on a cake board or plate. Trim the cake into layers ~3/4 inch thick (you should get three; you’ll need two for the cake. The rest is a baker’s treat!).
  10. Place one layer of the cake in the bottom of the ring and brush generously with simple syrup. Place the halved strawberries, cut side out and pointed end up, around the edge of the pan. Add blueberries between the strawberries if desired. Pipe the cream diplomat between the fruits and a layer across the top of the cake. Use a offset palette knife to smooth. Fill the center with the chopped berries + jam, then cover with another layer of cream. Place the second layer of cake on top and press down to level. Soak with simple syrup, then spread a thin layer of cream across the top. Refrigerate until set, about 4 hours or up to three days.
  11. Just before serving remove the cake ring and acetate. Arrange the cut fruit and basil on top as desired. (If you are doing this beforehand, brush a little warmed and thinned apricot jam on the fruit to preserve their color.) Enjoy!

Lime Poppyseed Cake with Hibiscus Glaze

lime poppyseed bundt with hibiscus glaze

March is just around the corner but here in Toronto we’re still firmly planted in winter, with a good foot of snow outside our front door. Hailing from a part of the world where daffodils often start blooming in February, I often start feeling a little color-deprived this time of year. Thank God for winter citrus! Just having a bowl of lemons, limes, and oranges around provides a truly welcome splash of color.

Since I usually get a little citrus-happy and stock my grocery cart with a few too many lemons or limes, I inevitably make some type of citrus poppyseed cake or two this time of year. My go-to recipe is the lemon pound cake from Rose Levy Beranbaum’s The Cake Bible (one of my all time favorite cookbooks), but this time around I had some sour cream that needed using so I decided to try a different Rose recipe, her Triple Lemon Velvet Cake from Rose’s Baking Basics. It didn’t disappoint, with a lovely velvet crumb that keeps nicely for days. I swapped out lime for lemon since that’s what I had the most of, and added a little bit of hibiscus powder for a pretty pink glaze. Definitely a cure for the winter blues!

A few notes:
  • I used my favorite 6-cup Heritage bundt pan and it worked fabulously. Just be sure to grease and flour it well, and don’t wait too long to turn the cake out (about 10 minutes works for me). This cake can also be baked in a regular loaf pan; the baking time should be roughly the same.
  • The original recipe calls for either cake or all-purpose flour. If you use all cake flour the crumb will be a bit more fluffy; with all-purpose a bit more dense. My personal preference is a a mix of the two (50/50).
  • I found hibiscus powder at my local bulk/health food store, but it is also easily found on Amazon.
hannah with bundt

Lime Poppyseed Cake with Hibiscus Glaze

Makes one 6-cup bundt cake | Adapted from Rose’s Baking Basics

Ingredients:

For the lime poppyseed cake:
  • 135g unsalted butter, at room temperature
  • 65g egg yolks (about 4-6), at room temperature
  • Zest of two limes
  • 120g sour cream, at room temperature
  • 1 1/4 tsp vanilla extract
  • 156g AP or cake flour (or a mix of the two)
  • 150g granulated sugar
  • 1 tsp baking powder
  • 1/4 tsp baking soda
  • 1/2 tsp kosher salt
  • 25g poppy seeds
For the lime syrup:
  • 50g / 3 Tbsp freshly squeezed lime juice
  • 55g granulated sugar
For the hibiscus glaze:
  • 115g icing sugar
  • 21g / 4 tsp freshly squeezed lime juice
  • 1/2 tsp hibiscus powder
  • 5 g / 1 tsp unsalted butter, melted and cooled

Method:

  1. Preheat oven to 350F with a rack in the lower third of the oven. Grease and flour a 6-cup bundt pan (or grease and line a loaf pan with parchment paper).
  2. In a glass measuring cup, whisk together the egg yolks, vanilla extract, and 1/4 (30g) of the sour cream.
  3. In the bowl of a stand mixer fitted with the paddle attachment, add the sugar and zest. Use your fingers to rub the zest into the sugar until fragrant. Add the flour, baking powder, baking soda, salt, and poppy seeds. Mix on low speed for 30 seconds to combine.
  4. Add the butter and remaining sour cream (90g). Mix on low until the dry ingredients are moistened, then increase the speed to medium and beat for about a minute to aerate the batter. Scrape down the sides of the bowl and paddle.
  5. Add the yolk mixture in two portions, beating on medium speed for 30 seconds after each addition.
  6. Scrape the batter into the prepared pan. Bake for 35-45 minutes, or until springy to the touch and a skewer inserted into the center of the cake comes out clean.
  7. While the cake is baking, prepare the lime syrup. In a small saucepan over medium heat, whisk together the lime juice and sugar until the sugar has completely dissolved. Cover and set aside.
  8. As soon as the cake comes out of the oven, transfer to a wire rack. Poke the bottom of the cake all over with a skewer and brush the bottom with about 1/3 of the syrup. Cool in the pan for 10 minutes. Invert onto a serving plate. Brush the top and sides of the cake with the remaining syrup.
  9. When the cake has cooled completely, make the hibiscus glaze. Whisk the hibiscus powder into the lime juice. Sift the icing sugar into a bowl. Whisk in the hibiscus-lime juice, followed by the butter. Pour or drizzle the glaze onto the cake.


Classic Cheesecake with Lime Curd Glaze

Lime glazed classic cheesecake

A classic cheesecake recipe is something every baker should have in his or her repertoire. It’s one of those crowd-pleasing desserts that can be tailored to fit the season or whatever you have on hand. However, finding the perfect cheesecake base can be a bit of a Goldilocks situation: this one’s too dense, that on’es too soft, too tart, too sweet… Well, friends, I think this one is juuuuust right!

The actual cheesecake portion is adapted from my friend Fanny’s cookbook, Oh Sweet Day! (You may remember this cranberry lime tart from there as well.) To me, it is cheesecake texture perfection: beautifully smooth and creamy but with a lightness as well, thanks to folded in egg whites and a long, gentle bake in a low oven. I love the textural contrast of a cookie crumb crust, so that’s what I’ve gone with here. And because it’s currently citrus season and I always seem to have a jar or three of lemon or lime curd in the fridge, this version is gussied up with a smooth lime glaze, the perfect tart foil for the creamy dreamy cheesecake base.

A few notes:

  • The cookie crust is fairly straightforward; you can really use whatever dry cookie you like or have on hand: graham crackers, gingersnaps, shortbread, Oreos without the middle, etc. You can even sub in some nuts if you like. Depending on the type/brand of cookie you use, you may need to adjust the ratio of butter to crumbs. I usually start with the amounts listed and go from there. I’m basically looking for a mixture that holds together when squeezed but doesn’t feel overly wet or greasy.
  • One key to a successful cheesecake is room temperature ingredients. This helps everything combine easily and smoothly for the most even, creamy texture. Make sure to take out your cream cheese, sour cream, and eggs ahead of time! Cream cheese especially needs a bit of time to get to temperature — I like to take it out at least a couple of hours before mixing and baking.
  • While Fanny doesn’t instruct to use a water bath, I’ve always used one and have never had a dry or cracked cheesecake — so I always do it! Instead of putting the cheesecake pan directly in the water, I just put a large roasting or 9×13 pan with a couple inches of hot water on the rack below the cheesecake.
  • I don’t have many springform pans so I usually bake cheesecakes in regular cake pans — in this case, I used an 8×3 round cake pan. Just grease your pan well and line the bottom with parchment, and don’t try to remove the cake until it is thoroughly chilled and set. To release, have ready a flat, large plate or cutting board covered with plastic wrap and your eventual serving plate. Warm the bottom of the pan on a burner and run a thin offset spatula all around the cake. Overturn onto the plastic lined plate/board, peel off the parchment, and flip back onto your serving plate.
  • Glazing is easiest when your cheesecake is completely chilled and the glaze is just barely warm. If some glaze drips over the edge, no big deal — just wipe it off!
classic cheesecake slice


Classic Cheesecake with Lime Curd Glaze

Makes one 8-inch cheesecake
Cheesecake base recipe adapted from Oh Sweet Day! / Glaze adapted from Shirl Gard

Ingredients

For the cookie crumb crust:

  • 175g cookie crumbs (approx. — see notes above)
  • 60g melted butter (approx. — see notes above)
  • Pinch of salt

For the classic cheesecake base:

  • 500g cream cheese (2 blocks — not the tub kind; I use Philadelphia brand), at room temperature
  • 240g (1 c) sour cream, at room temperature
  • 200g (1 c) sugar
  • 1/2 tsp kosher salt
  • 2 Tbsp lemon or lime juice
  • 1 Tbsp pure vanilla extract
  • 3 large eggs, separated, at room temperature

For the lime curd glaze:

  • 100g lime curd (homemade or store-bought), at room temperature
  • 100g sugar
  • 100g water
  • 5g powdered pectin

Method

  1. Preheat the oven to 350F with one rack in the middle and one below. Grease an 8-inch round cake pan (springform or regular works) and line the bottom with parchment paper.
  2. In a food processor, combine the cookie crumbs, salt, and melted butter. The mixture should hold together if you squeeze it in your hand, but shouldn’t feel overly greasy. If the mixture doesn’t hold together, add more melted butter a teaspoon at a time until it does. If overly greasy, add more cookie crumbs a teaspoon at a time until you get the right texture.
  3. Press the cookie crumbs into the bottom of the pan and slightly up the sides, if desired. Use a measuring cup or shot glass to press the crumbs in firmly and evenly.
  4. Bake until just set, about 12 minutes. Allow to cool on a wire rack completely before filling.
  5. Lower the oven temperature to 250F. Combine the cream cheese, sugar, salt, vanilla, and lemon/lime juice in the bowl of a food processor. Pulse until combined. Scrape down the sides, add the sour cream and pulse until smooth. Add the egg yolks one at a time, pulsing after each yolk just to combine. Scrape the batter into a large bowl.
  6. Using a hand or stand mixer, whip the egg whites on medium low until frothy. Turn up the speed to medium-high and whip until soft peaks.
  7. Fold the meringue into the cream cheese batter in three stages. Fold just until the batter is homogeneous and no white streaks remain.
  8. Pour the batter into the pan with the prepared crust. Tap the pan on the counter several times to dislodge any large air bubbles.
  9. Transfer the cheesecake to the middle rack in the oven. On the rack below, place a roasting pan or 9×13 baking pan filled with a couple inches of hot water.
  10. Bake for about 80-90 minutes, or until the edges of the cheesecake are set and puffed but the very center still looks wet and wobbly. Turn off the oven, crack open the oven door (I use a wooden spoon to prop it open) and allow the cheesecake to cool completely, at least an hour.
  11. Remove the cooled cheesecake from the oven. Run an offset spatula around the edges to loosen (but keep the cake in its pan) and refrigerate at least 4 hours (preferably overnight).
  12. To make the lime curd glaze, bring 100g water to a boil over medium heat. Whisk together the sugar and pectin.
  13. When the water reaches a boil, slowly add the sugar and pectin, whisking continuously. Cook the mixture, still whisking, for 2 minutes. Remove from the heat and cool until barely warm.
  14. Remove the cheesecake from the pan and transfer to a serving plate / cake stand. Use an offset spatula to smooth the sides if needed.
  15. Gently whisk together the 100g of room-temperature lime curd and 50g of the barely warm pectin simple syrup (the remainder of the syrup can be refrigerated for another use). Do this slowly so as not to introduce air bubbles into the mixture, which could show up in the final glaze.
  16. Carefully pour the glaze into the center of the cheesecake and use a small offset spatula to gently spread it to the edges. Refrigerate until ready to serve.
classic cheesecake from above

Lime Chiffon Cake with Mango Whipped Cream

lime chiffon cake with offset spatula

I’ve been dreaming of making this cake for some time now: soft, fluffy layers of chiffon sandwiched with citrus curd and mango frosting. I’ve tried once or twice in the past, but it was never as good as I wanted: cake layers were too dry, or the frosting was too heavy. But this time around it was just right! This is the perfect style of cake to serve to people who don’t like desserts that are too sweet, or as a light ending to a large meal.

A few notes:

  • If you’ve never made any type of sponge cake before, I recommend reading through the tips on my mom’s sponge cake recipe before starting. Same principles apply.
  • If you make your own lime curd for this recipe, I definitely recommend saving your lime rinds and making some fresh lime syrup to use as your cake soak. I followed the directions here (substituting limes for lemons) and just let the mixture sit overnight before draining.
  • The mango whipped cream frosting uses a game-changing food processor method by Stella Parks (which she learned from a Japanese bakery), and it’s the perfect accompaniment to chiffon — light but flavorful from the addition of freeze-dried fruit. I really don’t recommend using a butter-based frosting with this cake as it’s just too heavy.
  • I got my freeze dried mangoes from Trader Joe’s, but you can also source it online.
  • To decorate this cake, I dehydrated some lemon and lime slices by baking them at 200F for a few hours until dry (flipping them every hour or so). I also added a bit of chopped freeze-dried mango.
lime chiffon cake from above

Lime Chiffon Cake with Mango Whipped Cream

Makes one 6-inch cake

Ingredients:

For the lime chiffon cake:

  • 4 large egg yolks, at room temperature
  • 5 large egg whites, at room temperature
  • 150g cake flour
  • 175g caster sugar, divided
  • 1 1/2 tsp baking powder
  • generous 1/4 tsp kosher salt
  • 60g (1/4 c or 60ml) lime juice
  • 60g (1/4 c or 60 ml) water
  • 76g (1/3 c or 80 ml) oil
  • Zest of two limes
  • 1 tsp vanilla
  • 1/2 tsp cream of tartar

For the mango whipped cream:

  • 23g freeze-dried mango
  • 75g granulated sugar
  • 3 c heavy cream, chilled

To finish:

  • Simple syrup or fresh lime syrup
  • ~4 Tbsp lime curd (I use David Lebovitz’s recipe: it makes a lot more than you need for this cake, but you can use the rest on toast or freeze leftovers)
  • Dehydrated lemon and lime slices (optional, for garnish — see notes)
  • Chopped freeze-dried mango (optional, for garnish)

Method:

For the lime chiffon cake:

  1. Preheat the oven to 350F with a rack in the lower third. Line three 6-inch pans with parchment, but do not grease the sides of the pan.
  2. Sift together the cake flour, 150g caster sugar, baking powder, and salt in a large bowl (you’ll eventually be mixing the whole batter in this bowl, so choose a nice wide one!). Whisk to combine. Make a well in the center of the dry ingredients. Add the egg yolks, lime juice, lime zest, water, oil, and vanilla to the well, and whisk until smooth.
  3. Beat the egg whites on medium-low speed until foamy. Add the cream of tartar, increase the speed to medium, and whisk until soft peaks. With the mixer still on medium, slowly add the remaining 25 grams caster sugar. Increase the mixer speed to medium-high and beat until you have glossy firm peaks.
  4. Using a silicone spatula, carefully fold the egg whites into the egg yolk batter 1/3 at a time. Mix just until the batter is homogeneous and no white streaks remain.
  5. Divide the batter among the three prepared pans, about 250g each. Give each pan a couple raps on the counter to dislodge any big air bubbles.
  6. Bake until the cakes are puffed and firm and a tester comes out clean, about 25-30 minutes (do not open the oven door until at least 20 minutes have passed or the cakes might collapse!). Allow to cool a few minutes in the pan, then run an offset spatula around the edges (this helps minimize shrinkage). Cool another 10-15 minutes in the pan, then remove the cakes from the pans and allow to cool completely on a wire rack. Once cooled, Chill the cakes before frosting, at least 1/2 an hour.

For the mango whipped cream:

  1. In a food processor, grind the freeze dried mango and sugar into a fine powder. Stir with a fork to break up any clumps.
  2. Add the cream and pulse until very thick and creamy, about the consistency of Greek yogurt. Be careful not to over-process or the cream will turn to butter! If you spoon out some of the cream, it should hold its shape when the spoon is overturned. Use immediately, or refrigerate until needed (it should keep for about a week).

To assemble:

  1. Trim the tops of the cakes to level if needed and peel the parchment paper off each one. Place a dollop of cream on a cake board / plate / cake stand and place the first cake round on top.
  2. Brush the top of the cake generously with syrup. Spoon about 1/3 c of mango whipped cream on top of the first round and spread it on smoothly with an offset spatula. Drizzle a couple tablespoons of lime curd in the center, taking care not to go too close to the edge so the curd won’t leak out the sides.
  3. Repeat step 2 with the second layer. Finish by placing the last cake round top side down (soak it with simple syrup before placing it on top).
  4. Spread a thin, even layer of mango whipped cream over the sides and top of the cake to lock the crumbs in. Refrigerate for about 15-20 minutes until set.
  5. After the cake has chilled, spread a thick, even layer of cream on the top and sides. I used an offset spatula to create some texture. Decorate with dehydrated citrus slices and freeze-dried mango pieces, or as desired. Chill until ready to serve.
lime chiffon cake

Financiers

marcus eating financiers

I let out an audible “Oh, yay!” when I first received Mardi Michel’s delightful cookbook In the French Kitchen with Kids: Easy, Everyday Dishes for the Whole Family to Make and Enjoy. As I’ve mentioned a couple times on this blog, my older child is, as he reminds me often now, “Almost 3” and eager to help in the kitchen whenever possible. I’ve been looking for more recipes to try out with him, so this cookbook was truly a welcome delivery.

marcus reading in the french kitchen with kids

One of the things I appreciated most about In the French Kitchen with Kids is that it assumes kids are capable. There are recipes for quick croissants, creme caramel, eclairs, and steak frites — dishes one might not normally think of as “kid-friendly” but written up in a way that makes them very achievable for young people (with assistance). The book is thoughtfully well-written; the recipes are easy to follow and are peppered with historical tidbits and anecdotes to enhance the learning experience.

The first recipe we decided to make was financiers, or little almond cakes, because my son is currently very into muffin shapes and we had a few extra egg whites to use up. Buttery and nutty, financiers are the perfect little teatime treat and it’s all too easy to keep popping them into your mouth — they’re addictively delicious.

financiers

A couple of notes:

  • Michels’ recipe calls for melted butter, but I went the extra step to brown the butter. I love the extra nuttiness it lends and it’s worth the extra couple of minutes to me. Incorporate the browned butter while it’s still a little warm; this makes it easier to fold into the other ingredients.
  • I refrigerated the batter for a few hours after mixing because of time constraints (and I wanted to bake them off fresh for some guests). This isn’t necessary, but the batter does hold nicely in the fridge for a few days — it just might take a little longer to bake. My financiers took about 15 minutes to bake.
  • The recipe yield is 24 mini muffins, but naturally it depends on the size of your tin. I used this Wilton mini muffin pan and got 15 cakes, using OXO cookie scoop to portion the batter.

marcus mixing bowl
marcus pouring

Financiers

From Mardi Michels’ In the French Kitchen with Kids: Easy, Everyday Dishes for the Whole Family to Make and Enjoy. Reprinted by permission.
Makes 15-24 mini muffin financiers (see notes, above)

Ingredients

  • Unsalted butter, for greasing the pan
  • 1/2 cup (113 g) unsalted butter
  • 4 large egg whites
  • 3/4 cup (150 g) granulated sugar
  • 1/2 cup (50 g) almond meal
  • 1/3 cup (50 g) all-purpose flour
  • 1/4 teaspoon fine sea salt
  • 1/4 tsp pure vanilla extract (optional; my addition)
  • Icing sugar, for sprinkling

Method

  1. Preheat the oven to 400˚F (200˚C). If you are using a nonstick mini muffin pan you may not need to butter them, but otherwise generously butter the cups of the pan.
  2. Melt the butter either in a small pot on the stovetop over medium heat or in a microwave-safe bowl in the microwave for about 1 minute. Set aside to cool. (Note: I browned the butter and let it cool until slightly warm.)
  3. Beat the egg whites until frothy with handheld electric beaters on high speed, 1 to 2 minutes.
  4. In a separate bowl, whisk together the sugar, almond meal, flour and salt.
  5. Add the dry ingredients to the wet and fold them in gently with a rubber spatula until just combined.
  6. Add the cooled, melted butter to the batter and use a rubber spatula to gently mix until the butter is completely incorporated. (Note: at this point, I refrigerated the batter for a couple of hours.)
  7. Divide the batter between the cups of the muffin pan. You can do this with a 1 1/2-tablespoon cookie scoop or a small spoon. Fill each cup almost to the top.
  8. Bake for 10 to 12 minutes, or until the center is slightly puffed and the edges are golden and slightly crispy and coming away from the pan. There may be cracks in the tops. That’s totally okay!
  9. Remove the financiers from the muffin pan immediately and allow to
    cool on wire racks.
  10. Once they have cooled completely, sprinkle them with icing sugar to serve. These are best eaten the day they are made, although they can keep for a couple of days in an airtight container at room temperature.

Option: Raspberry financiers

  • Just before you bake the financiers, cut 12 raspberries in half and place one half, cut side down, on top of each financier. Press down gently.

marcus reaching for financiers

Mini Chocolate Cake with Strawberry Ganache

mini chocolate cake
This is my favorite chocolate cake to make for small celebrations. It’s really simple to whip up, but it stands nice and tall for an impressive treat. The cake itself is sturdy (especially important for these minis), but still has a fine, moist crumb. We are big chocolate raspberry fans around here so I almost always fill it with raspberry jam, but use whatever floats your boat (peanut butter, nutella, another jam…). I often use up bits and bobs of frosting I have leftover from other baking projects, but if you don’t have anything on hand I highly recommend this ganache. It’s also super easy to make (just requires some time to set up to a frosting consistency), and it’s rich so a little goes a long way.

I typically bake this cake in my 4-inch cake pans. If I’m super lazy, I’ll just split the batter between the two pans (they’ll be about 3/4 full but I haven’t had any problems with overflowing), but usually I’ll bake some off in a little ramekin for a baker’s treat.

slice of chocolate cake

Mini Chocolate Cake with Strawberry Ganache

Makes one 6-layer 4-inch cake

Ingredients:

For the mini chocolate cake (adapted from Linda Lomelino):

  • 100 g unsalted butter
  • 1/4 c milk
  • 120g AP flour
  • 3/4 tsp baking soda
  • 34g dutch-processed cocoa powder
  • 157g granulated sugar
  • 1/4 tsp kosher salt
  • 1 egg, at room temperature
  • 80g (1/3 c) sour cream, at room temperature
  • 1 tsp vanilla extract
  • 1/4 c hot coffee or espresso

For the strawberry ganache (adapted from The Cake Bible):

  • 204g bittersweet chocolate (~53% works best here — I used half milk and half 70%)
  • 51g white chocolate
  • 139g heavy cream
  • 81g strawberry puree

For assembly:

  • Simple syrup
  • ~1/2 c raspberry preserves or jam
  • Fresh berries, for garnish

Method:

For the mini chocolate cake:

  1. Preheat the oven to 350F. Line the bottoms of two 4-inch pans (plus an extra ramekin, if desired) with parchment paper, then grease the pans and dust them with cocoa powder.
  2. In a small saucepan, melt the butter over low heat. When the butter has melted, remove from the heat and whisk in the milk and vanilla. Allow to cool slightly while you prepare the rest of the ingredients.
  3. Sift together the flour, cocoa powder, sugar, salt, and baking soda in a medium bowl. Set aside.
  4. Whisk the sour cream into the butter mixture, followed by the egg. Whisk the wet ingredients into the dry until combined. Add the hot coffee and whisk just until smooth.
  5. Divide the batter among the pans (I usually put ~275g into each of the cake tins and the rest into the ramekin) and bake for 30-35 minutes (20-25 minutes for the ramekin), or until a skewer inserted into the center comes out with just a few moist crumbs. Transfer to a wire rack to cool. Once the pans are cool enough to handle, run a thin knife around the edges and turn the cakes out to finish cooling completely. For easiest assembly, I prefer to chill the cakes in the fridge before filling and frosting.

For the strawberry ganache:

  1. Break the chocolate into small pieces and process in a food processor until very fine.
  2. Heat the cream and strawberry puree in a small saucepan until just before the boiling point.
  3. With the food processor running, pour the cream mixture through the feed tube in a steady stream. Process for a few seconds until smooth.
  4. Transfer to a bowl or glass measuring cup and allow to cool at room temperature until ganache reaches a spreadable consistency (this takes me 2-3 hours).

To assemble:

  1. Level the cakes and cut each into 3 thinner layers for a total of 6 layers.
  2. Place the first layer of cake on a cake board or serving plate (use a dab of ganache to “glue” it in place) and brush with simple syrup.
  3. Pipe a ring of ganache around the edge and fill the center with raspberry jam. Continue this process until you’ve used up all the layers.
  4. Spread a thin layer of ganache over the entire cake to lock in the crumbs, followed by a thicker coat. (My kitchen was on the cold side, so my ganache set pretty quickly and I didn’t need to refrigerate the cake between coats.)
  5. Garnish with fresh berries and serve at room temperature.

mini chocolate cake - dark

Mom’s Sponge Cake

sponge cakeWhen we went back to Seattle to visit this past Christmas, I spent some time going through my mom’s recipe box and making some childhood favorites. This sponge cake was first on my list, then and now. It’s soft, light, and fluffy — perfect with a cup of tea or coffee. This cake is perfectly delightful plain, but just to be a little fancy I drizzled on a simple lemon glaze (colored with natural food powder from Go Supernatural).

A few notes:

  • This cake is traditionally baked in an ungreased aluminum 10″ tube pan for the best rise. Don’t use a non-stick pan; the cake has to cling to the sides to rise.
  • The most important keys to success with these type of cakes are properly whipped egg whites and good folding technique. For beating egg whites, I have the best success starting on a low speed and gradually raising it; this helps build a tighter, more stable structure and helps reduce the possibility of overbeating.
  • I find it easiest to fold these types of batters in a large, wide stainless steel mixing bowl with a silicone spatula. For the longest time I was so afraid of over-mixing my sponges that I’d end up undermixing them; it’s important to make sure you don’t have any pockets of flour or unincorporated egg whites or your cake won’t bake up properly. Just be patient and gentle and mix until you have a homogeneous batter.
  • The order of mixing is sort of personal preference. You could beat the egg whites first, transfer them to another bowl, and then beat the yolk mixture with the stand mixer. Or you could beat the yolk mixture with the stand mixer, transfer it to another mixing bowl, clean the mixer bowl and attachment thoroughly, and then beat the whites. I prefer to just start with my yolk mixture in my big mixing bowl and beat that with handheld electric mixer (or a whisk); that way I minimize the number of bowls used and I don’t have to clean stuff during the mixing process.
  • The cake should be cooled completely upside down to minimize shrinking. If your tube pan doesn’t have feet, you can invert it and slide a funnel or a heavy bottle through the center insert.

sponge cake in pan

sponge cake from above

sponge cake slice

Mom’s Sponge Cake

Makes one 10” tube cake

Ingredients:

For the sponge cake:

  • 10 large eggs, separated when cold but brought to room temperature before mixing the batter
  • 188g (1.5 c) cake flour
  • 300g (1.5 c) sugar (preferably caster), divided
  • 1/4 tsp cream of tartar
  • 1/2 c neutral oil (I use grapeseed)
  • 1/2 tsp kosher salt
  • 2 tsp pure vanilla extract

For the lemon glaze and garnish (optional):

  • 188g (1.5 c) icing sugar, sifted
  • 2-3 Tbsp freshly squeezed lemon juice
  • Pinch of salt
  • Zest of one lemon, for sprinkling

Method

  1. Preheat oven to 350F with a rack in the lower third.
  2. Sift cake flour into a small bowl and set aside.
  3. In a large, wide mixing bowl, combine half the sugar (150g), egg yolks, oil, salt, and vanilla and beat on medium until creamy and the sugar is dissolved (3-5 minutes). Set aside.
  4. In the bowl of a stand mixer fitted with the whisk attachment, beat the egg whites and cream of tartar on medium-low until foamy. Increase the speed to medium. When the whites reach soft peak stage, slowly add the remaining sugar (150g) one tablespoon at a time. Once all the sugar has been added, continue whipping on medium to medium-high until the mixture is glossy and holds medium-stiff peaks.
  5. Sift the flour into the yolk mixture in three batches, using a silicone spatula to mostly fold each portion in before sifting in the next. Once all the flour has been added, continue folding until all the flour is incorporated and the mixture is thick and smooth. Be sure to scoop all the way down to the bottom of the bowl to make sure the flour is evenly incorporated, but take care not to overmix.
  6. Fold in the whipped egg whites in three or four portions, using a silicone spatula to mostly fold in each portion before adding the next. Once all the egg whites have been added, fold until the batter is smooth and uniform in color, again taking care not to overmix.
  7. Pour the batter into an ungreased aluminum 10″ tube pan. Bake for 45-55 minutes or until the cake is well browned and a skewer inserted into the center comes out clean. Do not open the oven for at least 45 minutes or the delicate cake may fall. Invert the pan to cool completely (if your pan doesn’t have feet, you can insert a funnel or heavy bottle through the center). Slide an offset spatula around the edges to loosen, remove the insert, then slide the spatula around the bottom. Flip the cake onto a serving platter.

For the glaze and assembly:

  • Whisk together sifted icing sugar and salt in a medium bowl. Gradually whisk in the lemon juice 1 Tbsp at a time until desired consistency. Drizzle onto the cooled cake and sprinkle with lemon zest, if desired.

Chocolate Sheet Cake

chocolate sheet cake slices

I don’t have a whole lot to say about this cake. It’s easy and delicious in that moist, tender bakery-style sort of way; and it feeds a crowd. You don’t need a mixer; it’s almost a dump-everything-in-a-bowl-and-stir situation. The frosting is my favorite ever chocolate frosting: it’s swoopy and glossy and not too sweet, and if you use black cocoa and good dark chocolate it comes out basically black without a smidge of food coloring involved. I love it! Plus it’s all made in the food processor — even easier than the cake. Add a few sprinkles (the colorful ones and/or flaky sea salt) and you’ve got yourself a pretty classy sheet cake with minimal work involved.

frosting sheet cake

single slice

Happy Valentine’s Day!

Note:

  • If you don’t care about the color of the frosting, you can use Dutch-processed cocoa in place of black. The ultimate color of the frosting will depend on how black your black cocoa is (I got mine at a local baking goods store and it’s exceptionally dark) and what kind of dark chocolate you use. The frosting also tends to darken as it sits. The frosting isn’t too sweet — I definitely prefer it this way, but if you like a sweeter frosting, you can increase the amount of confectioners’ sugar to taste.

Chocolate Sheet Cake with Glossy Black Frosting

Makes one 9×13 cake

Ingredients

For the chocolate sheet cake:

  • 284g AP flour
  • 380g granulated sugar
  • 84g dutch process cocoa
  • 1 1/2 tsp baking powder
  • 2 tsp baking soda
  • 1 tsp kosher salt
  • 226g sour cream, at room temperature
  • 114g grapeseed oil (or other neutral oil)
  • 2 large eggs, at room temperature
  • 2 tsp pure vanilla extract
  • 1 c freshly brewed hot strong coffee

For the glossy black chocolate frosting (adapted from Sweetapolita):

  • 255g unsalted butter, softened
  • 90g confectioners’ sugar
  • 45g black cocoa powder
  • 1/4 c hot water
  • 60g / 1/4 c sour cream
  • 3/4 tsp pure vanilla extract
  • Generous pinch of salt
  • 145g good quality dark chocolate, melted and cooled (I use Callebaut 70%)

To assemble:

  • Sprinkles
  • Flaky sea salt

Method

For the chocolate sheet cake:

  1. Preheat the oven to 350F. Lightly grease and line a 9×13 pan with parchment paper that overhangs on the two long edges by at least a couple inches. This will make it easy to remove the cake from the pan later. (I like to secure the long edges with binder clips so the parchment doesn’t fall onto the cake in the oven.)
  2. Sift together all ingredients from the flour through the salt. In a small bowl, whisk together all the remaining ingredients except the coffee. Add the wet to the dry ingredients and whisk to combine. Add the coffee and stir just until the batter is smooth. Pour the batter into the prepared pan and level the surface with an offset palette knife.
  3. Bake until the cake is lightly springy to the touch and a toothpick inserted into the center comes out with a few moist crumbs (but no raw batter), about 28-35 minutes. Cool on a wire rack completely before frosting.

For the frosting:

  • Combine all ingredients except the melted chocolate in a food processor and process until combined. Add the melted chocolate and process until smooth. Use immediately. (Note: the frosting is glossy as long as it stays at room temperature; it will harden and take on a more matte look after refrigeration. If you do refrigerate the cake, make sure to bring it back to room temperature before serving. It just tastes better!)

To assemble:

  • Transfer the cake to a serving platter if desired. Spoon large dollops of frosting around the cake and use an offset spatula or spoon to swirl it around. Add sprinkles. Enjoy!

close up slices