Strawberry Double Fromage Cheesecake

Note: This post may contain affiliate links.
strawberry double fromage cheesecake

If you’re a fan of Asian ASMR YouTube channels, you’ve probably encountered some version of double fromage cheesecake over the years. Popularized by Japanese bakery chain LeTAO, double fromage cheesecake is made up of a sponge cake layer, topped with a layer of baked cheesecake, topped with a layer of cheesecake mousse (or no-bake cheesecake). Once set, the entire cake is dusted with leftover sponge cake crumbs. As with many Asian-style cakes it’s light and lightly sweetened — perfect for warm summer evenings.

LeTAO has actually shared their original recipe on YouTube (it’s in Japanese, but you can get a general idea from the subtitles). With their recipe as a guideline, I created this strawberry version by adding a layer of strawberry gelee between the two cheesecakes and strawberry puree to the cheesecake mousse. To pack a stronger strawberry punch, the whole cake is lightly frosted with strawberry whipped cream and strawberry-speckled cake crumbs (strawberry shortcake Good Humor bar vibes, anyone?).

This strawberry double fromage cheesecake isn’t hard to make, but it does take some time for the different layers to set. You can make it leisurely over one day, or break up the work over a couple days to fit your schedule.

strawberry double fromage cheesecake sliced

Baker’s Notes:

  • You’ll need strawberry puree for the strawberry gelee and strawberry cheesecake mousse layers. I made my own by simply whizzing up some fresh strawberries in a blender, but you can use store-bought puree or use frozen berries (thaw before blending). I like to strain my puree to get rid of the seeds, so I always start with 50% more berries (by weight) than what I need for the recipe. (In this case, I suggest starting with 225g fresh strawberries). Freeze any extras for a later use, or just toss into your next smoothie or swirl into yogurt!
  • I absolutely love the flavor combination of strawberries and elderflower, so I used some IKEA elderflower syrup in both the gelee and mousse. You could use another brand or even elderflower liqueur (like St-Germain). No biggie if you don’t have it, though — subs are in the recipe! 
strawberry double fromage cheesecake slice

Strawberry Double Fromage Cheesecake

Makes one 6″ cake | Adapted from LeTAO and Baked to Order

Ingredients:

For the sponge cake:
  • 45g milk 
  • 30g neutral oil (I used grapeseed)
  • 1/8 tsp kosher salt
  • 1/2 tsp vanilla extract
  • 3 large eggs, separated (cold is fine)
  • 1/4 tsp cream of tartar
  • 75g granulated sugar, preferably caster or superfine
  • 80g cake flour, sifted
For the baked cheesecake:
  • 165g full-fat cream cheese, at room temperature 
  • 50g granulated sugar
  • 1/4 tsp kosher salt
  • 1 large egg, at room temperature
  • 2g (1/2 tsp) vanilla extract 
  • 3g (3/4 tsp) lemon juice
  • 80g sour cream, room temperature
  • 5g (2 tsp) cake flour 
For the strawberry gelee:
  • 2g (scant 3/4 tsp) powdered gelatin
  • 10g cold water
  • 85g strawberry puree (strained or unstrained, depending on your preference)
  • 10g elderflower syrup (or more strawberry puree)
  • 5-15g granulated sugar (to taste)
For the strawberry cheesecake mousse:
  • 125g heavy cream, cold
  • 3.5g (slightly rounded 1 tsp) powdered gelatin
  • 20g milk, cold
  • 1 large egg yolk (~18-20 grams)
  • 40g granulated sugar
  • 20g elderflower syrup (or water)
  • 65g cream cheese, room temperature
  • 65g strained strawberry puree, room temperature 
For the strawberry whipped cream:
To finish:

Method:

Make the sponge cake:

Preheat the oven to 350F with a rack in the middle. Line the bottom of a round 8″ cake pan (with at least 2″ sides) with parchment. Lightly grease the parchment, but don’t grease the sides of the pan.

Combine the milk, oil, and salt in a small saucepan. Heat over low until warm (but not hot) to the touch. Remove from heat, add the vanilla, and keep warm while you prepare the rest of the batter.

Place the egg whites in a large, spotlessly clean stainless steel bowl. (You will eventually be mixing all the cake batter in this bowl, so pick one that’s nice and wide.) Using a handheld electric mixer, mix the egg whites on low until foamy. Add the cream of tartar and continue whisking on low to medium-low until the bubbles tighten and resemble shaving cream. Add the sugar a spoonful at a time, whisking all the while. Turn the speed up to medium and whisk until the meringue holds stiff, shiny peaks when the beaters are raised slowly.

Add the egg yolks one at a time, whisking on low after each addition. Mix just enough so the color is homogenous.

Sift in the flour in 2 batches. Use a balloon whisk or flexible spatula to fold the flour in after each addition. Fold just until the flour is mixed in, doing your best not to deflate the batter. Take extra care to scrape the sides and bottom of the bowl, as flour likes to hide and stick there!

Scoop about 1/2 a cup of batter into the milk-oil mixture. Whisk to combine — no need to be gentle about this; you’re just “tempering” the liquid so it’s more similar in consistency to the rest of the main batter, making it easier to fold the two together with minimal deflation.

Drizzle half the milk-oil mixture around the perimeter of the main batter. Use a balloon whisk or flexible spatula to fold in. Repeat with the remaining milk-oil mixture. Fold just until no streaks of liquid remain and you have one homogenous batter. (Again, scrape the sides and bottom of the bowl thoroughly!)

Scrape the batter into the prepared pan and smooth the top. Whack the pan firmly on the counter 2-3 times to break any large air bubbles.

Bake until golden and springy to the touch, about 30 minutes. Remove from the oven and immediately drop the pan onto the counter from a height of 12″. (This helps minimize shrinkage.) Let cool for about 10 minutes on a wire rack, then run a thin spatula around the edge. Leave in the pan to cool completely.

Right before preparing the baked cheesecake batter, cut the cake horizontally so you have a round about 1/2″ thick (save the rest of the cake for another use). Use a 6″ cake ring to punch out a circle of cake. Remove the excess cake around the outside of the ring; but do not discard. Remove cake and clean the ring. Line the ring with parchment paper and place on a cake round or sheet pan. Place cut round on the bottom of the ring.

Trim the brown parts off the cake you removed from outside the ring; wrap and refrigerate or freeze — you’ll use this for decorating the outside of the cake.

Make the baked cheesecake:

Preheat the oven to 300F with one rack in the middle and one below.

In a medium bowl, combine the cream cheese, sugar, and salt. Mix on medium-low with a handheld electric mixer. Scrape down the sides, add the egg, and mix until smooth. Add the vanilla and lemon juice, and mix until smooth. Add the sour cream and mix until well combined. Add the flour and mix until smooth.

Pour the batter into the prepared ring. Tap the pan on the counter several times to dislodge any large air bubbles.

Transfer the cheesecake to the middle rack in the oven. On the rack below, place a cake pan filled with about 2 inches (5 cm) of hot water. Bake until the edges are set but the center still gently wobbles, about 30 minutes. Cool to room temperature on a wire rack, then refrigerate uncovered until cold (at least 2 hours).

Make the strawberry gelee:

When the cheesecake has chilled completely, prepare the strawberry gelee. In a small bowl, sprinkle the gelatin evenly over the cold water. Let stand for 5 minutes to bloom.

In a small saucepan, combine the strawberry puree, elderflower cordial, and sugar. Heat over medium until the sugar has melted and the mixture is steaming but not boiling. Remove from heat and add the bloomed gelatin. Stir until the gelatin has completely dissolved, then scrape into a heatproof jug or container. Let cool for 10 minutes, then pour over the baked cheesecake layer. Chill while you prepare the strawberry cheesecake mousse.

Make the strawberry cheesecake mousse:

Whip the heavy cream until just before soft peaks. Chill while you prepare the rest of the mousse.

In a small bowl, sprinkle the gelatin evenly over the cold milk to bloom. Set a sieve over a clean, heatsafe bowl.

Fill a small saucepan with an inch of water and bring to a simmer over medium heat. In a heatproof bowl (that will fit over the saucepan without the bowl touching the water), whisk together the egg yolk, sugar, and elderflower cordial (or water). Heat, whisking constantly, until the mixture thickens and registers 155F on a digital thermometer. (This is to pasteurize the egg yolk.) Remove from double boiler and whisk in the gelatin mixture until completely dissolved. Whisk in the cream cheese and strawberry puree. Strain into the prepared bowl.

Using a flexible spatula, fold in the whipped cream in two portions, just until homogenous. Pour over the gelee layer. Refrigerate until set, at least 4 hours (or overnight).

Finish the cake:

When the mousse has set and you’re ready to decorate, make the strawberry whipped cream. Combine the cream and ground freeze-dried strawberries in a small bowl and whip to medium-firm peaks. (You can also do this in a mini food processor — grind the strawberries to a powder, if whole, then add the cream and pulse until thick like yogurt. It doesn’t take long!) Refrigerate until ready to use.

To make the strawberry crumbs, pulse the reserved cake scraps in a food processor until fine (or press through a sieve). Stir in the freeze dried strawberries.

To decorate, remove the cake ring and parchment paper. Frost the entire cake with a light coat of the strawberry whipped cream. Immediately press the strawberry crumbs all over the sides of the cake (you can do the top too, if you like, but I kept it naked). Transfer any remaining strawberry whipped cream to a piping bag fitted with a French star tip. Pipe a few swirls on top and garnish with fresh strawberries. Refrigerate until ready to serve. Cake is best the day it’s assembled, but you can refrigerate leftovers in an airtight container for up to 3 days.

strawberry double fromage cheesecake

Related recipes and resources:

Chinese Bakery Style Paper-Wrapped Sponge Cakes

chinese paper wrapped sponge cakes
Note: This post contains affiliate links.

Mildly sweet and impossibly fluffy, these paper-wrapped sponge cakes have been a favorite of mine since childhood. Along with gai mei bao (coconut cocktail buns) and dan tat (egg tarts), these simple cakes were a must-buy every time we visited a Chinese bakery. After years of attempting to recreate these treats at home, I’m so happy to finally share this recipe with you.

Tang-mian or “cooked dough” method

For this recipe, I use a technique known as tang mian, or cooked dough. Basically, the flour is “cooked” with heated oil and milk before getting mixed with other ingredients. Pre-coating the flour with fat limits gluten formation and yields an extra fluffy, moist, and cottony-textured cake. I’m not sure exactly where this technique originated, but it’s been popular amongst Asian bakers for quite some time. I’ve been experimenting with tang-mian recently and appreciate the textural difference particularly in tall cakes (less so in roll cakes, but that’s another recipe for another day). Try it and see what you think!

Keys to sponge cake success

As with all sponge-style cakes, the keys to success for these cupcakes are properly whipped egg whites and good folding technique.

This cake batter doesn’t contain any leavening agents (i.e. baking powder or soda). Instead, the rise all comes from the meringue — egg whites and sugar that are whipped to stiff peaks and folded into the batter.

I also use cold egg whites for this recipe. While most North American sponge or chiffon cake recipes direct you to use room temperature eggs, Asian cake recipes often call for using cold egg whites. Cold egg whites take longer to whip to stiff peaks, but this allows time to form a very fine and strong meringue with minimal risk of overbeating (a pinch of cream of tartar helps too). I mix on no higher than medium speed for.a smooth meringue with very small, even bubbles — this results in velvety-textured, smooth cake with no unsightly holes. You want to whip the meringue to stiff, shiny peaks for this recipe. This article from Fine Cooking pictures the various stages of meringue — very helpful!

Once you’ve created your perfect meringue, the trick is to incorporate it into the rest of the ingredients while still retaining the structure and air you’ve worked so hard to create. I start by whisking a small amount of meringue into the yolk batter to “temper” it, then scraping the yolk batter over the meringue and using a whisk to fold the two mixtures together. When just a few streaks of white remain, I switch to a silicone spatula and finish folding until the batter is all one color. You can also fold the meringue into the yolk batter in a few portions; but after making many, many chiffon and sponge cakes I find this method is more efficient — plus, I don’t end up with any film of yolk batter at the bottom of my mixing bowl. But use whatever folding method you prefer!

The molds

chinese flower sponge cake mold

If you grew up eating paper-wrapped sponge cakes, you may know that they are typically baked in flower-shaped individual tins. These tins are taller than typical cupcake molds and give these cakes their iconic shape. I got these flower cake molds from Hong Kong via a very kind friend. They are just under 2 3/4″ tall, just under 3″ wide at the top, and 1 7/8″ wide at the bottom (7cm tall, 7.1cm wide on top, 4.5cm wide on bottom).

Here are a few sources and ideas for finding for these tins:

Because I have such strong memories associated with these paper-wrapped cakes, using the proper molds absolutely enhanced my enjoyment of making them. The memories are not just about the taste of the cake — it’s the look and feel of them in your hand, the memory of peeling off the paper and slowly shredding off long pieces. If you have similar nostalgia and want to recreate this specific food memory, I think it’s 100% worth it to track some down.

HOWEVER! You can bake this batter in other cupcake or popover tins or even oven-safe paper cups — the cakes will still taste good. Here’s how I would calculate how much batter to fill a different-sized tin.

  • Weigh how much water it takes to fill your mold to the top and note the number in grams. For reference, one of my flower-shaped tins holds 180g of water, filled right to the top. You’ll sse these two numbers to calculate about how much batter to use per tin and your yield.
  • For example, one of my regular cupcake wells fits 100g of water. 100/180 = ~0.56. So, one of my regular cupcake wells holds 56% of the volume of one flower tin.
  • I use ~90g of batter per flower-shaped tin. Based on the previous calculation, I need 56% of that amount to fill a regular cupcake well. 90 x 0.56 = ~50. So I would use about 50g per cupcake mold, for a yield of 10-11 cupcakes. (90 x 6 = 540, total batter yield. 540 / 50 = 10.8. The recipe makes a little more than 540g to account for some loss in the bowls and utensils, so you should be able to get 11.)
  • Please note that the yield and baking time will vary depending on the size of your tin(s). Smaller, shallower cakes will bake faster than taller, thicker cakes.

It’s important to line whatever molds you use with parchment paper that extends the top edge. These delicate cakes rise quite a bit during baking and need the support. For my molds, I cut 7.5″ square papers out of parchment and followed this lining technique from Christine’s Recipes. For best results, take the time to crease the papers and get them to lie as flat as possible within the mold so batter doesn’t flow between the folds of the paper. I do NOT recommend using the method where you squish a paper into the mold using a similar-sized cup; though you can use a second mold to press the paper in tightly once you’ve folded and creased it.

Baker’s notes:

  • For best results, weigh your yolks and whites for this recipe. I use large eggs that typically weigh about 60g with shell, but even so I have noticed a surprising variance in how much large eggs weigh from brand to brand.
  • Cake flour helps achieve the very cottony, fine texture that is characteristic of these cakes. I do not recommend replacing with all-purpose. Cake flour tends to clump so I I sift it twice, once before adding to the milk-oil mixture and another time when I add it to the liquid.
chinese paper wrapped sponge cakes

Chinese Bakery Style Paper-Wrapped Sponge Cakes

Makes 6 large flower-shaped cupcakes (please read notes under “The Molds” if using different tins)

Ingredients:

  • 84g whole milk
  • 50g neutral oil (such as grapeseed or canola)
  • 1/8 tsp kosher salt
  • 1 1/2 tsp vanilla extract
  • 100g cake flour, sifted
  • 100g egg yolks (from about 5 large eggs), cold
  • 150g egg whites (from about 5 large eggs), cold
  • 1/4 tsp cream of tartar (optional — can sub with 1 tsp lemon juice)
  • 84g granulated sugar, preferably caster or superfine

Method:

Preheat the oven and prepare the tins: Preheat the oven to 350F with a rack in the middle. Line cupcake tins with parchment paper so the paper extends the rim of the mold (see above video for method). Place tins, evenly spaced, in a 9×13 baking pan or on a sheet tray.

Set up a bain-marie and heat milk and oil: Fill a medium saucepan with 1-2 inches of water. Bring to a simmer over medium-low heat. Meanwhile, whisk together the milk and oil in a medium heatproof bowl. Once the water reaches a gentle simmer, set the bowl over the simmering water (make sure the bottom of the bowl isn’t touching the water). Whisk over the heat constantly until the mixture reaches 150F on an instant-read digital thermometer, about 3-4 minutes. Turn off the heat and remove the bowl.

Make the yolk batter: Whisk the salt and vanilla into the warm milk-oil mixture. Sift in the cake flour and whisk until smooth. Let cool for 1-2 minutes (to avoid cooking the yolks), then whisk in the egg yolks one at a time. The batter should be smooth and shiny. Set aside.

Make the meringue: Place the egg whites in a spotlessly clean bowl — choose something large and wide as eventually you’ll be mixing all the batter in it. Using an electric handheld mixer, whisk egg whites on low until foamy. Add the cream of tartar and continue whisking on low to medium-low until the bubbles tighten and resemble shaving cream. Add the sugar a spoonful at a time, whisking all the while. Turn the speed up to medium and whisk until the meringue holds stiff, shiny peaks when the beaters are raised slowly.

Combine the two batters: Whisk the egg yolk batter briefly to loosen. Add a large spoonful of meringue and fold in using a whisk or flexible spatula. Scrape the egg yolk batter into the bowl with the remaining meringue. Use a whisk to gently but thoroughly fold the mixtures together. Avoid stirring — we want to retain as much air as possible. Once the two mixtures are about 80% combined, switch to a flexible spatula and continue folding until you have one homogenous batter with no streaks of egg white remaining.

Portion the batter: Divide the batter among the prepared tins (for my flower shaped tins, about 90g each). The tins should be filled to the top. I used a medium cookie scoop to portion the batter; alternatively you can transfer the batter to a piping bag and pipe it into the tins.

Bake the cakes: Bake until cakes are golden and springy to the touch and a skewer inserted into the center of a cake comes out clean, about 25-30 minutes. Try not to open the oven until the cakes are close to being done, or the delicate cakes may collapse. Immediately remove cupcakes from the tins and lay on their sides to cool on a wire cooling rack. This helps minimize shrinkage — a little is normal, but if cakes shrink significantly this is usually due to underbaking or a problem with the meringue/folding. Cakes are best enjoyed the day they’re baked, but leftovers can be stored for a couple days in an airtight container at room temperature or the refrigerator. Enjoy at room temperature.

paper wrapped sponge cake unwrapped

Related resources and recipes:

Berry Basil Fraisier

berry basil fraisier

To me, the unofficial start of summer is the arrival of fresh strawberries. To be honest, I’m not much of a summer person — I don’t like hot weather and the mosquitoes that come with it. But I love summer produce, and our family definitely looks forward to berry picking every year.

freshly picked strawberries

For the past several years, I’ve made a fraisier to celebrate fresh strawberries. A fraisier is a traditional French strawberries and cream cake, and to me it’s the best way to enjoy candy-sweet, ripe strawberries (after eating them straight off the plant).

hannah eating strawberry

With these fraisiers I tend to be a bit casual — I usually make them a little differently every time. Sometimes I use a Japanese genoise as the cake; I’ve also made a matcha sponge version that was delicious. Sometimes I make a gelee layer for the top. I’ve also learned a few things over the years — like the need for gelatin to set the cream, and to keep the cake layers on the thin side to let the strawberries really shine through.

For my 2019 fraisier, I used some fresh basil from our garden to infuse the cream. And because the spring here was quite cool and strawberries didn’t show up until practically July, I added in a few blueberries to make this a fourth of July appropriate cake. (You could definitely just use all strawberries too, though.) The sponge is a lemon-scented chiffon, which is light and fluffy and pretty simple to whip up. The result: summer in every bite.

A few notes:
  • For easiest assembly, I recommend a 6×3 cake ring and acetate strips. You could also use a springform pan and plastic wrap, but you’ll get the cleanest results from the ring and acetate. (I use these same tools to make Momofuku-style cakes.)
  • You can make the basil pastry cream base up to 5 days in advance, but wait to add the gelatin and whipped cream until you are ready to assemble the cake.
  • For the cake, I used a half recipe of this lime chiffon cake and baked it in a 6×3 cake pan (total baking time was about 35 minutes). Don’t use a shorter pan; it will overflow. You could probably also bake this in a quarter sheet pan and cut out two 6″ rounds, but you would need to adjust the baking time.
berry basil fraisier top down

Berry Basil Fraisier

Makes one 6-inch cake

Ingredients:

  • Half a recipe of this chiffon cake, baked in a 6×3 cake pan (I subbed lemon zest and juice for lime)
  • 1 recipe basil cream diplomat (recipe below)
  • Simple syrup
  • ~1 c chopped strawberries, mixed with a spoonful of strawberry puree or jam; plus about 10-12 strawberries, halved (try to choose ones that are the same height, or trim to match) and 10-12 blueberries
  • More berries and basil leaves, to decorate
For the basil cream diplomat:
  • 1 c whole milk
  • 50g sugar (1/4 c), divided
  • 20g cornstarch or custard powder
  • 2 large egg yolks
  • Pinch of salt
  • 3-4 sprigs of fresh basil
  • 14g (1 Tbsp) unsalted butter
  • 1/2 – 3/4 tsp gelatin*
  • 1/2 tbsp cold
  • 1/2 – 1 c heavy whipping cream*

*Use 1/2 c for a thicker filling and up to 1 c for a lighter filling (I usually use 1/2-3/4 c). If you use more than 1/2 heavy cream, use 3/4 tsp gelatin. 

Method:

  1. To make the basil cream diplomat: Bring the milk and basil sprigs to a simmer in a medium saucepan over medium low heat. Simmer for about 15 minutes, stirring occasionally, then remove from heat and cover. Allow basil to steep for about 45 minutes.
  2. Strain the milk (add more to reach 1 cup if necessary) and return to the saucepan along with 40g sugar and a pinch of salt. Place a strainer over a heat-safe jug or container.
  3. In a medium bowl, whisk together the remaining 10 g sugar and the cornstarch. Pour in a tablespoon or so of the milk mixture and whisk until smooth. Add the egg yolks and whisk until smooth.
  4. Heat the milk over medium heat until steaming. Remove from heat. Pour the milk in a slow, steady stream into the egg yolk mixture, whisking constantly. Scrape the custard mixture back into the saucepan and return to medium heat. Cook, whisking constantly, until the mixture thickens and large bubbles appear on the surface. Once the bubbles appear, continue whisking on the heat for two minutes.
  5. Strain the pastry cream into the prepared jug or container. Whisk in the butter until combined. Place a piece of plastic wrap over the top and allow to cool to room temperature, then refrigerate until cold (at least 2 hours).
  6. When you are ready to assemble the cake, finish preparing the cream diplomat. In a small bowl, sprinkle the gelatin evenly over the cold water and allow to sit for about 5 minutes. Meanwhile, put two inches of water into a small sauce pan and bring to a simmer over a medium heat. Measure 1/4 cup (60g) of the chilled pastry cream into a small stainless steel bowl that will sit across the saucepan with the simmering water, without touching the water.
  7. Heat the cream until it is 120F. Add the gelatin and whisk until smooth. Remove from the water bath, and whisk the remaining cold pastry cream in to incorporate in two batches.
  8. Whip the heavy cream until it holds medium-stiff peaks. Immediately fold the whipped cream into the pastry cream with a rubber spatula. Transfer to a piping bag and refrigerate while you continue assembling the cake.
  9. To assemble the berry basil fraisier: Line a 6×3 cake ring (or same-sized springform pan) with acetate (or plastic wrap) and place on a cake board or plate. Trim the cake into layers ~3/4 inch thick (you should get three; you’ll need two for the cake. The rest is a baker’s treat!).
  10. Place one layer of the cake in the bottom of the ring and brush generously with simple syrup. Place the halved strawberries, cut side out and pointed end up, around the edge of the pan. Add blueberries between the strawberries if desired. Pipe the cream diplomat between the fruits and a layer across the top of the cake. Use a offset palette knife to smooth. Fill the center with the chopped berries + jam, then cover with another layer of cream. Place the second layer of cake on top and press down to level. Soak with simple syrup, then spread a thin layer of cream across the top. Refrigerate until set, about 4 hours or up to three days.
  11. Just before serving remove the cake ring and acetate. Arrange the cut fruit and basil on top as desired. (If you are doing this beforehand, brush a little warmed and thinned apricot jam on the fruit to preserve their color.) Enjoy!

Mom’s Sponge Cake

sponge cake
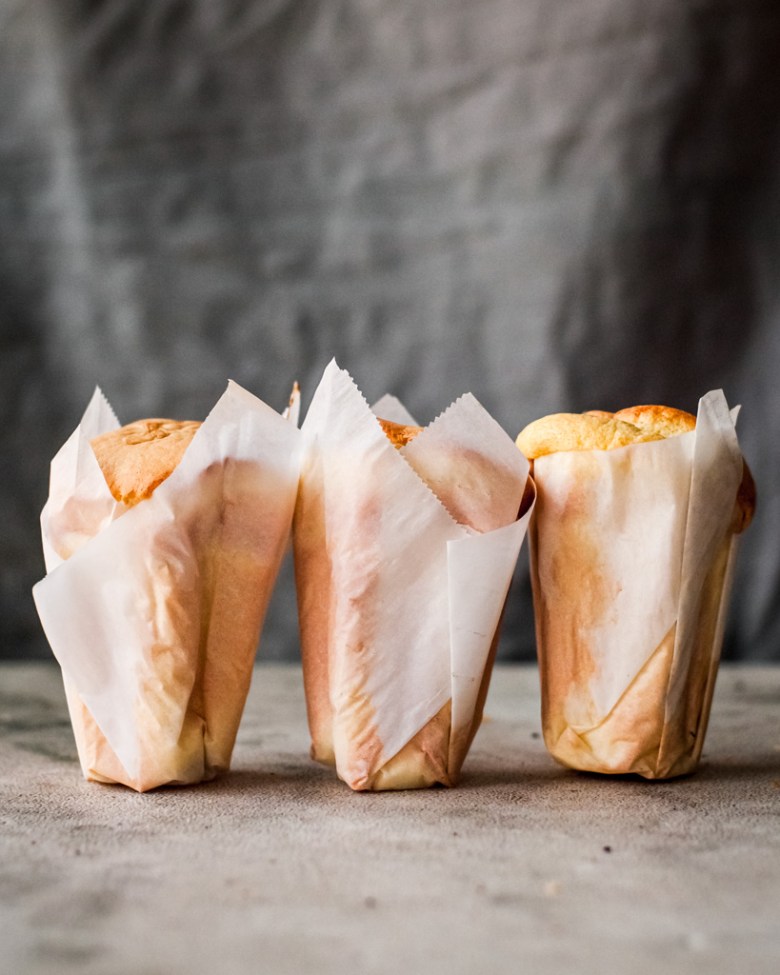
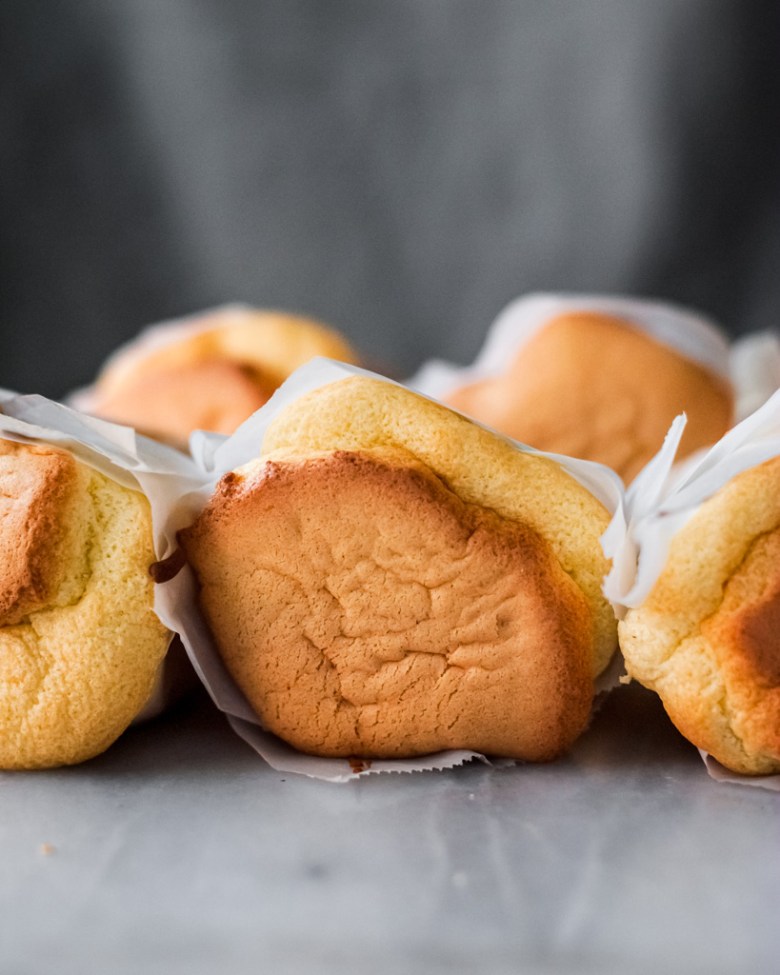
When we went back to Seattle to visit this past Christmas, I spent some time going through my mom’s recipe box and making some childhood favorites. This sponge cake was first on my list, then and now. It’s soft, light, and fluffy — perfect with a cup of tea or coffee. This cake is perfectly delightful plain, but just to be a little fancy I drizzled on a simple lemon glaze (colored with natural food powder from Go Supernatural).

A few notes:

  • This cake is traditionally baked in an ungreased aluminum 10″ tube pan for the best rise. Don’t use a non-stick pan; the cake has to cling to the sides to rise.
  • The most important keys to success with these type of cakes are properly whipped egg whites and good folding technique. For beating egg whites, I have the best success starting on a low speed and gradually raising it; this helps build a tighter, more stable structure and helps reduce the possibility of overbeating.
  • I find it easiest to fold these types of batters in a large, wide stainless steel mixing bowl with a silicone spatula. For the longest time I was so afraid of over-mixing my sponges that I’d end up undermixing them; it’s important to make sure you don’t have any pockets of flour or unincorporated egg whites or your cake won’t bake up properly. Just be patient and gentle and mix until you have a homogeneous batter.
  • The order of mixing is sort of personal preference. You could beat the egg whites first, transfer them to another bowl, and then beat the yolk mixture with the stand mixer. Or you could beat the yolk mixture with the stand mixer, transfer it to another mixing bowl, clean the mixer bowl and attachment thoroughly, and then beat the whites. I prefer to just start with my yolk mixture in my big mixing bowl and beat that with handheld electric mixer (or a whisk); that way I minimize the number of bowls used and I don’t have to clean stuff during the mixing process.
  • The cake should be cooled completely upside down to minimize shrinking. If your tube pan doesn’t have feet, you can invert it and slide a funnel or a heavy bottle through the center insert.

sponge cake in pan

sponge cake from above

sponge cake slice

Mom’s Sponge Cake

Makes one 10” tube cake

Ingredients:

For the sponge cake:

  • 10 large eggs, separated when cold but brought to room temperature before mixing the batter
  • 188g (1.5 c) cake flour
  • 300g (1.5 c) sugar (preferably caster), divided
  • 1/4 tsp cream of tartar
  • 1/2 c neutral oil (I use grapeseed)
  • 1/2 tsp kosher salt
  • 2 tsp pure vanilla extract

For the lemon glaze and garnish (optional):

  • 188g (1.5 c) icing sugar, sifted
  • 2-3 Tbsp freshly squeezed lemon juice
  • Pinch of salt
  • Zest of one lemon, for sprinkling

Method

  1. Preheat oven to 350F with a rack in the lower third.
  2. Sift cake flour into a small bowl and set aside.
  3. In a large, wide mixing bowl, combine half the sugar (150g), egg yolks, oil, salt, and vanilla and beat on medium until creamy and the sugar is dissolved (3-5 minutes). Set aside.
  4. In the bowl of a stand mixer fitted with the whisk attachment, beat the egg whites and cream of tartar on medium-low until foamy. Increase the speed to medium. When the whites reach soft peak stage, slowly add the remaining sugar (150g) one tablespoon at a time. Once all the sugar has been added, continue whipping on medium to medium-high until the mixture is glossy and holds medium-stiff peaks.
  5. Sift the flour into the yolk mixture in three batches, using a silicone spatula to mostly fold each portion in before sifting in the next. Once all the flour has been added, continue folding until all the flour is incorporated and the mixture is thick and smooth. Be sure to scoop all the way down to the bottom of the bowl to make sure the flour is evenly incorporated, but take care not to overmix.
  6. Fold in the whipped egg whites in three or four portions, using a silicone spatula to mostly fold in each portion before adding the next. Once all the egg whites have been added, fold until the batter is smooth and uniform in color, again taking care not to overmix.
  7. Pour the batter into an ungreased aluminum 10″ tube pan. Bake for 45-55 minutes or until the cake is well browned and a skewer inserted into the center comes out clean. Do not open the oven for at least 45 minutes or the delicate cake may fall. Invert the pan to cool completely (if your pan doesn’t have feet, you can insert a funnel or heavy bottle through the center). Slide an offset spatula around the edges to loosen, remove the insert, then slide the spatula around the bottom. Flip the cake onto a serving platter.

For the glaze and assembly:

  • Whisk together sifted icing sugar and salt in a medium bowl. Gradually whisk in the lemon juice 1 Tbsp at a time until desired consistency. Drizzle onto the cooled cake and sprinkle with lemon zest, if desired.

Mango Charlotte Cake

Do you have a cooking or baking bucket list? On my ever-growing one is gourmet pasta, multiple types of dim sum, and French entremets. Admittedly most of the things left on my list are a tad complicated and/or time consuming, so I’ve resigned myself to the reality that I probably won’t get to them for another decade or so (i.e. when the littles are more self-sufficient, at least).

While 7-layer entremets may have to wait, I’ve been able to tackle a couple other “fancy” cakes that are a little less complicated. The latest was this mango charlotte, which featured alternating layers of sponge cake and mango mousse surrounded by ladyfingers and topped with a mango glaze. The result was a beautifully light, sophisticated cake bursting with mango flavor. I’m eager to try this again with different fruits (raspberries? blackberries?); as it is definitely a nice alternative to a typical American-style layer cake.

Most charlottes call for a classic genoise as the cake portion. I used a Japanese genoise, which is a little sweeter and more m-m-moist than its European counterpart. To be honest, sponge cakes aren’t my forte but I’ve had good success with this one. The keys, I’ve found, are to whisk the eggs for a long time on a low speed (to build structure) and to fold in the flour with a slotted spoon (it’s faster and more efficient than a spatula). I tend to err on the side of undermixing, but don’t be like me unless you want failed batches of genoise with a) rubbery bottoms (from not mixing in the fats evenly) or b) flour bits (self-explanatory).

The star of the show is the fruit, though; I think I used about 7 medium-sized whole mangoes to make this cake! So you really do need to find very ripe, flavorful mangoes for this cake. Look for ones that have a little give when you gently squeeze them; and smell strongly of mango when you give them a sniff. If anything, err on the side of over-ripe!

While the mousse and glaze should be prepared right before using, the cake and ladyfingers can be baked in advance (freeze if you’re not using the same day). If you’re pressed for time, store-bought ladyfingers will do just fine as well.

Mango Charlotte Cake

Makes one 9-inch cake

Ingredients

For the ladyfingers
Makes about 3 dozen; freeze the extras or snack on them! | Adapted from The Cake Bible

  • 6 large eggs, separated
  • 150g caster sugar
  • 10g vanilla
  • 1 T warm water
  • 150g sifted cake flour
  • 3/4 tsp cream of tartar
  • Icing sugar, for sifting

For the Japanese Genoise
Adapted from Natalie Eng

  • 173g cake flour, sifted
  • 255g eggs (approx. 5 large), at room temperature
  • 195g caster sugar
  • 23g glucose
  • 45g unsalted butter
  • 68g whole milk
  • 1 1/2 tsp pure vanilla extract

For the Mango Mousse
Adapted from Joe Pastry

  • 567g (20 oz., about 4 medium-large) ripe fresh mangoes, cut into chunks (note: you will need additional mango (some pureed, some cut into chunks for the mirror glaze and filling; I recommend cutting up a couple extra mangoes and setting aside for that purpose)
  • 85g sugar
  • 2 Tbsp. fresh lemon juice
  • 3 1/2 tsp. powdered gelatin
  • 2 c heavy cream, chilled

For the Mango Mirror Glaze
Adapted from The Little Epicurean

  • 57g mango puree
  • 57g water
  • 28g sugar
  • 1 1/2 gelatin sheets (silver strength), bloomed

To assemble

  • 2 to 2 1/2 dozen ladyfingers (4-inch tall), bottoms trimmed
  • Simple syrup
  • ~1 c fresh mango chunks
  • Fresh berries for garnish (optional)
  • White chocolate curls for garnish (optional)
  • 9×3 cake ring (or springform pan)
  • 9-inch cake board
  • Acetate (can also use parchment paper or plastic wrap)

Method

Make the ladyfingers

  1. Preheat the oven to 400F. Line two large baking sheets with parchment paper (you may need 3 if your pans are small).
  2. In a large mixing bowl, beat the yolks and 1/2 c sugar on high for 5 minutes, or until the mixture is very thick and ribbons when dropped from the beater. Lower the speed and beat in the vanilla and water. Increase the speed to high and beat for another 30 seconds, or until thick again. Sift the flour over the yolk mixture without mixing in and set aside
    In another large bowl, beat the whites until foamy. Add the cream of tartar, and beat until soft peaks. Gradually beat in the remaining 1/4 c sugar, beating until very stiff peaks.
  3. Add 1/3 of the whites to the yolk mixture and use a slotted spoon or spatula to fold until all the flour is incorporated. Gently fold in the remaining whites.
  4. Transfer some of the batter to a piping bag fitted with a large round tip. Pipe 4 inch lines (“fingers”), leaving about 1/4 inch between each. (They will bake into each other, forming continuous strips.) Continue piping until you have used all the batter.
  5. Sift powdered sugar completely over the fingers. Once the sugar has dissolved, sift a second coat on.
  6. Bake for 8-10 minutes, or until light golden brown and springy to the touch. Transfer to a wire rack to cool slightly. Remove from the sheets while still a little warm (to prevent cracking) using a long, thin spatula or pancake turner. Cool completely on racks before using or store in an airtight container. (Note: If you aren’t using that day, I recommend freezing the fingers for longer storage as they do stale. They defrost quickly, so just pull them out about an hour before you want to assemble the cake.)

Make the Japanese Genoise Cake

  1. Preheat the oven to 350F. Line the bottoms of two 8-inch cake pans with parchment paper. Grease and flour the pans and set aside.
  2. In the bowl of a stand mixer, heat the eggs, sugar and glucose, whisking constantly, over a bain marie until the mixture reaches 45-50C. Transfer the bowl to the stand mixer and mix on high speed until pale and fluffy. Reduce the speed to low and keep whisking for an additional 7 minutes. This allows the air bubbles to be even and small hence making it more stable so you will not knock so much air out when you fold in the flour.
  3. In a saucepan (or in the microwave), heat the milk, butter and vanilla essence until the butter has melted and the mixture is warm. Mix about 1 cup of the egg mixture into the butter mixture and whisk to combine. Set aside.
  4. Sift the flour in three parts into the egg mixture, folding each part in with a large slotted spoon (my preferred tool) or a silicone spatula before adding more flour. You want to fold gently but also ensure the flour is completely mixed in; otherwise you will have lumps in your cake. Once the flour is well incorporated, pour the butter mixture into the egg batter and fold it in until it is well incorporated. Do not overmix, but again make sure the butter mixture is well incorporated; otherwise the bottom of your cake will be rubbery. The batter should still be fluffy and almost as if it’s heaving.
  5. Divide the batter evenly between the prepared pans and bake for about 25 minutes, or until golden brown on top, the cake springs back when lightly pressed, and the cake is pulling away from the sides of the pan. Rotate the pans after about 20 minutes for even baking (don’t open the oven sooner or your cakes may collapse). Transfer the finished cakes to a wire rack. Cool for about 10 minutes in the pan; then turn the cakes out and finish cooling them completely on the rack.

Prepare the cake pan

  • Line your cake ring with acetate and place a cake board on the bottom. Trim the tops and bottoms of the cakes. Place one cake round in the center of the cake ring and brush liberally with simple syrup. Place the ladyfingers around the edge, fitting them in tightly to ensure there are no gaps (you may have to trim the edge of the last one to fit neatly). Set aside while you prepare the mousse.

Make the Mango Mousse

  1. Whip the cream to soft peaks and keep refrigerated until ready to use.
  2. Combine the mango chunks, sugar, and lemon juice in a food processor and process until smooth. Strain the mixture through a sieve into a medium bowl. You should have ~2 cups of puree.
  3. Heat about one third of the mixture in a small saucepan or in the microwave until warm but not boiling. Sprinkle the gelatin evenly over the surface and stir to combine completely. Stir the warmed mixture back into the rest of the puree. Cool the mixture back to room temperature, stirring occasionally. When the mango is cooled, whip the cream to stiff peaks. Gently but thoroughly fold the mango mixture into the cream. Use immediately.

Continue assembling the cake

  • Evenly spread about a cup of mousse over the first cake layer, making sure to go right to the edges. Sprinkle the mango chunks evenly over the mousse. Spread on another ~1/2 cup of mousse (or enough to cover the mango chunks). Place the second cake layer on top and press down to ensure it’s level. Brush liberally with simple syrup. Evenly spread on another cup of mousse, leaving about an inch from the top for the mirror glaze and garnish. Refrigerate until mousse is set, at least 4 hours or overnight.

Make the Mango Mirror Glaze

  • Heat the water, sugar, and puree in a small saucepan until warm but not boiling. Remove from heat and immediately stir in the bloomed gelatin. Transfer mixture to a glass measuring cup (preferably with a spout for easy pouring) and cool until just slightly warm, stirring occasionally. Use immediately.

Glaze and finish cake

  1. Remove the chilled cake from the fridge. Pour the glaze evenly over the top of the cake. Return the cake to the fridge to set completely (about 1/2 an hour).
  2. Remove the cake ring and acetate. Garnish top with fresh berries and white chocolate curls, if desired. Refrigerate until ready to serve.