Spelt Buttermilk Biscuits

This post is sponsored by Weight Watchers Canada. Find out more about the WW Freestyle program, which encourages the freedom to eat the foods you love while nudging you towards healthier choices using the SmartPoints system. As always, all ideas and opinions expressed here are my own.

Biscuits aren’t something I ate much growing up. Not that I was deprived or anything — it’s just that we were more a Denny’s Grand Slam or banana pancakes kind of family when it came to special breakfasts. So it’s only been the last few years when I’ve started to appreciate the humble biscuit — and not just for breakfast.

These spelt buttermilk biscuits are both versatile and and quick to whip up. While there’s a time and a place for big, buttery biscuits, these lean towards light and fluffy thanks to a modest amount of butter and a good dose of buttermilk; a bit of spelt flour adds a wholesome nuttiness. Use them for breakfast sandwiches or berry shortcakes, or simply split and slather with butter and jam. These biscuits also take less than 45 minutes to make and bake, which is perfect for busy weekdays or unexpected guests.

spelt buttermilk biscuits split

Spelt Buttermilk Biscuits

Makes 6

Ingredients

  • 120g / 1 c AP flour
  • 95g / 3/4 c spelt flour
  • 3/4 tsp kosher salt
  • 1 Tbsp baking powder
  • 57g / 1/4 c cold, unsalted butter, cubed
  • 3/4 to 1 c cold buttermilk

Method

  1. Preheat your oven to 425F. Have ready an 8-inch cast iron skillet or line a cake pan with parchment paper.
  2. In a medium bowl, whisk together the flours, salt, and baking powder.
  3. Add the cold, cubed butter and use your fingers to flatten the butter. You want dime to nickel-sized pieces.
  4. Drizzle in 3/4 c of buttermilk and use a fork or spatula to combine until no dry bits of flour remain. You should have a shaggy, soft, and slightly tacky dough. If the dough won’t come together, drizzle in the remaining 1/4 c of buttermilk a teaspoon at a time until you have a cohesive mass.
  5. Lightly dust your counter with flour and turn the dough out. Using lightly floured hands, gently pat the dough into a square about 1” thick. Using a bench scraper, fold the dough in half. Rotate the dough 90 degrees and repeat the patting and folding 2 to 3 more times. Work gently and quickly; the idea is to build in some layers while still keeping the butter cold.
  6. After you’ve patted out the dough 1” thick for the final time, trim the edges of the dough so you have a neat rectangle with clean edges. This helps the biscuits rise evenly in the oven. If the dough feels sticky or warm at all, stick it in the freezer for 10 minutes. Then, using a bench scraper, cut the dough into 6 even pieces. Use firm, downward strokes to preserve the layers.
  7. Arrange the biscuits closely together in the skillet or prepared pan. Bake for 20-30 minutes, or until the tops are golden brown. Let them cool a few minutes in the pan before devouring. Biscuits are best served warm, but any not eaten right away can be stored in an airtight container overnight and toasted the next day.

Soft sourdough sandwich bread

soft sourdough sandwich bread

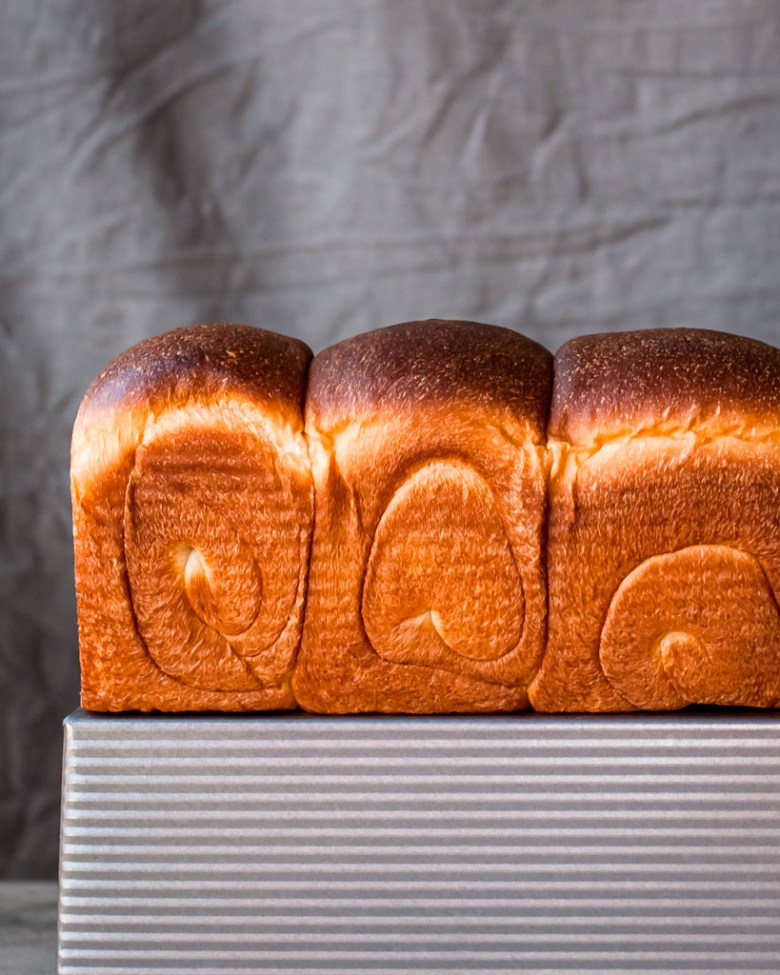
Many variations of this soft sourdough bread already exist on this site, but not one for good old white sourdough sandwich bread. This recipe makes a wonderfully soft loaf that my kids gladly eat plain, but it makes a mean sandwich and french toast as well. Using sourdough adds depth of flavor and keeps it fresh for multiple days! You can see me mix a similar style of dough in my Instagram story highlights (“Swirl Bread”), and there are lots of tips in previous posts on how to successfully make this style of bread. In summary, a thorough kneading, proper shaping, and full proofing are key to getting the right “shreddable” texture. It takes a little practice but I think it’s well worth the effort!

Suggested baking schedule:

You can make this bread in one day (there are a couple suggested schedules in my book, Baked to Order), but my preference is to make this loaf over two days. Resting the dough in the refrigerator overnight makes the dough easier to shape and adds an extra depth of flavor. I suggest you try to follow this schedule a couple of times until you’ve made it successfully, then adjust to fit your schedule.

  • Day 1, morning: Build stiff levain (note that you need an active and fed 100% hydration starter to build the levain, so feed as necessary so it will be ready)
  • Day 1, late afternoon/evening: Mix dough and let rise at room temperature for 2 hours, then refrigerate overnight
  • Day 2, morning: Shape dough and proof
  • Day 2, afternoon: Bake

.

sliced soft sourdough sandwich bread

Baker’s notes:

  • The stiff levain is…stiff! It should resemble bread dough. I like using a stiff levain as it adds additional strength to this enriched dough, which helps for the extended periods of fermentation.
  • Due to the enrichments in this dough (which slow fermentation), the final proof for this loaf must be done at room temperature (ideally 78-80F).   
  • It is possible to knead this dough by hand, though it will take considerably longer and can be quite sticky especially once the butter is added. If kneading by hand, I suggest using a slap and fold technique as demonstrated here. Consider it your workout for the day! 
  • If you have a 13x4x4 pullman pan, make 1.5x this recipe. Baking time might be a few minutes longer.
  • Please note that as with all recipes (but particularly sourdough ones), timings are only estimates. The amount of time your bread takes to proof will depend on the strength of your starter, kneading, and dough/room temperature. Also, starters that are not sufficiently strong enough and dough that is under/overkneaded can result in bread that does not rise as high — though the resulting loaf is usually still delicious!  

Soft Sourdough Sandwich Bread

Makes one 9x4x4 or 9×5 loaf (I absolutely love using my Pullman Pan for this!)| Adapted from Baked to Order and The Fresh Loaf

Ingredients:

For the stiff levain:

  • 18g ripe, active sourdough starter (100% hydration)
  • 31g milk
  • 57g bread flour

Final dough:

  • 142g bread flour
  • 142g all-purpose flour
  • 35g granulated sugar
  • 1 large egg (~50g)
  • 135g milk, cold
  • 21g milk powder
  • All of the levain, fully ripened
  • 7g salt
  • 35g unsalted butter, softened

To finish:

  • Milk, for brushing
  • Melted butter, for brushing

Method

  1. Make the stiff levain: In a medium bowl, mix the starter, milk, and flour together to form a stiff dough. Cover the bowl and ferment the levain at warm room temperature until more than doubled in volume, puffy, and domed, about 8 to 12 hours.
  2. Autolyse the dough: In a bowl of a stand mixer fitted with a dough hook, mix together all final dough ingredients except the salt and butter until just combined. Cover and autolyse (rest) for 30-60 minutes.
  3. Mix the dough: Add salt, and knead dough on low until gluten is moderately developed, about 5 minutes. The dough will start out sticky and rough but should gradually come together and feel smooth and stretchy. Add the butter in two batches, mixing in the first portion completely before adding the second. Continue kneading on low/medium-low until the gluten is very well developed and the dough passes the windowpane test as demonstrated here. Timing will depend on your flours and mixer, but usually takes about 5-10 minutes after the butter has been added. The dough should be smooth and supple (and quite lovely to handle!). Desired dough temperature is ~76-78F.
  4. Bulk rise and refrigerate dough: Transfer to a clean and lightly oiled bowl, cover, and bulk rise at warm room temperature for 2 hours. The dough will be noticeably puffed, but not doubled. Stretch and fold once, cover tightly with plastic wrap, and refrigerate overnight (at least 6 hours, and up to 24).
  5. Bring dough to room temperature: The next day, take the dough out and transfer to a lightly floured surface. Divide it into 3 or 4 equal parts and lightly shape each into a ball. Rest for one hour, covered by lightly oiled plastic.
  6. Shape the dough: Using a lightly floured rolling pin, roll each ball into an oval and roll up (like a jelly roll). Rest for 10 minutes. Roll each piece into an oval again, along the seam, and re-roll as tightly as possible. Transfer rolls to a loaf pan, seam sides down. Cover loosely with plastic and allow to rise about 6-8 hours at warm room temperature (78-80F). The dough should roughly triple in volume and nearly fill the tin (if using a Pullman Pan).
  7. Preheat the oven: About 1 hour before baking, preheat oven to 400F with a rack in the middle. After the dough has finished proofing, brush lightly with milk, transfer to oven, and bake for 20 minutes. After 20 minutes, reduce the heat to 350F and continue baking for 10-15 minutes, or until the internal temperature is at least 195F. If the loaf is browning too quickly, tent a piece of foil over the top to keep from burning. When the loaf is finished, immediately remove from the pan and turn onto a wire rack. Brush melted butter over the top and sides while the loaf is still warm, if desired (this helps create a soft crust). Allow to cool completely before slicing. Store leftovers in a sealed plastic bag.

sliced sourdough sandwich bread

sandwich bread slice

Fresh Fruit Tart

fresh fruit tart

After a decidedly wintry April here in Toronto (complete with snow and ice storms), May has brought some downright summery days. Seriously, I went from wearing a winter jacket to t-shirt + sandals in the span of a few days!

While chocolate is always in season for me, the warmer temps do put me in the mood for light, fruity desserts — preferably those that don’t require much oven time. Fruit tarts are one of my go-to desserts because they’re easy to make ahead. Both the crust and filling can be prepared a few days in advance. When you’re ready to serve all that’s left to do is fill the tart and pile on some fresh fruit, and you’re golden!

This classic fruit tart recipe is from Giselle Courteau’s Duchess Bake Shop: French-Inspired Recipes from Our Bakery to Your Home. This lovely cookbook is full of gorgeous recipes ranging from rustic pies to fancy gateaus to elegant pate a choux, all designed with the home baker in mind. It’s beautifully photographed and includes photo tutorials for items such as croissants and danishes — always a nice feature for those like me who learn visually. I love the mix of quick recipes and weekend projects, and look forward to test-driving more of these recipes in the months to come.

“Pastry and desserts are for celebrating, spending time with family and friends, and treating ourselves. Have fun with it and don’t take it all too seriously. If you don’t succeed on your first try, don’t give up: every time you make a recipe, you’ll learn something new to improve it next time. Allow yourself the freedom to make mistakes and be sure to take pride in your end result, whether it looks like the picture or not.”

-Giselle Courteau, Duchess Bake Shop (p. 14)

fresh fruit tart closeup

Fresh Fruit Tart

Makes one 8 or 9 inch tart

Ingredients

For the pastry cream:

  • 365g (1 1/2 c) whole milk
  • 1 vanilla bean, sliced open lengthwise
  • 80g (1/3 c + 1 Tbsp) egg yolks
  • 15g (2 Tbsp) cornstarch
  • 1/4 tsp salt
  • 40g (3 Tbsp) unsalted butter, cubed

For assembly:

  • Fresh fruit of your choice (berries recommended)
  • 1/4 c apricot jam (I used apple)
  • 1 tsp water
  • Fresh lemon zest, for garnish (optional)

Method:

For the pastry cream:

  1. Heat the milk and vanilla bean in a saucepan until scalding.
  2. While the milk is heating, place the sugar and egg yolks in a bowl and whisk until the yolks have lightened in color. This will take a few minutes of vigorous whisking. Whisk in the cornstarch and salt.
  3. Remove the vanilla bean from the heated milk and using the back of a knife, scrape the seeds back into the milk.
  4. Slowly drizzle the hot milk into the yolk mixture while continuing to whisk. If you add the hot milk too quickly the eggs will curdle and your pastry cream will come out lumpy.
  5. Once all the milk has been added, transfer the mixture back to the saucepan and place over medium heat. Whisking constantly, bring the mixture to a boil and continue cooking for 5 minutes more, whisking the entire time.
  6. Remove from heat. Immediately strain the pastry cream through a fine mesh strainer to remove any lumps. Add the butter and whisk until smooth, or, if you want your pastry cream even smoother, use an immersion blender.
  7. Cover the pastry cream and refrigerate for 2-3 hours, until set.

To assemble the tart:

  1. Use a spatula to slightly break up the cold pastry cream. Fill the tart shell with pastry cream to just slightly below the rim, spreading it out smoothly with a knife or a small offset spatula.
  2. Arrange the fresh berries or other fruit in a pattern on top.
  3. In a microwave or over the stove, gently melt the apricot jam with the water — without letting it come to a boil — and brush it generously over the top of the fruit. Garnish with fresh lemon zest. If not serving immediately, refrigerate until ready to serve.

From Duchess Bake Shop: French-Inspired Recipes from Our Baker to Your Home. Reprinted by permission.

Mini Chocolate Cake with Strawberry Ganache

mini chocolate cake
This is my favorite chocolate cake to make for small celebrations. It’s really simple to whip up, but it stands nice and tall for an impressive treat. The cake itself is sturdy (especially important for these minis), but still has a fine, moist crumb. We are big chocolate raspberry fans around here so I almost always fill it with raspberry jam, but use whatever floats your boat (peanut butter, nutella, another jam…). I often use up bits and bobs of frosting I have leftover from other baking projects, but if you don’t have anything on hand I highly recommend this ganache. It’s also super easy to make (just requires some time to set up to a frosting consistency), and it’s rich so a little goes a long way.

I typically bake this cake in my 4-inch cake pans. If I’m super lazy, I’ll just split the batter between the two pans (they’ll be about 3/4 full but I haven’t had any problems with overflowing), but usually I’ll bake some off in a little ramekin for a baker’s treat.

slice of chocolate cake

Mini Chocolate Cake with Strawberry Ganache

Makes one 6-layer 4-inch cake

Ingredients:

For the mini chocolate cake (adapted from Linda Lomelino):

  • 100 g unsalted butter
  • 1/4 c milk
  • 120g AP flour
  • 3/4 tsp baking soda
  • 34g dutch-processed cocoa powder
  • 157g granulated sugar
  • 1/4 tsp kosher salt
  • 1 egg, at room temperature
  • 80g (1/3 c) sour cream, at room temperature
  • 1 tsp vanilla extract
  • 1/4 c hot coffee or espresso

For the strawberry ganache (adapted from The Cake Bible):

  • 204g bittersweet chocolate (~53% works best here — I used half milk and half 70%)
  • 51g white chocolate
  • 139g heavy cream
  • 81g strawberry puree

For assembly:

  • Simple syrup
  • ~1/2 c raspberry preserves or jam
  • Fresh berries, for garnish

Method:

For the mini chocolate cake:

  1. Preheat the oven to 350F. Line the bottoms of two 4-inch pans (plus an extra ramekin, if desired) with parchment paper, then grease the pans and dust them with cocoa powder.
  2. In a small saucepan, melt the butter over low heat. When the butter has melted, remove from the heat and whisk in the milk and vanilla. Allow to cool slightly while you prepare the rest of the ingredients.
  3. Sift together the flour, cocoa powder, sugar, salt, and baking soda in a medium bowl. Set aside.
  4. Whisk the sour cream into the butter mixture, followed by the egg. Whisk the wet ingredients into the dry until combined. Add the hot coffee and whisk just until smooth.
  5. Divide the batter among the pans (I usually put ~275g into each of the cake tins and the rest into the ramekin) and bake for 30-35 minutes (20-25 minutes for the ramekin), or until a skewer inserted into the center comes out with just a few moist crumbs. Transfer to a wire rack to cool. Once the pans are cool enough to handle, run a thin knife around the edges and turn the cakes out to finish cooling completely. For easiest assembly, I prefer to chill the cakes in the fridge before filling and frosting.

For the strawberry ganache:

  1. Break the chocolate into small pieces and process in a food processor until very fine.
  2. Heat the cream and strawberry puree in a small saucepan until just before the boiling point.
  3. With the food processor running, pour the cream mixture through the feed tube in a steady stream. Process for a few seconds until smooth.
  4. Transfer to a bowl or glass measuring cup and allow to cool at room temperature until ganache reaches a spreadable consistency (this takes me 2-3 hours).

To assemble:

  1. Level the cakes and cut each into 3 thinner layers for a total of 6 layers.
  2. Place the first layer of cake on a cake board or serving plate (use a dab of ganache to “glue” it in place) and brush with simple syrup.
  3. Pipe a ring of ganache around the edge and fill the center with raspberry jam. Continue this process until you’ve used up all the layers.
  4. Spread a thin layer of ganache over the entire cake to lock in the crumbs, followed by a thicker coat. (My kitchen was on the cold side, so my ganache set pretty quickly and I didn’t need to refrigerate the cake between coats.)
  5. Garnish with fresh berries and serve at room temperature.

mini chocolate cake - dark

Baking with Discard Sourdough Starter

sourdough scones

I feed my sourdough starter twice daily most of the time, which means I end up with a fair amount of “discard” starter. Now, I’m not the most ambitious discard user out there (i.e. I don’t mind composting it), but lately I’ve been trying to incorporate it more often into some of my “normal” (read: non-sourdough) baking. So if you’re looking to up your discard game, here are some ideas to get you started. If you have any favorite discard recipes to share, please leave them in the comments — I’m always interested in more ideas!

Adding Sourdough to Quick Bread Recipes

sourdough banana bread
Replacing some of the flour and liquids in quick bread (including scone and pancake) recipes is one of the easiest ways to use up discard starter. You don’t even need a specific “sourdough” recipe. Since starter is, essentially, flour and water, all you have to do is measure out the amount of starter you want to use and subtract that amount in flour/liquid called for in your recipe.

Say, for example, you have 100g of starter you want to use up, and your recipe calls for 225g of flour and 100g of water. If your starter is 100% hydration (equal parts flour and water), simply subtract 50g of flour and 50g of water (100g total) from your recipe and use starter in its place (I typically whisk it in with the wet ingredients). This is definitely easiest to do if you are baking by weight, which I highly recommend (this OXO digital scale is definitely my most frequently used kitchen appliance).

If your recipe doesn’t call for water you can replace another liquid instead — say milk, juice, or even oil. Just keep in mind that these ingredients contribute more than just hydration to the final product (i.e. sweetness, flavor, fat) so you may not want to replace all of it.

Note: When I use sourdough in these situations it’s purely for “less waste” reasons — not for leavening. I still keep the chemical leaveners (baking soda/powder) in. My starter is refreshed pretty often and is quite mild, so I don’t really detect any “sourdough tang” in the final product (maybe a little in pancakes). But if your starter has been sitting in the fridge for awhile or is especially acidic you might have different results. Finally, you’ll also need to experiment with the amount of starter you can sub in for your individual recipes. For quick bread loaves I usually sub around ~20-25% of the flour weight; higher percentages tend to lend a bit of a “spongy” texture in my experience, but it really varies with the recipe.

Here are a few recipes on CTD in which I’ve successfully used discard starter:

Sourdough Granola

sourdough granola

Making granola one of my current favorite ways to use up discard because it’s so easy and and flexible! This formula/guideline is largely inspired by my Instagram friend Fumi. The starter basically acts as a binder so you end up with a nice crunchy, clumpy granola (my favorite kind!) without having to add too much sweetener or fat.

Preferment:

  • 100g sourdough starter (100% hydration; can be straight from the fridge)
  • 30g water
  • 30g brown sugar (light or dark)
  • 30g flour (AP or whole grain)

Mix and ferment for 3-8 hours. (Fermenting isn’t necessary but I typically let mine ferment for at least 3 hours.)

Final mix:

  • 1/4 tsp kosher salt
  • 160g rolled oats (not instant)
  • 70g raw, unsalted nuts (roughly chopped if large)
  • 50g mixed seeds (flax, sunflower, pumpkin, millet, sesame…)
  • 20g honey or maple syrup
  • 15-30g neutral oil (I like grapeseed)
  • Mix-ins: Dried fruit, cacao nibs, crystallized ginger

Method:

  1. Preheat the oven to 300F.
  2. Combine all the dry ingredients except for the mix-ins in a large bowl. Whisk the wet ingredients (honey/maple syrup and oil) into the preferment, then pour the wet ingredients over the dry and mix to combine.
  3. Spread the mixture thinly on a silicone or parchment-lined baking sheet.
  4. Bake for ~45 min, rotating pan halfway through. If the granola is browning quickly, turn the oven down to 275 or 250 halfway through baking. Turn oven off and allow to cool for ~30 minutes, then break the granola into pieces and return to the turned-off oven to cool completely. Add mix-ins once completely cool and store in an airtight container.

Other recipe ideas

Here are some other recipe/resource ideas for using up sourdough starter discard:

Sourdough Matcha and Black Sesame Swirl Bread

matcha black sesame swirl bread

Hello friends! Many of you have been asking about this matcha and black sesame variation of swirl bread since I posted my first test on Instagram. I was hoping it would be as easy as subbing in some black sesame spread for the cinnamon sugar, but alas — the spread was delicious but too wet, resulting in too much steam (and, consequently, unsightly gaps) during the baking process. (It does taste good, though, so if you don’t really care so much about the swirl it’s an option. Or maybe try shaping your loaf this way.

But if you are swirl-obsessed, you’ll want to go the extra step to make some black sesame sugar. This is a recipe I first saw on Lady and Pups and it works a charm. I can find roasted sesame seeds very easily at my local Asian supermarket; but if you don’t have those you can roast your own via Mandy’s instructions.

Also, a word about matcha. The next time I make this, I’m going to try adding a bit more because I personally like a strong matcha flavor. I suspect there will be other tweaks that will need to come in play, though, because I find too much matcha powder tends to dry out baked goods (a 1:1 swap with some of the flour didn’t work for me; I had to keep the original amount of flour to create a strong enough dough). The intensity of your matcha flavor will also very much depend on the quality of your powder — a culinary grade one works best for baking. So all that to say, experiment with quantities to your taste, but you’ll likely need to adjust the liquid/flour level to compensate.

Lastly, if you follow me on Instagram, I have a story highlight called “Swirl Bread” that goes through the entire process (it’s the cinnamon swirl version, but the method is the same. This will hopefully give you some visual cues as to how your dough should look at each stage.

Enjoy!

Sourdough Matcha and Black Sesame Swirl Bread

Makes one loaf (I highly prefer a 9x4x4 Pullman Pan for the nicest shape, but a regular 9×5 loaf pan works too)

Ingredients

For the levain

  • 18g starter (100% hydration)
  • 31g milk
  • 57g bread flour
  • Mix and ferment at room temperature until ripe (mine is usually ready in 4-6 hours, but it depends on the strength of your starter). When ready it should be more than doubled in volume, puffy, and domed. You should see large bubbles if you pull back the top.

For the final dough:

  • 284g bread/AP flour (I use half and half)
  • 46g sugar
  • 21g milk powder
  • 12g matcha powder, preferably culinary grade
  • 53g egg (about 1 large)
  • 104g milk
  • 88g cream
  • All of the levain
  • 6g salt
  • 52g unsalted butter, at cool room temperature

For the black sesame sugar filling:

  • 50g brown sugar
  • 50g granulated sugar
  • 50g roasted black sesame seeds
  • One egg, whisked with a bit of water or milk

Method

  1. Mix together all final dough ingredients except the salt and butter until just combined. Cover and autolyse (rest) for 45-60 minutes.
  2. Add salt, and knead dough (with the dough hook attachment if using a stand mixer) until gluten is moderately developed (I use speed 3-4 on a KA mixer). The dough will start out sticky and rough but should gradually come together and feel quite smooth and stretchy. Turn the mixer to low and add butter about a tablespoon at a time, incorporating each batch before adding the next. Turn the speed back up and continue kneading until the gluten is very well developed and the dough passes the windowpane test as demonstrated here. The dough should be smooth and supple (and quite lovely to handle!). This will take quite some time, especially if done by hand. Consider it your arm workout for the day!
  3. Transfer dough to a clean and lightly oiled bowl, cover, and bulk rise at room temp for 2 hours. The dough will be noticeably expanded, but not doubled. Fold, cover tightly with plastic wrap, and refrigerate overnight (or at least 6 hours, and up to 24).
  4. To prepare the filling, combine the sugars and sesame seeds in a small bowl. Pulse about half of the mixture in a food processor until it resembles cornmeal (this took about 20 pulses for me). Transfer to an airtight container and repeat with the other half. Cover and refrigerate until ready to use. (This is done in two portions to avoid over-processing the ingredients, which will result in sesame butter…)
  5. When ready to shape, prepare the egg wash. Line a loaf pan (I prefer a Pullman pan) with parchment and lightly grease. Take the dough out of the refrigerator and transfer to a lightly floured surface. Roll into a large rectangle about 10″ x 15″, doing your best to maintain an even thickness (the more accurate your shape, the better your swirl will look at the end).
  6. Brush the rectangle with an even coat of egg wash and sprinkle on a generous and even layer of black sesame sugar. Go all the way to the edges and gently press to adhere.
  7. Fold in the long edges so they meet at the middle, like you are closing the shutters on a window. You should have a long, skinny rectangle about 15″ x 5″. Repeat the egg wash and black sesame sugar process, again going all the way to the edges.
  8. Starting with the short end closest to you, roll the rectangle into a tight log. Transfer, seam side down, to the prepared pan.
  9. Brush the loaf with a coat of egg wash (this keeps it from drying out) and cover with a piece of lightly oiled plastic wrap. Proof at room temperature until the dough is puffed and roughly doubled (if you’re using a pullman pan, the dough should fill the length of the pan and be about an inch from the top). This usually takes me ~8 hours, or overnight. Cover and refrigerate the egg wash; you’ll use it again later.
  10. About 45 minutes before you’re ready to bake, preheat your oven to 400F with a rack in the middle. When the oven is preheated, gently brush the loaf with another coat of egg wash. Bake for 20 minutes, then turn the oven down to 350F, rotate the pan, and bake for another 20-30 minutes. (If the loaf is browning too quickly, tent a piece of tinfoil over the top.) When finished, the loaf should be well browned and register at least 195F in the center.
  11. Gently remove the loaf from the pan and cool on its side (this helps the loaf retain its shape and keeps the bottom from getting soggy). Resist the urge to cut before the loaf has cooled; otherwise the texture will be gummy. Leftovers keep well at room temperature for a few days, well wrapped; it also makes excellent French toast.

matcha black sesame swirl bread 2

Popcorn, Three Ways

Hawaiian popcorn

Popcorn is one of our family’s favorite snacks, so I’m thrilled to have partnered with Simon Malls to create three easy popcorn recipes perfect for your Oscar’s party or late night snack attack: Sea Salt & Vinegar, Hawaiian Popcorn, and Brown Butter Popcorn Marshmallow Treats.

sea salt and vinegar popcorn

brown butter marshmallow popcorn

Head over to the Simon website to snag all three recipes!

Making Cultured Butter

bread and cultured butter

You’ve probably noticed we make a lot of bread in these parts. I’ll often eat my slices plain (especially on the first day, when the crust is at its crackliest), but I do also enjoy making things to top my toasts. One of the simplest, but most fun, is cultured butter.

Cultured butter is one of those snooty sounding things that is actually dead easy to make. All it requires is adding live bacteria to cream before churning it into butter. This can be done a number of ways, but one of the most straightforward is just adding a few spoonfuls of plain yogurt to cream and letting it sit at room temperature for a bit. This simple step enhances the flavor of butter, giving it a slight tang (the exact flavor profile will depend on how long you culture the cream as well as the quality of ingredients you use). Some people would say there are health benefits as well, but I just think it tastes good. Plus, it’s a fun little party trick!

Once you’ve churned your butter, you can flavor it as desired. I usually just add a little salt, but there’s nothing stopping you from making any range of fancy compound butters (think herbs, citrus, honey…). Serve with your next loaf of homemade sourdough!

cultured butter

Notes:

  • Just as there are several ways you can culture the butter, there are different methods of churning as well. The food processor is hands-down my favorite because it’s quick and clean. You could also use a handheld or stand mixer, but make sure you cover the bowl with a splash guard or plastic wrap because trust me — the buttermilk will splatter once it separates from the butterfat. If you’re feeling especially old school, you could also try the old shake-it-in-a jar method. I’m far too lazy so I’ve never tried…
  • I have a story highlight of this whole process on Instagram (“Cultured Butter”), so check that out for some extra visual cues.
  • I haven’t tried using cultured butter in baking, first because I think it’s better appreciated serve straight up and second because I don’t know the final fat content compared to “normal” butter. The buttermilk, on the other hand, I definitely use in any recipes called for buttermilk. Here are a few to get you started:

Cultured Butter

Makes ~1/2 lb butter (1 c), plus a cup of buttermilk

Ingredients and materials:

  • 2 c heavy cream (at least 35%; not ultra-pasteurized)
  • 60g / 1/4 c plain whole milk yogurt (not Greek-style)
  • Salt to taste (if desired)
  • Ice water
  • Food processor (see note above)
  • Fine-mesh strainer double-lined with cheesecloth, set over a jar or bowl
  • Small spatula
  • Clean bowl

Method:

  1. In a glass measuring cup or jar, whisk together the cream and yogurt to combine. Cover and leave at warmish room temperature for 18-36 hours (in especially warm climates/seasons, this may take less time; check at 12 hours).
  2. When your mixture is thickened and tastes delightfully tangy, congratulations — you’ve made creme fraiche! You could stop here, or continue on to make some cultured butter.
  3. Refrigerate the creme fraiche for 1-2 hours. (This is especially important if you’re churning in a food processor to keep the butter from melting.)
  4. When creme fraiche is cold, transfer to a food processor. Process until the the butterfat clumps and separates from the buttermilk (this takes a few minutes).
  5. Strain the butter mixture through the cheesecloth-lined strainer, squeezing to extract as much buttermilk as possible from the butter. Reserve buttermilk for another use.
  6. Transfer butter to a clean bowl. Pour about 1/4 c ice water over the butter and use a spatula to press the butter against the side of the bowl. You’re “washing” the butter of all the buttermilk, which will keep your butter fresh for longer. Drain the cloudy water, and repeat the process until the water looks clear. (This may take 5-6 washings.)
  7. Season with salt to taste if desired (you can knead this in with your hands). Roll into a wax paper log or transfer to another container. Keeps for a couple weeks in the fridge; freeze for longer storage. Serve at room temperature.

Mom’s Sponge Cake

sponge cakeWhen we went back to Seattle to visit this past Christmas, I spent some time going through my mom’s recipe box and making some childhood favorites. This sponge cake was first on my list, then and now. It’s soft, light, and fluffy — perfect with a cup of tea or coffee. This cake is perfectly delightful plain, but just to be a little fancy I drizzled on a simple lemon glaze (colored with natural food powder from Go Supernatural).

A few notes:

  • This cake is traditionally baked in an ungreased aluminum 10″ tube pan for the best rise. Don’t use a non-stick pan; the cake has to cling to the sides to rise.
  • The most important keys to success with these type of cakes are properly whipped egg whites and good folding technique. For beating egg whites, I have the best success starting on a low speed and gradually raising it; this helps build a tighter, more stable structure and helps reduce the possibility of overbeating.
  • I find it easiest to fold these types of batters in a large, wide stainless steel mixing bowl with a silicone spatula. For the longest time I was so afraid of over-mixing my sponges that I’d end up undermixing them; it’s important to make sure you don’t have any pockets of flour or unincorporated egg whites or your cake won’t bake up properly. Just be patient and gentle and mix until you have a homogeneous batter.
  • The order of mixing is sort of personal preference. You could beat the egg whites first, transfer them to another bowl, and then beat the yolk mixture with the stand mixer. Or you could beat the yolk mixture with the stand mixer, transfer it to another mixing bowl, clean the mixer bowl and attachment thoroughly, and then beat the whites. I prefer to just start with my yolk mixture in my big mixing bowl and beat that with handheld electric mixer (or a whisk); that way I minimize the number of bowls used and I don’t have to clean stuff during the mixing process.
  • The cake should be cooled completely upside down to minimize shrinking. If your tube pan doesn’t have feet, you can invert it and slide a funnel or a heavy bottle through the center insert.

sponge cake in pan

sponge cake from above

sponge cake slice

Mom’s Sponge Cake

Makes one 10” tube cake

Ingredients:

For the sponge cake:

  • 10 large eggs, separated when cold but brought to room temperature before mixing the batter
  • 188g (1.5 c) cake flour
  • 300g (1.5 c) sugar (preferably caster), divided
  • 1/4 tsp cream of tartar
  • 1/2 c neutral oil (I use grapeseed)
  • 1/2 tsp kosher salt
  • 2 tsp pure vanilla extract

For the lemon glaze and garnish (optional):

  • 188g (1.5 c) icing sugar, sifted
  • 2-3 Tbsp freshly squeezed lemon juice
  • Pinch of salt
  • Zest of one lemon, for sprinkling

Method

  1. Preheat oven to 350F with a rack in the lower third.
  2. Sift cake flour into a small bowl and set aside.
  3. In a large, wide mixing bowl, combine half the sugar (150g), egg yolks, oil, salt, and vanilla and beat on medium until creamy and the sugar is dissolved (3-5 minutes). Set aside.
  4. In the bowl of a stand mixer fitted with the whisk attachment, beat the egg whites and cream of tartar on medium-low until foamy. Increase the speed to medium. When the whites reach soft peak stage, slowly add the remaining sugar (150g) one tablespoon at a time. Once all the sugar has been added, continue whipping on medium to medium-high until the mixture is glossy and holds medium-stiff peaks.
  5. Sift the flour into the yolk mixture in three batches, using a silicone spatula to mostly fold each portion in before sifting in the next. Once all the flour has been added, continue folding until all the flour is incorporated and the mixture is thick and smooth. Be sure to scoop all the way down to the bottom of the bowl to make sure the flour is evenly incorporated, but take care not to overmix.
  6. Fold in the whipped egg whites in three or four portions, using a silicone spatula to mostly fold in each portion before adding the next. Once all the egg whites have been added, fold until the batter is smooth and uniform in color, again taking care not to overmix.
  7. Pour the batter into an ungreased aluminum 10″ tube pan. Bake for 45-55 minutes or until the cake is well browned and a skewer inserted into the center comes out clean. Do not open the oven for at least 45 minutes or the delicate cake may fall. Invert the pan to cool completely (if your pan doesn’t have feet, you can insert a funnel or heavy bottle through the center). Slide an offset spatula around the edges to loosen, remove the insert, then slide the spatula around the bottom. Flip the cake onto a serving platter.

For the glaze and assembly:

  • Whisk together sifted icing sugar and salt in a medium bowl. Gradually whisk in the lemon juice 1 Tbsp at a time until desired consistency. Drizzle onto the cooled cake and sprinkle with lemon zest, if desired.

Chocolate Sheet Cake

chocolate sheet cake slices

I don’t have a whole lot to say about this cake. It’s easy and delicious in that moist, tender bakery-style sort of way; and it feeds a crowd. You don’t need a mixer; it’s almost a dump-everything-in-a-bowl-and-stir situation. The frosting is my favorite ever chocolate frosting: it’s swoopy and glossy and not too sweet, and if you use black cocoa and good dark chocolate it comes out basically black without a smidge of food coloring involved. I love it! Plus it’s all made in the food processor — even easier than the cake. Add a few sprinkles (the colorful ones and/or flaky sea salt) and you’ve got yourself a pretty classy sheet cake with minimal work involved.

frosting sheet cake

single slice

Happy Valentine’s Day!

Note:

  • If you don’t care about the color of the frosting, you can use Dutch-processed cocoa in place of black. The ultimate color of the frosting will depend on how black your black cocoa is (I got mine at a local baking goods store and it’s exceptionally dark) and what kind of dark chocolate you use. The frosting also tends to darken as it sits. The frosting isn’t too sweet — I definitely prefer it this way, but if you like a sweeter frosting, you can increase the amount of confectioners’ sugar to taste.

Chocolate Sheet Cake with Glossy Black Frosting

Makes one 9×13 cake

Ingredients

For the chocolate sheet cake:

  • 284g AP flour
  • 380g granulated sugar
  • 84g dutch process cocoa
  • 1 1/2 tsp baking powder
  • 2 tsp baking soda
  • 1 tsp kosher salt
  • 226g sour cream, at room temperature
  • 114g grapeseed oil (or other neutral oil)
  • 2 large eggs, at room temperature
  • 2 tsp pure vanilla extract
  • 1 c freshly brewed hot strong coffee

For the glossy black chocolate frosting (adapted from Sweetapolita):

  • 255g unsalted butter, softened
  • 90g confectioners’ sugar
  • 45g black cocoa powder
  • 1/4 c hot water
  • 60g / 1/4 c sour cream
  • 3/4 tsp pure vanilla extract
  • Generous pinch of salt
  • 145g good quality dark chocolate, melted and cooled (I use Callebaut 70%)

To assemble:

  • Sprinkles
  • Flaky sea salt

Method

For the chocolate sheet cake:

  1. Preheat the oven to 350F. Lightly grease and line a 9×13 pan with parchment paper that overhangs on the two long edges by at least a couple inches. This will make it easy to remove the cake from the pan later. (I like to secure the long edges with binder clips so the parchment doesn’t fall onto the cake in the oven.)
  2. Sift together all ingredients from the flour through the salt. In a small bowl, whisk together all the remaining ingredients except the coffee. Add the wet to the dry ingredients and whisk to combine. Add the coffee and stir just until the batter is smooth. Pour the batter into the prepared pan and level the surface with an offset palette knife.
  3. Bake until the cake is lightly springy to the touch and a toothpick inserted into the center comes out with a few moist crumbs (but no raw batter), about 28-35 minutes. Cool on a wire rack completely before frosting.

For the frosting:

  • Combine all ingredients except the melted chocolate in a food processor and process until combined. Add the melted chocolate and process until smooth. Use immediately. (Note: the frosting is glossy as long as it stays at room temperature; it will harden and take on a more matte look after refrigeration. If you do refrigerate the cake, make sure to bring it back to room temperature before serving. It just tastes better!)

To assemble:

  • Transfer the cake to a serving platter if desired. Spoon large dollops of frosting around the cake and use an offset spatula or spoon to swirl it around. Add sprinkles. Enjoy!

close up slices