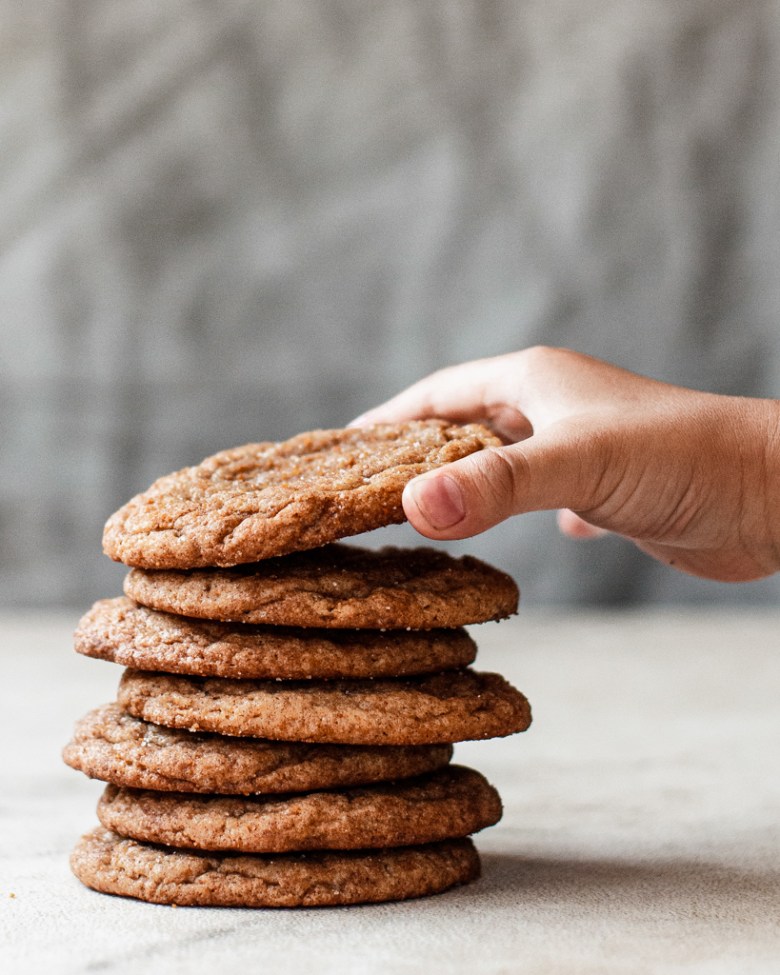
Sourdough Chocolate Chunk Cookies with Rye and Espresso

sourdough chocolate chunk cookie

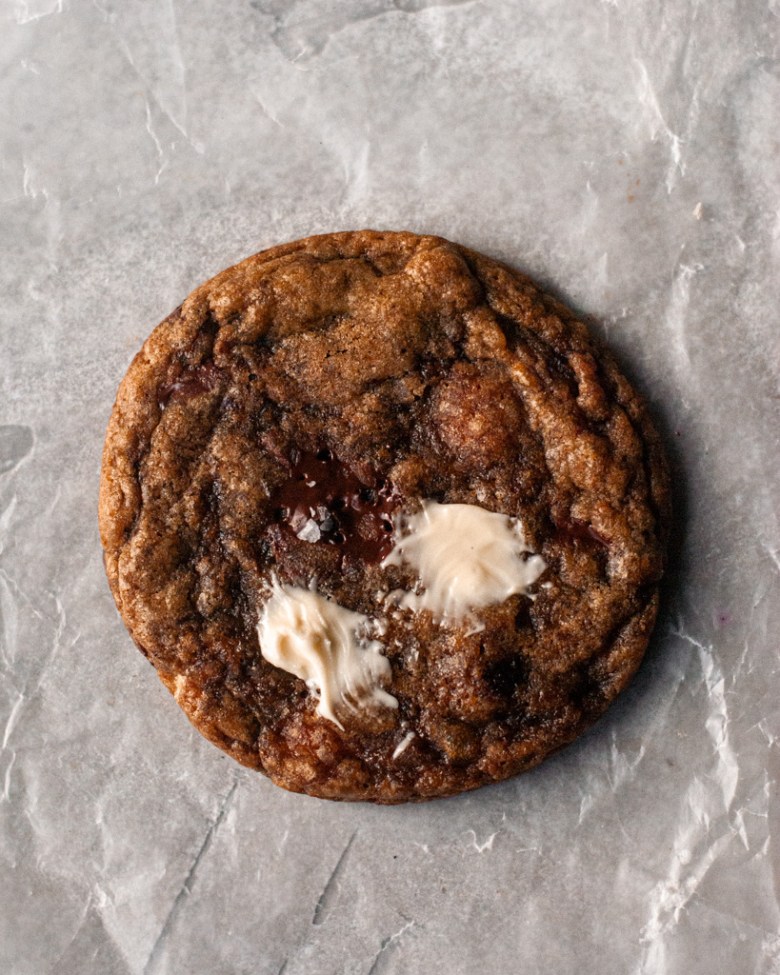
Meet the newest member of CTD chocolate chunk cookie family! This particular recipe was designed to use up sourdough starter and be a relatively quick bake (i.e. no softening of ingredients, no mandatory long resting). But don’t worry, they are positively packed with flavor and are poised become the new most-frequent impulse bake in this house (toss up between this and the sourdough chocolate cake)!

If you’ve baked the salted chocolate chunk cookie from my book, this recipe will seem familiar to you. We’re featuring the same heavy hitters: browned butter, rye flour, espresso. However, I’ve tweaked the proportions a touch to reflect my current cookie preferences: slightly thinner but still chewy with crisp edges.

To chill or not to chill

That is the million dollar cookie question, isn’t it? Many bakers swear by “ripening” their cookie dough for 24 or even up to 72 hours for improved texture and flavor.

For this particular cookie, I suggest chilling for a minimum of 30-45 minutes — this helps to resolidify the butter and control spreading. If you’re in a real hurry, you can flatten the dough to help it chill faster or even stick it in the freezer. Thanks to all the flavor bombs in the dough, you will get tasty cookies.

But if you have the patience, chilling the dough for a full 24 hours does pay off with a more complex, harmonious flavor and a thicker, fudgier texture. (Beyond 24 hours I don’t detect a noticeable enough difference to warrant the extra time.) It’s similar to the difference between meat that’s been seasoned and then cooked right away versus something that’s had time to marinate overnight. You can enjoy and be satisfied by both, but the one with the longer marination just tastes better. I usually bake a couple off for instant gratification and keep the rest in the fridge for a full rest.

Here’s a quick video so you can see the difference between the 45 minute vs 24 hour chill. Top cookies had a 45 minute chill; bottom had 24 hours.

And a cross section! 24 hour chill on the left, 45 minute chill on the right.

You can also freeze portioned dough for longer storage. If you like super thick cookies you can bake directly from frozen, but I prefer to let the unbaked dough sit out at room temperature for 20-30 minutes (about the time it takes to preheat the oven) for better spread.

Chocolate selection

I really enjoy a mix of white and dark (but not too dark) chocolate in this cookie. Mixing up the chocolates makes for more interesting eating, and the white chocolate helps balance out the intensity of the brown butter, espresso, and rye. But I think all milk or even caramelized white chocolate would taste great in this dough base too! Use what you have and like.

I prefer using chopped chocolate or callets rather than chocolate chips for better taste and spread. (You don’t need to chop the callets if they’re on the small side; I usually use Callebaut callets and toss them straight into the dough.)

OK, on to the recipe!

sourdough chocolate chunk cookie

Sourdough Chocolate Chunk Cookies with Rye and Espresso

Yield: 1 dozen cookies
Prep Time: 15 minutes
Cook Time: 12 minutes
Chilling Time: 45 minutes
Total Time: 1 hour 12 minutes

Rich, flavorful chocolate chunk cookies made with sourdough discard.

Ingredients

  • 115g unsalted butter, cold and cubed
  • 1 tsp espresso powder
  • 10g freshly brewed coffee (can sub milk or water)
  • 85g light brown sugar
  • 85g granulated sugar
  • 1 large egg yolk, cold
  • 80g sourdough discard (100% hydration), cold
  • 1 1/2 tsp vanilla extract
  • 100g all purpose flour
  • 45g rye flour
  • 1/2 tsp baking powder
  • 1/2 tsp baking soda
  • 3/4 tsp kosher salt
  • 70g chopped white chocolate
  • 70g chopped bittersweet chocolate (I like 55-65%)
  • Flaky salt, for garnish (optional)
  • Additional chocolate, for garnish (optional)

Instructions

  1. To brown the butter, place the butter in a small, light-colored saucepan over low-medium heat. Once the butter has melted, turn the heat up to medium-high. Stir frequently with a heatproof spatula, scraping the sides and bottom of the pan as needed. The butter will crackle, foam, turn clear gold, then finally start browning. It’s done when the crackling subsides and you smell toasted nuts. This process takes about 7-10 minutes total, but the butter can go from browned to burnt in a flash—so keep an eye on it. Scrape the butter and all the toasty bits into a large bowl and stir in the espresso powder and coffee -- this helps infuse the butter with extra coffee flavor. Let cool until tepid, about 10 minutes.
  2. Whisk the sugars into the butter until smooth and combined, followed by the egg yolk, sourdough starter, and vanilla. The mixture should be viscous and homogenous, with no streaks of visible starter. 
  3. In a separate bowl, whisk together the flours, baking powder, baking soda, and salt. Add the dry ingredients to the wet and fold together until just combined. When just a few streaks of flour remain, add the chocolate, and mix until evenly distributed.
  4. Cover and chill the dough for 45-60 minutes, or until cool to the touch. (You can leave the dough in the bowl where it was mixed, but transferring it to plastic wrap and flattening to a 1” slab will quicken the cooling process.) Alternatively, the dough can be chilled for up to 24 hours or frozen for longer storage. (They will spread less and may require an extra minute or two of baking time.)
  5. While the dough is chilling, preheat the oven to 350°F (175°C) with a rack in the middle and line two large baking sheets with parchment paper.
  6. Portion the dough into twelve equal balls, about 54g each. Place the dough balls on the prepared baking sheets about 2½ inches apart and sprinkle the tops with flaky sea salt.
  7. Bake the cookies one sheet at a time until the tops are set and no longer shiny, about 12 to 14 minutes. Rotate the sheet in the oven halfway through baking. Right after the cookies come out of the oven, use a large round cookie cutter to nudge them into perfectly round circles, if desired. Top with a few pieces of chopped chocolate for garnish.
  8. Cool the cookies on the baking sheets for about 5 minutes, then transfer to a wire rack to cool completely. 

Notes

Recipe adapted from Baked to Order.
sourdough chocolate chunk cookie

Related recipes and resources:

Brown Butter Fortune Cookies

brown butter fortune cookies
Note: This post contains affiliate links.

Here’s another recipe to add to your “what to do with extra egg whites” list: brown butter fortune cookies! Making fortune cookies is both simple and fun, and the result is much tastier than what you typically get with your takeout.

The batter comes together simply with a bowl and a whisk, no mixer needed. Well you do need to brown some butter. You could use plain melted butter (skip the water if you do), but I think browning it is worth the few extra minutes for the extra flavor. This is a simple cookie, so the nuttiness really shines through!

My favorite way to make fortune cookies is in a waffle cone maker. It’s fast and produces perfectly even, crisp rounds. I have a Chef’s Choice 838 which is sadly discontinued, but try calling up your local kitchenware or restaurant supply store to see if they have one lurking around (that’s how my husband found ours). I suspect a pizzelle or krumkake iron would also work very nicely, though I don’t own those kitchen gadgets (yet…). However, you can definitely make fortune cookies successfully in a regular oven as well, so don’t let a lack of equipment deter you!

Shaping the fortune cookies takes a little practice; but after a couple goes you’ll be set. The cookies are hot, so you might want to wear gloves or use the edge of a tea towel to protect your fingers. (I don’t bother, but I have asbestos hands.) Placing the shaped cookies into an egg carton helps lock the shape in as they cool completely.

fortune cookies egg carton

Here are a couple different ways to shape the cookies; try both and see what works best for you.

Don’t worry if the shaping takes you a few tries. Even if you end up with some misshaped cookies, they’ll still taste wonderful! By the way, fortune cookie factories often sell their misshapen cookies. One place in my hometown calls them the “unfortunates”…ha!

Baker’s Notes:

  • I like to use a 1 Tbsp cookie scoop / disher to portion the thin batter.
  • If baking the cookies, I find it easiest to spread the batter on silicone mats, such as a Silpat, versus parchment paper. The mats don’t crinkle and produce smoother cookies.
  • Every oven is different so I recommend baking a single test cookie to determine the perfect timing for you. (Let the cool completely so you can accurately evaluate the crispness.) But If you find out after the cookies have cooled that the centers aren’t completely crisp, it’s ok — you can bake them in a low (250F) oven for 5-10 minutes, or until dry.
  • Once your fortune cookies have cooled completely, you can drizzle on or dunk them in some tempered chocolate for extra flair. These would make the perfect edible Valentine’s day cards!
  • Use this same batter to make ice cream cones, bowls, or curved tuiles!
fortune cookies baked and waffled
brown butter fortune cookies

Brown Butter Fortune Cookies

Yield: 15-18 cookies
Prep Time: 20 minutes
Cook Time: 40 minutes
Total Time: 1 hour

Brown butter fortune cookies are delightfully crisp and nutty. Include personalized messages for the perfect edible gift! Fortune cookies can either be baked or cooked in a waffle cone iron.

Ingredients

  • 56g unsalted butter (yields ~45g browned butter)
  • 30g cold water
  • 100g egg whites (about 3 large), at room temperature
  • 80g granulated sugar
  • 1/4 tsp kosher salt
  • 1 tsp pure vanilla extract
  • 1/4 tsp pure almond extract (optional)
  • 80g all purpose flour

Instructions

  1. Brown the butter: Place the cubed butter in a small, light-colored saucepan over medium-low heat. Once the butter has melted, turn the heat up to medium-high. Stir frequently with a heatproof spatula, scraping the sides and bottom of the pan as needed. The butter will crackle, foam, turn clear gold, then finally start browning. It’s done when the crackling subsides and you smell toasted nuts. This process takes about 10 minutes total, but the butter can go from browned to burnt in a flash—so keep an eye on it. Pour the butter and all the toasty bits into a heatsafe bowl and add 30g cold water. Cool to room temp.
  2. Mix the batter: In a medium bowl, whisk together egg whites, sugar, and salt until frothy (1-2 minutes). Add the extracts and cooled butter; mix until very well combined. Sift in the flour and whisk until smooth. Cover and rest at room temperature while you preheat the oven or waffle cone iron. If you’re going to include fortunes in your cookies, have them prepared before you start baking the cookies.
  3. To bake fortune cookies in the oven: Preheat the oven to 350F. Line two baking sheets with silicone mats. Using an offset spatula or back of a spoon, spread a 1 Tbsp portion of batter into a thin circle 4-5″ in diameter. Bake until golden, about 9-11 minutes. Slide an offset spatula under the entire cookie to release, then immediately shape (see step 5). Note: I recommend doing a test bake with one cookie to determine the correct baking time for your oven. After you’ve figured it out, I would stick to baking two at a time as the window to shape the fortune cookies is short, 10-15 seconds once the cookies come out of the oven. Use a cool baking sheet / silicone mat each time or the excess heat will make the batter difficult to spread.
  4. To make fortune cookies in a waffle cone iron: Cook 1 Tbsp portions according to manufacturer’s instructions (mine took 85-90 seconds), then immediately shape (see step 5).
  5. To shape fortune cookies: Place the fortune, if using, in the center of the cookie. Fold the cookie in half to create a half-moon. Hold the cookie rounded side down. Pull the corners up so they meet while pushing the middle down, creating the classic fortune cookie shape. Alternatively, you can fold the cookie, rounded side up, over the edge of a loaf pan or glass. Try both methods and see which works best for you. Refer to the videos above for more visual guidance. Hold the cookie in place until it sets, 5 to 10 seconds. Place shaped cookie into the space of an empty egg carton, tips facing down down. Let cool completely.
  6. Storage: Store fortune cookies in an airtight container at room temperature for up to 5 days.

Notes

Recipe adapted from Red House Spice.

fortune cookies square

Tips for creating beautiful holiday treat boxes

Christmas cookies selection
Note: this post contains affiliate links.

For the better half of the past decade, one of my favorite parts of the holiday season has been creating treat boxes for our friends, neighbors, and families. I don’t remember a lot of the gifts I received as a kid, but I do remember the couple annual homemade cookie packages we’d receive every Christmas. While I didn’t have a clue about baking then, I admired the care and time required to create something so special.

Once I started baking, I knew I wanted to start my own tradition of spreading cheer through edible gifts. If you want to do the same but don’t know where to start, have no fear! This post lays out all my best practices for creating beautiful treat boxes, stress-free. In this guide, you’ll find advise on:

  • Treat selection
  • Scheduling, including a suggested timeline
  • Packaging supplies
  • Storage
  • Shipping cookies
  • Bonus pro-tips
  • Recipes to get you started

Treat Selection

Variety

For the most interesting treat box, variety is king. I aim for 8-12 different treats; but even 4 to 6 varieties will dazzle. Variety can be visual — think different shapes, colors, and sizes. But also consider varieties of texture and flavor. For example, I aim for a range of chewy, crunchy, and melt-in-your-mouth buttery textures.

When it comes to flavors, I like including at least one treat in each of the following categories:

Think Beyond Cookies

In addition to cookies, I love adding chewy caramel candies, marshmallows, English toffee, peppermint bark, and even little packages of savoury crackers in my holiday treat boxes. An added bonus is that many confections last for several weeks when stored properly, so you can make these ahead of time.

Familiar vs. new recipes

I know how it is. Your favorite blogger or foodie magazine publishes a dozen new holiday recipes. You want to make All. The. Cookies.

If you are trying to make holiday treat boxes on a somewhat large scale (i.e. more than a dozen), I HIGHLY recommend making a test batch of any new recipe you want to include. There’s nothing more disappointing than having a flop right in the middle of production with no time, ingredients, or energy to replace it with something else. At the very least, bake one test cookie for new batches so you can determine the proper bake time and temperature for your oven. King Arthur Baking has an excellent article on how to effectively bake test cookies.

I usually make about 2/3 familiar favorites and 1/3 new recipes each year. If you do treat boxes year after year, eventually you’ll build up a varied repertoire of cookies that you can mix and match to keep things fresh for both you and your recipients.

Time and Energy

Are you swamped every December with barely any time to bake? That doesn’t mean you can’t pull off a beautiful treat box, but you’ll need to plan your baking schedule carefully and choose recipes that aren’t too time-consuming. For example, bar and drop cookies are faster to make than cutout or sandwich cookies.

Do you genuinely like decorating individual gingerbread men with royal icing or do you lose steam after the first cookie (*raises hand*). Go for treats that you actually enjoy making and add flair with simple flourishes like sparkling sugars, festive sprinkles, or dipped glazes.

In the end, creating these boxes is about bringing cheer to others. It’s hard to do that if you’re stressed and overcommitted, so take some time to plan a selection that’s appropriate given your time and skill. Have fun!

Scheduling

I give myself about a month to plan out and execute treat boxes. A slow and steady approach allows me to enjoy the process without getting stressed out. Here’s how I break it down:

  • 4 weeks out
    • Create recipient list
    • Make treat selection and calculate number of batches needed per recipe
    • Do test batches for new recipes
    • Inventory and shop for packaging supplies
    • Can start making and freezing cookie dough
  • 3 weeks out
    • Inventory and shop for ingredients
    • Continue making and freezing cookie dough
  • 2 weeks out
    • Make and package confections
    • Bake longer shelf-life cookies
    • Continue making and freezing cookie dough
  • 1 week out
    • Print any labels or lists to include inside boxes
    • Finish making all cookie dough (freeze or refrigerate per recipe instructions)
  • 1-2 days before delivery
    • Bake shorter shelf life cookies
  • 12-24 hours before delivery
    • Assemble packages

Storage

Once you’ve baked your treats, cool them completely before storing. Keep each type in a separate container. If you store everything together, dry-textured cookies will pull moisture from chewier cookies; and individual flavors will all start melding into each other (peppermint-flavored gingerbread, anyone?).

To keep everything as fresh as possible, I try to package treat boxes within 24 hours of delivery. Let your recipients know that the contents are best consumed ASAP!

treat boxes

Packaging

While there are a myriad ways to package your treats, I like using bakery-style window boxes. They’re professional-looking, budget-friendly, and available in various sizes. I buy mine from a local packaging company here in Toronto. Check your local baking supply store for options. If you go with any paper style box, lay down some tissue or parchment paper on the bottom to prevent grease stains.

Here are some other packaging materials I use every year:

  • Clear candy bags for confections or anything that needs an extra layer of protection. These come in many sizes.
  • Twisting wax paper for individually wrapping caramels or other sticky candies. A huge time saver!
  • Cupcake liners of different sizes to separate different treats. Get them in festive patterns to add some color!

I also like to include a list of all the cookies included (noting any that contain nuts or other allergens) so that people have an idea of what they’re getting.

Execution

The freezer is your friend

Most cookie doughs freeze well for several months, so you can actually prep many recipes well in advance. You can freeze some fully baked cookies, though avoid any with a sugar coating or glazes — those elements don’t hold up well in the freezer. In general, I prefer freezing unbaked dough vs. already baked goods. I try to bake off dough within two months for optimal freshness.

Whether you freeze your cookies baked or unbaked, keep them well wrapped and sealed, and label everything clearly. The biggest enemies of frozen goods are freezer burn and unwanted scents.

Create a game plan

Once you’ve selected what treats to include, determine the approximate order of when items should be prepared. Many recipes include shelf life and make ahead information; if not, google is your friend. I like make all my confections (marshmallows, caramels, toffee) first, as they have a longer shelf-life than cookies. Next come sturdy/drier cookies, such as shortbread and biscotti. Bake drop-style cookies last as they usually are at their peak for 3-5 days.

Assembly line

If you’re packaging up more than a couple boxes at a time, have each item prepped before doing your final assembly. Confections should be sealed up, and cookies can be portioned out and placed in cupcake liners. Put together one sample box to make sure everything fits the way you like, then use that as your guide for packaging all the other boxes.

Shipping cookies

While I don’t mail cookies, I’ve often flown across the country with packages of baked goods. My best advice is to pack your baked goods in airtight, sturdy, non-crushable boxes — tins are great. Wrap pairs of cookies like sandwiches in plastic wrap and use plenty of padding material so they can’t move. If the cookies can rattle around, they’ll probably break. Stick to sturdy cookies and bars. Here are a few excellent articles for more information on shipping cookies successfully:

Bonus Pro-Tips

If you’re changing a recipe’s batch size, write out the new ingredient quantities.

If you’re halving, doubling, or tripling a recipe, calculate and write out the new ingredient quantities before starting. Do not depend on your mental math in the moment. At some point you will forget you’re not making the recipe as written and ruin your batch of cookies by not properly scaling the sugar, raising agent, or flour. I SPEAK FROM EXPERIENCE.

On big baking days, bake recipes starting from low oven temp to high oven temp.

To maximize efficiency when baking multiple types of cookies, take a minute to check the oven temperatures for each recipe. Start with the cookies that require the lowest temperature, then work up to those with the highest oven temperature. As always, I recommend an oven thermometer to make ensure your oven is running true to dial. My favorite is the ThermoWorks Dot coupled with a high temperature probe and clip.

Take notes during and after assembly.

If you want to make treat boxes an annual tradition, your future self will appreciate your taking good notes about the process each year. Beyond a basic thumbs up or down for each new recipe, I like to include logistical details (i.e. Only include x number of cookies per tray or they’ll spread into each other! Cut marshmallows into an 8×10 grid so you have enough for everyone!) and links to products I found especially useful. Every year I learn something new and the entire process feels more efficient.

christmas cookies on sheet tray

Recipes to get you started

Toasted milk powder (extra-strength brown butter) chocolate chunk cookies

toasted milk powder cookies

Everyone has opinions about chocolate chip cookies. For me, it’s always been about the dough. If I’m going to the effort to make cookies, the cookie dough itself should be full of flavor and well-seasoned, worth eating with or without chocolate. I don’t like cookies that are more chocolate than cookie — if I want that much chocolate, I’ll just eat a chocolate bar.

My go-to base is in my cookbook, Baked to Order. I use brown butter, a mix of flours (including rye), and a hit of espresso powder for an extra flavorful cookie. I still make that recipe often, but lately I’ve been tinkering with it a little to really focus on one particular element: brown butter.

Brown butter has been the darling of the culinary world for…I don’t know, decades now? I’m sure you’re familiar with it. Browning butter is the process of heating butter until the water evaporates and the milk solids (which make up about 3-5% of the butter content) brown. In French, brown butter is called beurre noisette, or “hazelnut butter”, because the aroma resembles toasted hazelnuts. It’s a beautiful thing.

But what if you want to add more brown butter flavor? You can’t just add more brown butter, or the ratio of fat to everything else will result in a very different end product. Enter: toasted milk powder.

Milk powder is essentially a concentrated powder of milk solids, made by preheating, evaporating, and reheating milk. It’s a staple in my baking kit; I use it most often in my enriched sourdoughs to make extra tall and soft loaves (by increasing the protein and lactose without adding extra liquid). I first came across the concept of toasting milk powder on Francisco Migoya’s blog, where he talks about adding it to financier batter. It’s brilliant — by toasting the milk powder, you’re adding more of the tasty brown bits that give brown butter its flavor and aroma!

There are a number of ways to toast milk powder. If you want to make a large batch to have on hand, try the microwave method or the pressure cooker method. For these cookies, I decided to just toast the milk powder directly in the browning butter.

Baker’s notes:

  • When toasting the milk powder, keep the heat down and whisk constantly to avoid clumping. Normally I crank the heat up once the butter has melted, but I got more consistent results with the milk powder keeping the temp around medium-low. If your milk powder is clumpy, definitely sift it / break up any lumps before adding to the butter.
  • You can make these cookies straight from the melted butter stage, but these days I prefer the texture of the final cookies when the butter is brought back to a spreadable consistency. Creaming the butter also helps break up any bits of clumpy toasted milk powder that may have formed during the browning process.
  • I’ve added in a touch of liquid (usually coffee) to make up for the moisture loss from browning the butter. It helps the cookies spread more predictably, especially if you’re refrigerating/freezing the dough for more than a day.
  • To get perfectly round cookies, you can scoot them with a round cookie cutter just larger than the baked cookie or use an offset spatula or spoon to nudge them into shape IMMEDIATELY after the cookies come out of the oven. Totally optional; it’s just for looks.

Toasted milk powder (extra-strength brown butter) chocolate chunk cookies

Makes 12-14 cookies | Adapted from Baked to Order

Ingredients:

  • 113g unsalted butter, cubed
  • 45g nonfat milk powder
  • 100g light brown sugar
  • 65g granulated sugar
  • 1/2 tsp baking powder
  • 1/2 tsp baking soda
  • 3g (3/4 tsp) Diamond Crystal kosher salt
  • 1/2 tsp espresso powder (optional)
  • 1 large egg, cold
  • 1 large egg yolk, cold
  • 18g coffee or milk
  • 1 tsp vanilla extract
  • 175g all purpose flour
  • 140g good quality dark chocolate, chopped (I like a mix of 55% and 70%)
  • Flaky sea salt, for garnish (optional)

Method:

Make the extra-strength brown butter: In a medium saucepan, melt the butter over medium-low heat. Once the butter has melted, whisk in the milk powder. Continue cooking on medium-low heat, whisking constantly, until the milk solids darken and the butter takes on a toasty, nutty smell. Remove from heat and scrape the butter and all the toasty bits into a heatproof container. Refrigerate until spreadable, about 45 minutes. (You can speed up the process by stirring the butter over an ice bath or sticking it in the freezer, stirring every 5-10 minutes.) You can make the extra-strength brown butter up to a week in advance; bring to room temperature before mixing cookie dough.

Make the cookie dough: In a medium bowl, combine the softened extra-strength brown butter, sugars, baking powder, baking soda, salt, and espresso powder. Using an electric hand-held mixer, mix on medium speed until well combined, 2-3 minutes (the mixture will be a bit crumbly). Scrape down the beaters and sides of the bowl. Add the egg and egg yolk and mix until smooth, then add the coffee or milk and vanilla. Mix until well combined. Scrape down the sides of the bowl. Add the flour and mix on low until the flour is mostly mixed in, then add the chopped chocolate. Switch to a spatula and mix just until the chocolate is evenly distributed and no streaks of flour remain. Cover and refrigerate for BARE MINIMUM 1 hour, but preferably at least four hours (or up to 3 days).

Bake the cookies: Preheat the oven to 350F with a rack in the middle and line two baking sheets with parchment paper. Portion the dough into golf-ball sized portions (weigh them if you want perfectly even cookies — I usually make mine around 55g each, which gives me a baker’s dozen). Place the cookies on the prepared baking sheets about 2½ inches apart and sprinkle the tops with flaky sea salt.

Bake the cookies one sheet at a time until the edges are set and the centers no longer look wet, about 12 to 14 minutes. Rotate the sheet in the oven halfway through baking. Cool the cookies on the baking sheets for about 5 minutes, then transfer to a wire rack to cool completely. Store leftovers in an airtight container.

toasted milk powder cookies

Related recipes and resources:

Neapolitan Mallomars (chocolate-covered marshmallow cookies)

neapolitan mallomar
Note: This post contains affiliate links.

Whether you call them Mallomars, whippets, krembos, Viva Puffs, mallowpuffs, pinwheels, or chocolate tea cakes, chocolate-covered marshmallow cookies are beloved childhood treats around the world. Today I’m sharing a homemade Neapolitan version, which fuses vanilla shortbread, strawberry marshmallow, and dark chocolate coating. These cookies are a blast to make and sure to delight the entire family!

These neapolitan mallomars are a little bit of a project, but none of the elements are too difficult. To divide the work I like to bake the shortbread bases one day, then make the marshmallow and dip the cookies in chocolate the next. However, you can make these in one afternoon — choose a time when you are relaxed and ready to have fun in the kitchen!

To temper or not to temper

Recently over on Instagram I asked how people felt about tempering chocolate. Most people said they’d rather not, with “I’ve never done it before” or “It takes too long” being the main reasons. I understand that working with chocolate can seem intimidating, especially if you don’t do it often — I’m definitely no expert!

But if unfamiliarity is the only thing holding you back, I encourage you to give tempering chocolate a shot for this recipe. It’s a fantastic skill to have, and nothing can truly replace the shine and snap of well-tempered chocolate. I used the cocoa butter silk tempering method this time (yes, I made my own silk because we’re still stay-at-home over here so why not). If you have the time and tools for this (sous vide machine, cocoa butter) give it a shot — I was really happy with how easy it was! But if not, this article on chocolate tempering from Sugar Geek Show walks you through a few options. Choose whichever makes the most sense for you!

However, if you’d really rather not temper you can cover the cookies with a mixture of chocolate and coconut oil, which will set nice and snappy in the fridge. If you go this route the chocolate shell will look a little less pristine and you will need to store the cookies in the fridge, but the end product will still taste wonderful.

Baker’s notes:

  • Freeze-dried strawberries are the key ingredient to making a vibrantly fruity marshmallow. I buy mine online, but check your grocery store or local specialty food store as well. Don’t grind the strawberries until you’re ready to make the marshmallow — the strawberry powder tends to clump with exposure to air. If you can’t find freeze-dried strawberries, you can leave it out for a plain marshmallow center.
  • Before dipping the cookies, I like to pour the melted chocolate into a tall, narrow vessel (like a deli quart container). Choose something microwave-safe so that if the chocolate starts to cool and thicken too much, you can reheat it gently (5 second bursts in the microwave, stirring well after each!).
neapolitan mallomars

Neapolitan Mallomars

Makes about 30 cookies

Ingredients:

For the vanilla shortbread:
  • 150g unsalted butter, at room temperature
  • 50g icing (powdered) sugar
  • Scant 3/4 tsp kosher salt
  • Seeds from one vanilla bean (optional)
  • 1 1/2 tsp pure vanilla extract
  • 165g all-purpose flour
For the strawberry marshmallow:
  • 45g freeze-dried strawberries
  • 14g powdered gelatin
  • 76g water (for blooming the gelatin)
  • 1 tsp pure vanilla extract
  • 76g water (for the sugar syrup)
  • 95g corn syrup
  • 227g granulated sugar
  • 1/4 tsp kosher salt
For the chocolate coating:
  • 340g good-quality semisweet chocolate (I used Callebaut 54.5%), tempered
  • 34g refined coconut oil (optional, if not tempering the chocolate)

Method:

For the vanilla shortbread:

Make the shortbread dough: In the bowl of a stand mixer fitted with the paddle attachment (or using a handheld mixer), combine the butter, icing sugar, vanilla bean seeds (if using), and salt. Mix on low to combine, then increase the speed to medium and beat until smooth and well-combined, about 2 to 3 minutes. Scrape down the paddle and sides of the bowl. Add the vanilla extract and beat well to combine. Turn the mixer down to low and add the flour, mixing just to combine. Use a flexible spatula to fold from the bottom of the bowl to make sure everything is well-mixed and there are no pockets of unincorporated flour. If the dough is very soft and sticky, cover and chill for about 10 minutes before proceeding.

Roll and chill the dough: Transfer dough to a piece of parchment paper and pat into a square about 1-inch (2.5-cm) thick. Place another piece of parchment on top and roll dough to about ¼-inch (6-mm) thick, lifting the top piece of parchment occasionally to avoid creases in the dough. Slide dough onto a baking sheet (still sandwiched between pieces of parchment). Refrigerate until firm, at least 30 minutes or up to 2 days.

Cut and bake the shortbread cookies: When ready to bake, preheat the oven to 350F with a rack in the middle. Line a large cookie sheet with parchment paper (I reuse one of the sheets sandwiching the cookie dough). Use a 1 3/4″ round cookie cutter to cut circles, gathering and rerolling the scraps until the dough is used up. Place cookies on the prepared sheet, spacing about 1″ apart (they won’t spread much).

Bake cookies until set and the edges are lightly golden, about 15 minutes. Cool completely on a wire rack before assembling.

For the strawberry marshmallow:

Make the freeze-dried strawberry powder and prep your tools: Place the freeze-dried strawberries in the bowl of a food processor. Pulse until they form a fine powder. Set aside. Fit a piping bag with a 1/2″ round tip. Arrange all the cooled shortbread cookies on a parchment-lined sheet pan. (Once the marshmallow is whipped, you must immediately pipe it onto the cookies before it starts to set.)

Bloom the gelatin: In a small, wide bowl, mix the gelatin with 76g cool water and the vanilla extract. Stir to combine, making sure all the gelatin is saturated. Leave to bloom while you prepare the sugar syrup.

Cook the sugar syrup: In a medium (3-3.5L) heavy-bottomed saucepan, combine the remaining 76g water, corn syrup, sugar, and salt. Stir to combine. Place over medium heat. Stir occasionally with a heat-proof spatula or fork until the mixture starts bubbling, then stop stirring (stirring a boiling sugar syrup can encourage crystallization). Clip on a digital thermometer and continue cooking the syrup until it reaches 250F.

Cool the syrup: Once the syrup reaches temperature, carefully pour the hot syrup into the bowl of a stand mixer, using a flexible, heat-resistant spatula to scrape the pot. Let the syrup cool until it registers 212F on a digital thermometer, about 4-5 minutes.

Whip the marshmallow: Once the syrup has cooled to 212F, scrape the bloomed gelatin into the bowl. Carefully transfer the bowl to the mixer fitted with the whisk attachment. Whisk on medium low until the gelatin has melted, then increase the speed to medium-high and whisk until the mixture is fluffy, thick, and roughly tripled in volume and the mixer bowl has cooled to room temperature, about 10 minutes. Turn off the mixer and add the strawberry powder. Mix for about 15-30 seconds, or until powder is evenly mixed in. Grease a flexible spatula or plastic bowl scraper and scrape the marshmallow into the prepared piping bag.

Pipe the marshmallow: To pipe the marshmallow, hold your piping bag at a 90-degree angle about half an inch above a cookie. Squeeze until a mound of marshmallow covers the entire base, then slowly pull up as you stop squeezing. Repeat with the remaining cookies. You can leave the marshmallows with little peaks, or use a damp finger to flatten them down. Let set at room temperature, uncovered, until set and no longer sticky — about 45-60 minutes. (If you have any remaining marshmallow, pipe it onto a piece of parchment and let it set overnight; then cut into cubes and toss with equal parts cornstarch and icing sugar. Store in an airtight container.)

For the chocolate coating:

Prepare the chocolate: When you’re ready to dip the cookies, temper chocolate using your preferred method. Alternatively, chop the chocolate into small, even pieces. Heat the chopped chocolate and coconut oil together in 20-second bursts in the microwave, stirring well in between, until just melted. Be careful not to overheat.

Dip the cookies: Place a piece of parchment under a large wire cooling rack. Holding a cookie by the base, dunk into the chocolate to completely coat marshmallow. Hold upside-down for a few seconds to let any excess chocolate drip off back into the bowl, then place cookie-side-down on the wire rack. Repeat with remaining cookies. If using tempered chocolate, let cookies set at cool room temperature for about an hour before enjoying. If using chocolate-coconut oil coating, refrigerate for about 15 minutes until set. Store leftover cookies in an airtight container for at least a week. Tempered chocolate cookies can be kept at room temperature; chocolate-coconut oil-coated cookies should be stored in the refrigerator.

mallomars on plate

Related articles and recipes:

Small batch brown butter sourdough snickerdoodles

brown butter sourdough snickerdoodles

Hi, hello, and happy spring! Just popping in with a fun little recipe to add to your sourdough discard repertoire: brown butter sourdough snickerdoodles.

I love riffing on the classic snickerdoodle — previously, we’ve done gingerbread latte snickerdoodles, graham cracker snickerdoodles, raspberry lemonade snickerdoodles, and there’s a whole recipe on snickerdoodle variations in my book! Today we’re veering into new territory by adding some sourdough discard to the mix, which (along with a healthy dose of brown butter) give these treats a big boost of flavor. Add in crisp edges, soft centers, cinnamon sugar goodness — these cookies don’t last long in our house!

brown butter sourdough snickerdoodles

Baker’s notes:

  • Sourdough discard is the portion of your starter that you would normally throw away when doing a feeding. I usually store my discard for up to a week in the fridge, using it to make anything from granola to pie crust to chocolate cake. For this recipe, you can use discard that’s at room temperature or straight from the fridge, as long as it’s not overly acidic-smelling or has formed any liquid “hooch” on top.
  • I prefer to bake these cookies after a short chill, just long enough to make the dough easier to portion. Since this dough does have discard in it, it will continue to ferment if left in the fridge. If you’re not planning to bake off all the cookies at once, I would recommend freezing unbaked dough balls (without the sugar sprinkle) in an airtight bag/container. Bring to room temperature and reroll each portion between your hands (this slightly warms the dough, helping the sugar sprinkle stick) before rolling in sugar and baking.

Small batch brown butter sourdough snickerdoodles

Makes 10 cookies

Ingredients:

For the brown butter sourdough snickerdoodle base:

  • 115g unsalted butter, cubed (cold is fine)
  • 25g milk, cold
  • 140g all-purpose flour
  • 1 tsp cream of tartar
  • 1/2 tsp baking soda
  • 1/2 tsp kosher salt (I use Diamond Crystal; use a scant 1/2 tsp for other brands or 1/4 tsp table salt)
  • 1/2 tsp ground cinnamon
  • 100g granulated sugar
  • 30g light brown sugar
  • 1 large egg yolk, cold
  • 1/2 tsp vanilla extract
  • 60g 100% hydration sourdough discard

For the cinnamon sugar sprinkle:

  • 25g granulated sugar
  • 1/2 to 1 tsp ground cinnamon (to taste)

Method:

  • Brown the butter: Place the cubed butter in a small, light-colored saucepan over medium-low heat. Once the butter has melted, turn the heat up to medium-high. Stir frequently with a heatproof spatula, scraping the sides and bottom of the pan as needed. The butter will crackle, foam, turn clear gold, then finally start browning. It’s done when the crackling subsides and you smell toasted nuts. This process takes about 10 minutes total, but the butter can go from browned to burnt in a flash—so keep an eye on it. Pour the butter and all the toasty bits into a medium bowl. (You should have ~92g brown butter.) Stir in the cold milk and let cool for 5 minutes.
  • Combine the dry ingredients: In a small bowl, whisk together the flour, cream of tartar, baking soda, salt, and cinnamon. Whisk for a good 30-45 seconds to ensure the leaveners and spices are evenly distributed.
  • Combine the wet ingredients: Whisk the sugars into the butter-milk mixture until combined. Whisk in the egg yolk and vanilla until smooth. Add the sourdough discard and whisk until totally smooth.
  • Add the dry ingredients and chill the dough: Add the dry ingredients to the wet and use a flexible spatula to mix just until no streaks of flour remain. Cover and refrigerate for about 30 minutes, or until the dough is cool but still scoopable (it will be fairly soft).
  • Preheat the oven and prepare pans and cinnamon-sugar: While the dough is chilling, preheat the oven to 400F with a rack in the middle. Line two baking sheets with parchment paper. Prepare the sugar coating by whisking together the granulated sugar and cinnamon.
  • Portion the dough: Portion the cookie dough into 10 equal golf-sized balls, about 47 grams each. Roll between hands into a smooth ball, then toss in sugar coating. Place the cookies on the prepared baking sheets about 2 inches apart. Sprinkle each with a bit more sugar coating.
  • Bake the cookies: Bake sheets one at a time for about 9 to 10 minutes, rotating the pan halfway through. Cookies should be puffed and the tops starting to crack, but the centers should still look a little soft. After removing the pan, bang it a couple of times on the counter to help deflate the cookies and get that classic crinkled top. Cool cookies on the pan for about 5 minutes, then transfer to a wire rack to cool completely.
brown butter sourdough snickerdoodles

Related recipes and resources:

Caramelized White Chocolate and Walnut Cookies

caramelized white chocolate and walnut cookies

Hello! Just dropping in here with a new cookie recipe for you all: caramelized white chocolate and walnut! These are a quick-and-easy, must-have-cookies-ASAP recipe — it uses melted butter and cold eggs, so you can whip them up on a whim.

These cookies are a variation on the triple chocolate peppermint cookies I posted in December, but here we’re highlighting caramelized white chocolate (or blonde chocolate) — some melted straight into the dough, and more folded in at the end for maximum impact. Caramelized white chocolate has been a trending flavor in the dessert world for about a decade now — while plain white chocolate tends to taste overly sweet and one-note, roasting it produces more complex and toasty flavors. You can make your own caramelized white chocolate by simply chopping up high quality white chocolate and baking it (stirring often) at a 250F until golden and toasty (see this tutorial from David Lebovitz). Or you can buy something like Valrhona Dulcey.

To complement the caramelly sweetness of the chocolate, I added toasted walnuts and a generous pinch of flaky salt. If you don’t have walnuts, I think either toasted hazelnuts or pecans would work nicely here — or even macadamia nuts if you’re a fan of the white chocolate macadamia nut pairing! And while flaky salt is normally an optional garnish, I highly HIGHLY recommend it here. It really helps balance out the cookie and veer it ever so slightly into the salty-sweet category.

After mixing the dough, just a short chill (30 minutes in the fridge, or even 10 minutes in the freezer) helps control spread and produces cookies with a thick, blondie-ish centers. If you bake them straight after mixing, the cookies will spread more and not be quite as soft overall. In the photo below, the top cookie was baked from dough that was chilled for half an hour; the bottom cookie was baked straight after mixing.

These cookies don’t brown much, so just keep an eye on them and bake just until the edges are set but the centers still look soft. They’ll continue to cook and set up on the pan. Enjoy slightly warm with a cup of black coffee (or milk)!

Baker’s notes:

  • For perfectly round cookies, use a round cookie cutter slightly larger than your cookie or even a spoon or offset spatula to nudge the cookies into shape right after baking. You must do this right when the cookies come out of the oven when they are still a bit malleable.
  • Don’t want to bake all the cookies off at once? You can keep unbaked dough balls in the fridge for up to 3 days or freeze for longer storage. For cookies chilled longer than half an hour, I find they spread best if you bring them to room temperature before baking (just pull them out while the oven is preheating).

Caramelized White Chocolate and Walnut Cookies

Makes about 15 cookies | Adapted from Baked to Order

Ingredients:

  • 113g (1/2 c) unsalted butter, cubed
  • 1/2 tsp espresso powder (optional)
  • 150g chopped caramelized white or blonde chocolate (such as Valrhona Dulcey), divided
  • 175g (1 1/3 c plus 1 Tbsp) all-purpose flour
  • 1/2 tsp baking powder
  • 1/2 tsp baking soda
  • 3/4 tsp kosher salt (Diamond Crystal)
  • 120g granulated sugar
  • 30g light brown sugar
  • 1 large egg, cold
  • 1 large egg yolk, cold
  • 1/2 tsp vanilla extract
  • 100g walnuts, toasted and chopped
  • Flaky salt, for garnish

Method:

  1. In a small saucepan, melt the butter over low heat. You’re not trying to brown it or drive off any moisture, so don’t let it boil — pull it off when there are still a couple unmelted bits left and let the residual heat finish the job.
  2. While the butter is melting, place the espresso powder and 50g of the chopped caramelized white chocolate in a large bowl. Once the butter has melted, pour it over the espresso-chocolate mixture. Whisk until the chocolate has melted. Let cool for about 5 minutes.
  3. Whisk the sugars into the butter until smooth and combined, followed by the egg and egg yolk. Whisk in the vanilla extract.
  4. In a separate bowl, whisk together the flour, baking powder, baking soda, and salt. Add the dry ingredients to the wet and fold together until just combined. When just a few streaks of flour remain, add the remaining 100g caramelized white chocolate and walnuts. Mix just until evenly distributed. Cover and chill for half an hour, or until firm but not solid.
  5. While the dough is chilling, preheat the oven to 350°F (175°C) with a rack in the middle and line two large baking sheets with parchment paper. Portion the dough into 15 ping-pong sized balls, about 50 grams each. (At this point, the dough balls can be refrigerated for up to 3 days or frozen for longer storage. For best results, bring dough to room temperature before baking — see notes above.) Place the cookies on the prepared baking sheets about 2½ inches apart and sprinkle the tops generously with flaky salt.
  6. Bake the cookies one sheet at a time until the edges are set but the centers are still soft and barely set, 10-11 minutes (the cookies will not brown much). Rotate the sheet in the oven halfway through baking. Cool the cookies on the baking sheets for about 5 minutes, then transfer to a wire rack to cool completely. Store leftovers in an airtight container for up to 3 days.

Bye 2020

top 9 instagram rushyama

No one is trying to hang on to 2020 any longer than is absolutely necessary. But even at the end of this strange, strange year I wanted to take a moment to remember a few bright spots. More than ever this year, I got messages, comments, and emails about how recipes on this site helped you to pass time, to find comfort, to learn a new skill. As a food blogger I can’t ask for anything more, so thank you for making this little hobby of mine even more rewarding through your kind words and recipe remakes. See you in 2021!


I wrote a cookbook!

baked to order

I didn’t publish any recipes on the blog until April because I was fully immersed in finishing my cookbook, Baked to Order: 60 Sweet and Savory Recipes with Variations for Every Craving. Writing a cookbook was an opportunity I never imagined would come my way, but I’m forever grateful it did. It connected me with a wonderful photographer, Diana Muresan; and many of you helped test the recipes to ensure they would work in kitchens other than my own.

While it was a notoriously challenging year to release a book (ingredient shortages, printing and mailing delays, no in-person events or book signings), I smile every time I see Baked to Order in another kitchen somewhere in the world. Thank you for supporting me by supporting Baked to Order — I am truly humbled by your kindness, and I look forward to seeing more of your bakes from it in the new year.


Sourdough Recipes

Remember when flour and yeast was scarce and everyone made a sourdough starter? Yeah, me neither. But while the intense sourdough craze of spring 2020 has cooled, your love for sourdough hasn’t. My sourdough discard post was the most popular page on the blog in 2020, and I published a few new sourdough recipes this year:


So! Many! Cookies!

Cookies were my ideal 2020 baked good: perfect for socially-distanced drop-offs and easy to freeze for later. I published more cookie recipes this year than ever before, because I made more cookies this year than ever before!


Small Batch Recipes

This year, we all looked for ways to celebrate in scaled-down fashion. I absolutely cannot wait for the day I can make and share a big old layer cake with my friends, but will enjoy these small-batch treats for years to come.

Raspberry Lemonade Snickerdoodles

raspberry lemonade snickerdoodles

The idea for these raspberry lemonade snickerdoodles has been brewing in the back of my brain for awhile. I love a good snickerdoodle riff, starting with these gingerbread latte snickerdoodles a couple years back. After working on a classic snickerdoodle recipe + variations for my upcoming book, I’m now revisiting a few ideas that I didn’t have room to include (like these graham cracker snickerdoodles from earlier this summer). The beautiful multi-colored sugar cookies from Amy and Sarah inspired the look for this zesty and cheerful raspberry lemonade version!

Making these cookies is fairly straightforward, but for the full raspberry lemonade experience you’ll need a few special ingredients:

  • Cream of tartar: Cream of tartar is an acid (in powder form; find it in the baking/spices aisle of your grocery store). Combined with baking soda, cream of tartar leavens these snickerdoodle cookies and produces the classic snickerdoodle tang. While there are a lot of suggested substitutions for cream of tartar on the internet, I have not tried them in this particular recipe.
  • Freeze-dried raspberries: To get a concentrated amount of raspberry flavor in these cookies, I use ground freeze-dried raspberries. Freeze-dried fruit is an amazing way to amp up your baked goods as it brings intense flavor without extra moisture. I ground up whole freeze-dried raspberries into a powder and added it directly to the cookie dough. Freeze-dried fruit is available online and in many grocery stores.
  • Citric Acid: To give these cookies an extra tangy zing, I use a small amount of citric acid in the sugar sprinkle. Citric acid occurs naturally in citrus fruits (like lemons!) and is also artificially made and used as a flavoring agent and preservative. Citric acid is commonly found in the baking/spices aisle of the supermarket or in bulk food stores. Can you omit it? Sure, but your cookies will not be nearly as punchy. (You could try sprinkling a little lemon zest onto the cookies right after baking, but the flavor will be less potent.) Citric acid keeps well and can be used in many other recipes that might benefit from a little pucker!

Anyways, enjoy these summery snickerdoodles! They really put a smile on my face!

raspberry lemonade snickerdoodles unbaked
raspberry lemonade snickerdoodle stack

Raspberry Lemonade Snickerdoodles

Makes 12 cookies

Ingredients:

For the raspberry lemonade snickerdoodle base:

  • Zest of one medium lemon
  • 120g (scant 2/3 c) granulated sugar
  • 30g (2 1/2 Tbsp) light brown sugar
  • 113g (1/2 c) unsalted butter, at room temperature
  • 1 tsp cream of tartar
  • 1/2 tsp baking soda
  • 3/4 tsp kosher salt (I use Diamond Crystal; use 1/2 tsp if using another brand of kosher salt or 1/4 tsp table salt)
  • 1 large egg, at room temperature
  • 175g (1 1/3 c plus 2 tsp) all purpose flour
  • 6g finely ground freeze dried raspberries (1 Tbsp ground, from about 1/4 c whole freeze dried raspberries), plus extra for sprinkling (optional)
  • 1-2 drops pink/fuschia food coloring (optional, for more intense color)

For the lemonade sugar sprinkle:

  • 25g (1/8 c) granulated sugar
  • 1/2 tsp citric acid

Method:

  1. In the bowl of a stand mixer fitted with the paddle attachment, combine lemon zest and sugars. Use your fingertips to rub the zest into the sugars until fragrant — this releases the essential oils from the zest and intensifies the lemon flavor of the cookies.
  2. Add the butter, cream of tartar, baking soda, and salt to the zest-sugar mixture. Mix on low to combine, then increase the speed to medium and cream until light and fluffy, about 3-4 minutes. Scrape down the sides of the bowl and the paddle a couple times during this process to ensure even mixing.
  3. Reduce the mixer speed to low and add the egg. Increase the speed to medium and mix until smooth. Scrape down the bowl and paddle.
  4. With the mixer on low, add the flour. Mix just until combined. Use a flexible spatula to stir from the bottom of the bowl a few times to make sure everything is well-mixed and there are no pockets of unincorporated flour.
  5. Remove half the dough and wrap in plastic. Add the ground freeze-dried raspberries and food coloring (if using) to the remaining half of the dough and mix until combined. Wrap in plastic. Chill both pieces of dough until firm but still pliable, about 30-45 minutes.
  6. While the dough is chilling, preheat the oven to 375°F with a rack in the middle and line two large baking sheets with parchment paper.
  7. In a small bowl, whisk together the granulated sugar and citric acid for the lemonade sugar sprinkle.
  8. Divide each half of dough into twelve acorn-sized balls. You should end up with a total of 24 balls, 12 of each color (about 20g each). Gently press one ball of each color together to form 12 cookies total — don’t roll them too tightly so the colors remain distinct. Toss each in the lemonade sugar sprinkle, coating completely. Place the cookies on the prepared baking sheets about 2½ inches apart.
  9. Bake the cookies one sheet at a time until the cookies have puffed and edges are set but the centers are still soft, about 10 to 12 minutes. Rotate the sheet in the oven halfway through baking. Immediately after removing the cookies from the oven, sprinkle a little more ground freeze-dried raspberries on the berry half of the cookie, if desired. Cool the cookies on the baking sheets for about 5 minutes, then transfer to a wire rack to cool completely. Store leftovers in an airtight container for up to 3 days.

Graham Cracker Snickerdoodles

graham cracker snickerdoodle

People often ask how I come up with ideas of what to make. I have many sources of inspiration — cookbooks, Instagram, the supermarket (moreso when it was normal to go there and just browse…one day, one day) — but perhaps the most common one is that I need to use something up. In this case, it was a small bag of graham cracker crumbs that wasn’t enough for making a pie crust or anything else semi-useful. I happened to be in a cookie-making mood (pretty common these days), so I figured I’d just chuck them in my snickerdoodle dough and see what happened.

Well, the cookies were good but not quite right; but now of course the idea of graham cracker snickerdoodles was stuck in my head. So yes, I had to go get more graham crackers to continue testing and tweaking the proportions of this recipe. And yes, now I have another small bag of graham cracker crumbs just waiting to be the muse for another recipe. Vicious cycle, tough job, someone’s gotta do it!

Anyways, about these graham cracker snickerdoodles. These cookies combine the soft chew and slight tang of a classic snickerdoodle with the pleasant wheatiness and honey-cinnamon vibes of a graham cracker. They’re the perfect mid-afternoon snack, though one of these days I’m going to test the theory that they’d make pretty fine ice cream sandwiches as well.

A few notes:

  • In the spirit of graham crackers, I use a whole wheat flour for the cookie dough. Traditionally graham flour is coarse and unsifted wheat flour, but here I’ve gone with my favorite sifted red fife flour from Flourist. It has a lovely flavor and texture, and works very well as a 1:1 swap for all-purpose flour in baked goods. I think any soft white wheat flour would work nicely here, or simply use all-purpose.
  • There are also actual graham crackers inside and out — some mixed into the cookie dough, and some in the sugar sprinkle used to roll the cookie dough balls in before baking. Don’t go overboard and add too many graham cracker crumbs to the actual dough — the dough will be too overloaded and won’t spread properly (I speak from experience). A digital scale is (and always is) your friend here.
  • If you don’t want to bake all the cookies off at once, you can refrigerate the dough up to 5 days or freeze for longer storage (in both cases, wait until right before baking to toss in the sugar sprinkle). It’s difficult to get the sugar sprinkle to stick to dough that is too cold, so I suggest taking the dough out of the freezer/fridge while preheating the oven. Roll the dough balls in your hands to slightly warm up the dough before rolling in the sugar sprinkle and baking.
graham cracker snickerdoodle stack

Graham Cracker Snickerdoodles

Makes about 12 cookies

Ingredients:

For the snickerdoodle dough:
  • 113g (1/2 c) unsalted butter, at room temperature
  • 66g (1/3 c) granulated sugar
  • 66g (1/3 c) light brown sugar
  • 20g (1 Tbsp) honey 
  • 1 tsp cream of tartar
  • 1/2 tsp baking soda
  • 1/2 tsp ground cinnamon
  • 1/2 tsp kosher salt
  • 1 large egg, at room temperature
  • 1 tsp vanilla extract
  • 170g (1 1/3 c) white whole wheat flour or sifted wheat flour (I like Flourist sifted red fife)
  • 50g (1/2 c) finely ground graham cracker crumbs
For the sugar sprinkle:
  • 15g (1 Tbsp) finely ground graham cracker crumbs
  • 15g (heaping 1 Tbsp) granulated sugar
  • 1/4 tsp ground cinnamon

Method:

  1. In the bowl of a stand mixer fitted with the paddle attachment, combine the butter, sugars, honey, cream of tartar, baking soda, cinnamon, and salt. Mix on low to combine, then increase the speed to medium and cream until light and fluffy, about 3-4 minutes. Scrape down the sides of the bowl and the paddle a couple times during this process to ensure even mixing.
  2. Reduce the mixer speed to low and add the egg and vanilla. Increase the speed to medium and mix until smooth. Scrape down the bowl and paddle.
  3. With the mixer on low, add the flour and graham cracker crumbs. Mix just until combined. Use a flexible spatula to stir from the bottom of the bowl a few times to make sure everything is well-mixed and there are no pockets of unincorporated flour. Cover and chill until firm but still scoopable, about 45 minutes.
  4. While the dough is chilling, preheat the oven to 375°F with a rack in the middle and line two baking sheets with parchment paper. In a small bowl, whisk together the graham cracker crumbs, granulated sugar, and cinnamon for the sugar sprinkle.
  5. Portion the dough into twelve ping-pong sized balls, about 45 grams (3 tbsp) each. Toss each in the sugar sprinkle, coating completely. Place the cookies on the prepared baking sheets about 2½ inches (6 cm) apart.
  6. Bake the cookies one sheet at a time until the edges are golden but the centers are still soft and pale, about 10 to 12 minutes. Rotate the sheet in the oven halfway through baking. Immediately after baking, sprinkle on a bit more sugar sprinkle if desired. Cool the cookies on the baking sheets for about 5 minutes, then transfer to a wire rack to cool completely. Store leftovers in an airtight container.