Sourdough discard jammy crumb bars

sourdough discard jammy crumb bars

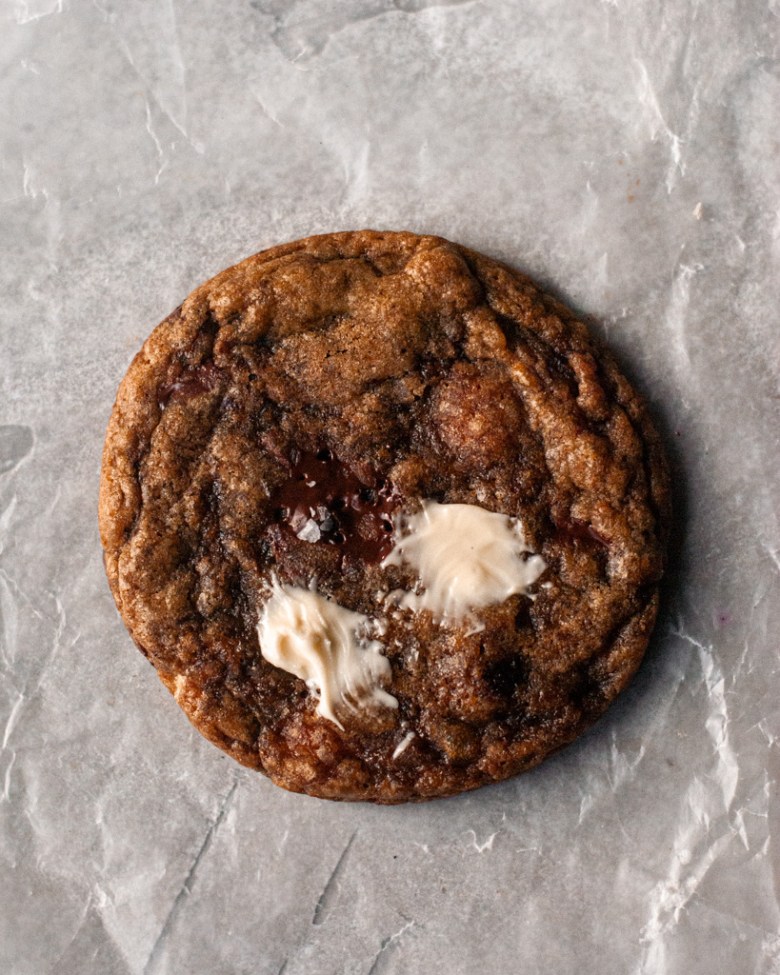
This recipe was born out of the convergence of portable dessert season and a full jar of sourdough discard in my fridge. Bonus points if I could also use up one of my half-consumed jams and the small stash of roasted hazelnuts leftover from the last round of recipe testing. So I present to you: sourdough discard jammy crumb bars!

These bar cookies come together in a snap, thanks to cold butter and the food processor. I used a high proportion of nuts in the crust for flavor and fat — hazelnuts and almonds because it’s what I had, but I think you could easily swap them out for whatever you have on hand and what would match the flavor of your jam. Since pre-made jams are usually quite sweet, I’ve pulled back on the sugar in the crust. If you prefer something a little more indulgent, you could dust these with powdered sugar or make a quick glaze to drizzle over the top!

You can use whatever jam you have on hand, something a little tart and not too runny is my preference. I also like to add a little squeeze of lemon juice to the jam to brighten it up a touch. If your jam is thick and hard to spread, warm it up in the microwave or a small saucepan to loosen.

The 1/8 sheet pan

I’ve spoken before about my love for small sheet pans, and for this recipe I used the cutest of them all: the 1/8 sheet pan! Since these bars aren’t too thick, the short edges of the pan make removing the bars very easy. Ff you need a little convincing as to why you should invest in 1/8 sheet pans, let me give you just a few ways they are used in our house:

  • Toasting small amounts of nuts or flour
  • Baking a couple of cookies from the freezer stash to satisfy a late-night craving
  • A casual serving plate for BBQ’s (I see them used a lot at burger joints!)
  • They fit in standard toaster ovens so great for single-serving meals too!

The interior dimensions of an 1/8 sheet pan are roughly 9.5″ x 6″, so if you don’t have an one you could use a 9×5 loaf pan for similar results (the bars will just be slightly thicker). Alternatively, you can increase everything by 25-30% and bake in an 8×8 or 9×9 pan. Note that the bake times may vary depending on the size of pan you use, so rely on visual cues to determine doneness.

Sourdough discard

The starter in this recipe is primarily for flavor, not leavening, so its ok to use discard that’s a little old. I just try to use my discard within a week, before it starts developing a layer of alcohol on top or smelling too acidic. For these bars, use discard straight from the fridge as we want to keep the butter nice and cold.

Want more sourdough discard recipes? I’ve got you covered:

sourdough discard jammy crumb bars
Sourdough Discard Jammy Crumb Bars

Sourdough Discard Jammy Crumb Bars

Yield: 8 large bars
Prep Time: 10 minutes
Cook Time: 35 minutes
Total Time: 45 minutes

A simple bar cookie using sourdough discard and your favorite jam!

Ingredients

  • 40g hazelnut meal (or whole roasted and skinned hazelnuts)
  • 64g almond meal
  • 40g granulated sugar
  • 3/4 tsp kosher salt
  • 60g all purpose flour
  • 60g spelt flour
  • 68g unsalted butter, cold and cubed
  • 80g 100% sourdough discard, cold
  • 200g jam
  • Squeeze of lemon juice (optional)
  • 1 Tbsp coarse sugar

Instructions

  1. Preheat the oven to 350F with a rack in the middle. Line an 1/8 sheet pan or 9x5 loaf pan with a parchment sling, leaving enough overhang on the long sides for easy removal. Lightly grease the pan and parchment.
  2. In the bowl of a food processor, combine the nut meal (or whole nuts), sugar, and salt. Pulse to combine (or if starting with whole nuts, until the nuts are finely ground). Add the flour and pulse to combine. Add the cold butter and pulse until big chunks of butter are no longer visible and the mixture resembles coarse meal. Add the cold sourdough discard over the top and pulse until the mixture starts coming together in big clumps.
  3. Transfer about 250g (~60%) of the mixture to the prepared pan (reserve the rest for the topping). Use a small measuring cup or glass to press it into an even layer. Prick the entire surface with a fork.
  4. Bake until set, about 10 minutes. Cool on wire rack while you prepare the jam filling (no need to let it completely cool).
  5. If your jam is on the sweet side, add a couple teaspoons of freshly squeezed lemon juice and stir to combine. If the jam is difficult to spread, you can warm it briefly in the microwave or in a small saucepan.
  6. Evenly spread the jam over the bottom crust. Scatter the remaining crumb mixture evenly over the top, followed by the coarse sugar.
  7. Bake until the top is set and golden brown, about 20-25 minutes. Transfer to a wire rack to cool completely. For easiest slicing, I like to further chill the bars in the fridge for another hour or so.
  8. Slice into desired sizes and enjoy! Store leftovers in an airtight container for up to 5 days or freeze for longer storage.

Sourdough Chocolate Chunk Cookies with Rye and Espresso

sourdough chocolate chunk cookie

Meet the newest member of CTD chocolate chunk cookie family! This particular recipe was designed to use up sourdough starter and be a relatively quick bake (i.e. no softening of ingredients, no mandatory long resting). But don’t worry, they are positively packed with flavor and are poised become the new most-frequent impulse bake in this house (toss up between this and the sourdough chocolate cake)!

If you’ve baked the salted chocolate chunk cookie from my book, this recipe will seem familiar to you. We’re featuring the same heavy hitters: browned butter, rye flour, espresso. However, I’ve tweaked the proportions a touch to reflect my current cookie preferences: slightly thinner but still chewy with crisp edges.

To chill or not to chill

That is the million dollar cookie question, isn’t it? Many bakers swear by “ripening” their cookie dough for 24 or even up to 72 hours for improved texture and flavor.

For this particular cookie, I suggest chilling for a minimum of 30-45 minutes — this helps to resolidify the butter and control spreading. If you’re in a real hurry, you can flatten the dough to help it chill faster or even stick it in the freezer. Thanks to all the flavor bombs in the dough, you will get tasty cookies.

But if you have the patience, chilling the dough for a full 24 hours does pay off with a more complex, harmonious flavor and a thicker, fudgier texture. (Beyond 24 hours I don’t detect a noticeable enough difference to warrant the extra time.) It’s similar to the difference between meat that’s been seasoned and then cooked right away versus something that’s had time to marinate overnight. You can enjoy and be satisfied by both, but the one with the longer marination just tastes better. I usually bake a couple off for instant gratification and keep the rest in the fridge for a full rest.

Here’s a quick video so you can see the difference between the 45 minute vs 24 hour chill. Top cookies had a 45 minute chill; bottom had 24 hours.

And a cross section! 24 hour chill on the left, 45 minute chill on the right.

You can also freeze portioned dough for longer storage. If you like super thick cookies you can bake directly from frozen, but I prefer to let the unbaked dough sit out at room temperature for 20-30 minutes (about the time it takes to preheat the oven) for better spread.

Chocolate selection

I really enjoy a mix of white and dark (but not too dark) chocolate in this cookie. Mixing up the chocolates makes for more interesting eating, and the white chocolate helps balance out the intensity of the brown butter, espresso, and rye. But I think all milk or even caramelized white chocolate would taste great in this dough base too! Use what you have and like.

I prefer using chopped chocolate or callets rather than chocolate chips for better taste and spread. (You don’t need to chop the callets if they’re on the small side; I usually use Callebaut callets and toss them straight into the dough.)

OK, on to the recipe!

sourdough chocolate chunk cookie

Sourdough Chocolate Chunk Cookies with Rye and Espresso

Yield: 1 dozen cookies
Prep Time: 15 minutes
Cook Time: 12 minutes
Chilling Time: 45 minutes
Total Time: 1 hour 12 minutes

Rich, flavorful chocolate chunk cookies made with sourdough discard.

Ingredients

  • 115g unsalted butter, cold and cubed
  • 1 tsp espresso powder
  • 10g freshly brewed coffee (can sub milk or water)
  • 85g light brown sugar
  • 85g granulated sugar
  • 1 large egg yolk, cold
  • 80g sourdough discard (100% hydration), cold
  • 1 1/2 tsp vanilla extract
  • 100g all purpose flour
  • 45g rye flour
  • 1/2 tsp baking powder
  • 1/2 tsp baking soda
  • 3/4 tsp kosher salt
  • 70g chopped white chocolate
  • 70g chopped bittersweet chocolate (I like 55-65%)
  • Flaky salt, for garnish (optional)
  • Additional chocolate, for garnish (optional)

Instructions

  1. To brown the butter, place the butter in a small, light-colored saucepan over low-medium heat. Once the butter has melted, turn the heat up to medium-high. Stir frequently with a heatproof spatula, scraping the sides and bottom of the pan as needed. The butter will crackle, foam, turn clear gold, then finally start browning. It’s done when the crackling subsides and you smell toasted nuts. This process takes about 7-10 minutes total, but the butter can go from browned to burnt in a flash—so keep an eye on it. Scrape the butter and all the toasty bits into a large bowl and stir in the espresso powder and coffee -- this helps infuse the butter with extra coffee flavor. Let cool until tepid, about 10 minutes.
  2. Whisk the sugars into the butter until smooth and combined, followed by the egg yolk, sourdough starter, and vanilla. The mixture should be viscous and homogenous, with no streaks of visible starter. 
  3. In a separate bowl, whisk together the flours, baking powder, baking soda, and salt. Add the dry ingredients to the wet and fold together until just combined. When just a few streaks of flour remain, add the chocolate, and mix until evenly distributed.
  4. Cover and chill the dough for 45-60 minutes, or until cool to the touch. (You can leave the dough in the bowl where it was mixed, but transferring it to plastic wrap and flattening to a 1” slab will quicken the cooling process.) Alternatively, the dough can be chilled for up to 24 hours or frozen for longer storage. (They will spread less and may require an extra minute or two of baking time.)
  5. While the dough is chilling, preheat the oven to 350°F (175°C) with a rack in the middle and line two large baking sheets with parchment paper.
  6. Portion the dough into twelve equal balls, about 54g each. Place the dough balls on the prepared baking sheets about 2½ inches apart and sprinkle the tops with flaky sea salt.
  7. Bake the cookies one sheet at a time until the tops are set and no longer shiny, about 12 to 14 minutes. Rotate the sheet in the oven halfway through baking. Right after the cookies come out of the oven, use a large round cookie cutter to nudge them into perfectly round circles, if desired. Top with a few pieces of chopped chocolate for garnish.
  8. Cool the cookies on the baking sheets for about 5 minutes, then transfer to a wire rack to cool completely. 

Notes

Recipe adapted from Baked to Order.

sourdough chocolate chunk cookie

Related recipes and resources:

Sourdough Discard Cheese Crackers

sourdough cheese crackers

These sourdough discard cheese crackers are one of my “oops, got lots of discard that needs using up QUICK” back pocket recipes. But honestly, these crackers are also tasty enough that I’d build lots of starter just to make a batch. I made probably a dozen batches of these over Christmas, portioning them into little packages to include with my yearly cookie boxes as a savoury counterpart to all the sweetness; and nowadays I make a batch every couple of weeks to satiate all the hungry snackers in my house.

The original recipe for these crackers comes from the ever-excellent Bake from Scratch website; I’ve tinkered just slightly with the spices and salt level and developed some handy tips for baking them.

Baker’s Tips:

  • The starter in this recipe is primarily for flavor, not leavening, so its ok to use discard that’s a little old. I just try to use my discard within a week, before it starts developing a layer of alcohol on top or smelling too fermented. The original recipe says to use room temperature discard but I always use cold from the fridge without a problem.
  • A pasta machine is hands-down my favorite way to roll out these crackers thinly and evenly. Of course you can roll by hand — just go thinner than you think as the crackers do puff in the oven. I highly recommend rolling directly on parchment so it’s easy to transfer the dough to the sheet pan; it’ll be too delicate to move without tearing. You can roll on a silicone mat too; just be careful when scoring that you don’t accidentally damage your mat.
  • I prefer to bake crackers on convection setting — it’s a little quicker and I find the browning more even. Every oven is different, though — the first time you make these, I recommend baking one tray of crackers at a time to gauge how long they take in your oven. Also, how thinly you roll your crackers plays a major role in how long they’ll take to bake.
bowl of sourdough cheese crackers

Sourdough Discard Cheese Crackers

Makes about 2 sheet pans’ worth of crackers | Adapted from Bake From Scratch

Ingredients:

  • 65g white whole wheat or sifted wheat flour
  • 63g all-purpose flour
  • 1/4 tsp baking soda
  • 1/2 tsp granulated garlic
  • 1/2 tsp dry mustard
  • 1/4 tsp smoked paprika
  • 5g (1 1/4 tsp) kosher salt (Diamond Crystal)
  • 275g sourdough discard (100% hydration; straight from the fridge is fine)
  • 57g unsalted butter, melted and cooled slightly
  • 60g freshly grated sharp cheddar

Method:

In a small bowl, whisk together the flours, baking soda, spices, and salt.

In a medium bowl, stir together the sourdough discard and melted butter until smooth. Stir in the cheese.

Add the dry ingredients to the wet. Stir/knead together until all the flour is incorporated and the dough has a clay-like consistency. Flatten and wrap with plastic. Refrigerate until chilled, at least 20 minutes (or up to 24 hours).

When ready to bake, preheat the oven to 350F (I prefer convection, if possible; but 350F conventional works fine too) with racks in the upper and lower thirds. Have ready two large pieces of parchment paper and two large baking sheets.

To roll by hand: Divide the dough in half. Place one half in the center of one piece of parchment. Roll into a rectangle as thin as possible (aim for thinner than 1/8″ thick) doing your best to keep the entire piece even. Slide the rolled out dough, still on the parchment, to one of the baking sheets. Repeat with the second half of dough.

To roll with a pasta maker: Alternatively, roll out dough using a pasta maker (my preferred method). In this case, work with about 1/6 of the dough at a time. For my pasta machine, I roll to the 3rd (out of 6) settings. Transfer the strips of dough to parchment lined baking sheets, cutting the strips as needed to fit.

Dock the dough all over with a fork. Use a pastry wheel to score into desired sizes (or leave them whole, and break into shards after baking). If you want to make them look like certain popular commercial cheesy crackers, you can skip the docking, score them into roughly 1.25″ squares, and poke the center of each with a chopstick (this is easier if you’ve rolled with a pin vs. a pasta maker).

Bake, rotating sheets halfway through, until the entire surface is evenly golden and the crackers are crisp. Timing will vary wildly depending on how thinly you rolled the dough; start checking around 15 minutes. Crackers can go from pleasantly golden to too dark very quickly; so once they’ve started to take on color keep a close eye on them. Crackers will also make it blatantly obvious where the hot spots in your oven are; so you may need to transfer some crackers to a cooling rack and let other pieces continue baking a little longer.

Cool crackers completely on a wire rack, then break into pieces and store at room temperature in an airtight container. They should keep for at least a couple weeks, though they’ve never lasted that long around here…

Related recipes and posts:

Sourdough Sprinkle Snack Cake

sourdough sprinkle snack cake slice

Happy weekend! Just wanted to say hi and share another fun way to use some of your sourdough discard — sprinkle (or funfetti) cake! This is my favorite soft and fluffy buttermilk cake base from Baked to Order, but rejiggered as a snack cake. Snack cake…I love that term! Basically it’s a small, typically one layer cake that is simple to put together and keep around for snacking — no party or special occasion required. Count me in!

sourdough sprinkle snack cake

Baker’s notes:

  • You can use discard that’s a few days old; I keep discard in the fridge for up to the week or until it starts to produce “hooch” (a thin, liquid alcohol byproduct on top) or smells unpleasantly acidic. For this cake, you’ll want to bring the starter back to room temperature so it mixes into the batter easily.
  • If you don’t have sourdough discard, increase the all-purpose flour and buttermilk by 60 grams each. No other changes needed.
  • I always use plain old rainbow jimmies (the long, rod-shaped sprinkles) for mixing into cakes. They tend to hold their color and not bleed into the batter as much as other styles. Save your fancy designer sprinkles for the top (I get mine from Sweetapolita)!
  • I used half a batch of my fave buttermilk ermine frosting here, with some freeze-dried strawberries mixed in for color and flavor. But this cake would go well with your favorite frosting — it’s a great time to use up any leftover bits you might have in your freezer. I used about 300g of frosting (a little under 2 cups), for reference. By the way, I always advocate for making a full batch of frosting and freezing whatever you don’t use in an airtight bag. It’s such a useful freezer stash item for when you want to make a few cupcakes or another snack cake. Just bring the frosting to room temperature and re-whip it before using (it may look separated or curdled at first, but it should come together after a good whip at the right temp). Frosting temperature sweet spot for me is around ~72F — much warmer than this and the frosting will be too droopy and runny; much cooler and it’ll be dense and hard to spread.

Sourdough Sprinkle Snack Cake

Makes one 8×8 cake | Adapted from Baked to Order

Ingredients:

For the sourdough sprinkle snack cake:
  • 100g cake flour 
  • 40g all purpose flour
  • 130g buttermilk, at room temperature
  • 120g sourdough discard (100% hydration), at room temperature 
  • 84g unsalted butter, at room temperature
  • 180g granulated sugar
  • 6.5g (1 3/4 tsp) baking powder
  • 3g (3/4 tsp) kosher salt
  • 30g neutral oil (such as grapeseed or canola)
  • 2 large eggs, at room temperature
  • 2 tsp pure vanilla extract
  • 1/4 tsp almond extract
  • 40g rainbow sprinkles (long jimmies style)

For the strawberry buttermilk ermine frosting:

  • Half batch buttermilk ermine frosting (~300-350g), at room temperature
  • 10g freeze-dried strawberries, ground
  • Assorted sprinkles (for decorating, if desired)

Method:

For the sourdough sprinkle snack cake: Preheat the oven to 350°F (175°C) with a rack in the middle. Line an 8×8 square aluminum baking pan with parchment paper, leaving about 3 inches of overhang on two of the sides for easy removal. Lightly grease the pan and parchment.

In a small bowl, whisk the flours together thoroughly.

In a measuring cup with a spout, whisk together the buttermilk and sourdough discard until smooth.

In the bowl of a stand mixer fitted with the paddle attachment (or using a handheld mixer), combine the butter, sugar, baking powder, and salt. Mix on low to combine, then increase the speed to medium and cream until light and fluffy, about 5 minutes. Use a flexible spatula to scrape down the sides of the bowl and the paddle a couple of times during this process. Add the oil and mix well to combine. Scrape down the bowl and the paddle.

Add the eggs one at a time, making sure each is well incorporated before adding the next. Add the vanilla and almond extracts and mix well to combine. Scrape down the bowl and the paddle.

With the mixer on low, add the flour and buttermilk mixture in five additions, beginning and ending with the flour. Use a flexible spatula to fold from the bottom of the bowl a few times to make sure the batter is well-mixed. Fold in the sprinkles.

Scrape the batter into the prepared pan and use an offset spatula to smooth the top.

Bake until the cake is puffed and lightly golden and a skewer inserted into the center comes out clean or with a few moist crumbs, about 35-45 minutes. Transfer to a wire rack to cool completely before frosting.

For the strawberry buttermilk ermine frosting: In a stand mixer fitted with the paddle attachment or using a handheld electric mixer, beat together the frosting and freeze-dried strawberry powder until smooth. Use immediately.

To assemble: You can leave the cake in the pan for easy transporting, or transfer it to a serving plate. Dollop the frosting on and use an offset spatula or back of a spoon to swirl it over the surface of the cake. Decorate with sprinkles, if desired. Refrigerate any leftovers in an airtight container for up to 3 days; bring to room temperature before serving.

Related recipes and articles:

sprinkle snack cake on plate

Small batch brown butter sourdough snickerdoodles

brown butter sourdough snickerdoodles

Hi, hello, and happy spring! Just popping in with a fun little recipe to add to your sourdough discard repertoire: brown butter sourdough snickerdoodles.

I love riffing on the classic snickerdoodle — previously, we’ve done gingerbread latte snickerdoodles, graham cracker snickerdoodles, raspberry lemonade snickerdoodles, and there’s a whole recipe on snickerdoodle variations in my book! Today we’re veering into new territory by adding some sourdough discard to the mix, which (along with a healthy dose of brown butter) give these treats a big boost of flavor. Add in crisp edges, soft centers, cinnamon sugar goodness — these cookies don’t last long in our house!

brown butter sourdough snickerdoodles

Baker’s notes:

  • Sourdough discard is the portion of your starter that you would normally throw away when doing a feeding. I usually store my discard for up to a week in the fridge, using it to make anything from granola to pie crust to chocolate cake. For this recipe, you can use discard that’s at room temperature or straight from the fridge, as long as it’s not overly acidic-smelling or has formed any liquid “hooch” on top.
  • I prefer to bake these cookies after a short chill, just long enough to make the dough easier to portion. Since this dough does have discard in it, it will continue to ferment if left in the fridge. If you’re not planning to bake off all the cookies at once, I would recommend freezing unbaked dough balls (without the sugar sprinkle) in an airtight bag/container. Bring to room temperature and reroll each portion between your hands (this slightly warms the dough, helping the sugar sprinkle stick) before rolling in sugar and baking.

Small batch brown butter sourdough snickerdoodles

Makes 10 cookies

Ingredients:

For the brown butter sourdough snickerdoodle base:

  • 115g unsalted butter, cubed (cold is fine)
  • 25g milk, cold
  • 140g all-purpose flour
  • 1 tsp cream of tartar
  • 1/2 tsp baking soda
  • 1/2 tsp kosher salt (I use Diamond Crystal; use a scant 1/2 tsp for other brands or 1/4 tsp table salt)
  • 1/2 tsp ground cinnamon
  • 100g granulated sugar
  • 30g light brown sugar
  • 1 large egg yolk, cold
  • 1/2 tsp vanilla extract
  • 60g 100% hydration sourdough discard

For the cinnamon sugar sprinkle:

  • 25g granulated sugar
  • 1/2 to 1 tsp ground cinnamon (to taste)

Method:

  • Brown the butter: Place the cubed butter in a small, light-colored saucepan over medium-low heat. Once the butter has melted, turn the heat up to medium-high. Stir frequently with a heatproof spatula, scraping the sides and bottom of the pan as needed. The butter will crackle, foam, turn clear gold, then finally start browning. It’s done when the crackling subsides and you smell toasted nuts. This process takes about 10 minutes total, but the butter can go from browned to burnt in a flash—so keep an eye on it. Pour the butter and all the toasty bits into a medium bowl. (You should have ~92g brown butter.) Stir in the cold milk and let cool for 5 minutes.
  • Combine the dry ingredients: In a small bowl, whisk together the flour, cream of tartar, baking soda, salt, and cinnamon. Whisk for a good 30-45 seconds to ensure the leaveners and spices are evenly distributed.
  • Combine the wet ingredients: Whisk the sugars into the butter-milk mixture until combined. Whisk in the egg yolk and vanilla until smooth. Add the sourdough discard and whisk until totally smooth.
  • Add the dry ingredients and chill the dough: Add the dry ingredients to the wet and use a flexible spatula to mix just until no streaks of flour remain. Cover and refrigerate for about 30 minutes, or until the dough is cool but still scoopable (it will be fairly soft).
  • Preheat the oven and prepare pans and cinnamon-sugar: While the dough is chilling, preheat the oven to 400F with a rack in the middle. Line two baking sheets with parchment paper. Prepare the sugar coating by whisking together the granulated sugar and cinnamon.
  • Portion the dough: Portion the cookie dough into 10 equal golf-sized balls, about 47 grams each. Roll between hands into a smooth ball, then toss in sugar coating. Place the cookies on the prepared baking sheets about 2 inches apart. Sprinkle each with a bit more sugar coating.
  • Bake the cookies: Bake sheets one at a time for about 9 to 10 minutes, rotating the pan halfway through. Cookies should be puffed and the tops starting to crack, but the centers should still look a little soft. After removing the pan, bang it a couple of times on the counter to help deflate the cookies and get that classic crinkled top. Cool cookies on the pan for about 5 minutes, then transfer to a wire rack to cool completely.
brown butter sourdough snickerdoodles

Related recipes and resources:

Sourdough pie crust

apple pie with sourdough crust

If you’ve hung around this site much, you probably know that I’ve got a thing for sourdough. Most often I use my sourdough starter to make bread — both crusty and soft — but I’ve been known to sneak it into things like chocolate cake and crackers. Repurposing “discard” (the portion of starter that is typically thrown away at each feeding) into something delicious is a challenge I really enjoy — not just because it reduces waste, but also because starter can add deeper flavor to so many baked goods! And pie crust is no exception.

Adding sourdough starter to pie dough is fairly straightforward. I’ve based this recipe on my go-to all-butter pie crust (which is in my book) by replacing all the liquid and part of the flour with ripe/discard starter. Since this recipe calls for a decent amount of starter, I usually save up a few days’ worth of discard in the fridge before making this crust. Since the starter isn’t for leavening, it doesn’t need to be at peak readiness as if you were mixing bread dough. As long as it still looks bubbly and isn’t overly soupy or acrid-smelling, it should work just fine. (I generally try to use my discard within 5-7 days.)

I’ve used sourdough pie crust for both sweet and savory pies and galettes. The starter adds a lovely depth of flavor. I don’t find it sour at all (though this will depend on the health/taste of your own starter!). It bakes up a little more tender than my regular pie dough, but is still plenty flaky as long as you handle it correctly (namely keep your ingredients cold and don’t overwork the dough!).

sourdough pie crust unbaked
A few notes:
  • I keep a 100% hydration (equal parts flour and water) starter, which is what I use for this recipe. I’ve never had to add any extra liquid, but if you keep a stiffer starter (or live in a drier climate) you might need a touch of ice water or milk to help bind your dough together.
  • Make sure your starter is well-chilled before using it to make pie dough. I like to measure it out and refrigerate it for at least a couple hours before mixing.
  • In general, I like to keep my butter pieces fairly large when making pie dough, especially if I’m going for maximum flake. I find it’s especially helpful when making sourdough pie crust since you have to work the dough a little more than normal to incorporate the starter.
  • When you first add the starter to your dough it may seem like it won’t incorporate. Avoid the temptation to add liquid or knead — just fold the mixture over itself and it should eventually start coming together.
  • The folding in step 4 is optional, but I almost always do it for extra-flaky and easy-to-handle dough.
  • You can halve all the ingredients to make a single 9″ pie crust, but I always make a double batch to maximize my time in the kitchen. Pie dough freezes incredibly well, and having a couple batches in the freezer stash makes me feel like a baking ninja: I’m already halfway to an awesome galette or pie!
Have crust, make pie!

Once you’ve made this sourdough pie crust, use it your favorite sweet or savory pie or try it in one of these recipes:

Sourdough pie crust

Makes enough for one double-crust 9″ pie | Adapted from Baked to Order

Ingredients:

  • 250g flour (I typically use 125g all purpose and 125g whole grain such as spelt, whole wheat, einkorn, or rye)
  • 1 1/2 tsp (6 grams) kosher salt (I use Diamond Crystal brand)
  • 2 Tbsp (25 grams) granulated sugar
  • 250g unsalted butter, cold and cut into 1/2″ cubes
  • 250g ripe or discard 100% hydration sourdough starter, cold (see notes above)

Method:

  1. In a large bowl, whisk together the flour, salt, and sugar. Scatter the butter over the top. Use the pads of your fingers to flatten the butter pieces, tossing them with the flour mixture so each piece is coated on all sides. The butter pieces should remain fairly large, about the size of walnut halves. Work quickly so the butter remains cold.
  2. Scrape the sourdough starter over the flour-butter mixture. Use a flexible spatula to fold and mash the starter into the flour-butter mixture. Once the starter is well dispersed, use your hands to continue folding the dough over itself, giving the bowl a quarter-turn between folds, until there aren’t any dusty bits of flour remaining on the bottom of the bowl and the dough just holds together when you squeeze a bit in your hand. (Depending on the consistency of your starter and the humidity of your environment, you may need to add a drizzle of cold water or milk to bring the dough together; but I usually don’t need any.) You should still see visible pieces of butter—this is a good thing! Fold the dough over itself several more times, giving the bowl a quarter turn after each fold, to make a cohesive but ragged mass.
  3. If the dough is still cool to the touch at this point, continue on; if it feels at all soft or sticky, cover and refrigerate for 20-30 minutes before continuing.
  4. Transfer the dough to a lightly floured surface. Using a floured rolling pin, roll the dough into a roughly 13-inch (33-cm) square. Brush off any extra flour and fold the dough into thirds like a letter. Fold into thirds again so you end up with a roughly 4.-inch (11-cm) square. Roll into a 3/4-inch (2-cm)-thick rectangle twice as long as it is wide and cut in half. Wrap each half and refrigerate for at least 2 hours, or up to 1 day. (The dough can also be frozen at this point and defrosted in the fridge overnight before using.)

A simple sourdough chocolate cake

sourdough chocolate cake no sprinkles

Simple. Small-batch. Sourdough. Chocolate. Cake. That’s all there is to this recipe, but it seems to be everything we’re craving right now.

This is a riff on the chocolate cake that will be in my cookbook, scaled down and adapted to use sourdough discard, AKA the portion of starter that you normally discard every time you do a feeding. I usually collect all my discard in a container in the fridge and use it within a week or before it starts to develop an overly acidic smell / layer of liquid “hooch” on top.

For the best cake texture, I like to use discard that has fallen and no longer bubbly. The discard is just here for flavor and not leavening; and using a super active starter can make for a “bready” texture — not what we want here.

I frosted this cake with about a cup of silky fudge frosting I had left in the freezer, but you could certainly enjoy this plain, with a simple dusting of icing sugar, or maybe some whipped cream and berries. Whatever you pair it with, I hope you enjoy!

sourdough chocolate cake slice

Sourdough Chocolate Cake

Makes one single-layer 8″ cake

Ingredients:

  • 57g (1/4 c) unsalted butter
  • 28g (2 Tbsp) neutral vegetable oil
  • 120g (1/2 c) 100% hydration ripe sourdough starter
  • 1 tsp vanilla extract
  • 63g (2/3 c) rye flour (all-purpose works too) 
  • 34g (1/3 c) Dutch-processed cocoa powder
  • 160g (3/4 c) light brown sugar
  • 1/2 tsp kosher salt
  • 3/4 tsp baking soda
  • 1 large egg, at room temperature
  • 80g (1/3 c)sour cream, at room temperature
  • 60g (1/4 c) hot coffee

Method:

  1. Preheat the oven to 350°F with a rack in the middle. Grease an 8-inch round cake pan and line the bottom with parchment paper, then grease the pan again and dust with cocoa powder.
  2. In a small saucepan, melt the butter over low heat. When the butter has melted, remove from the heat and whisk in the oil, starter, and vanilla. Allow to cool slightly while you prepare the rest of the ingredients.
  3. Sift together the flour, cocoa powder, brown sugar, salt, and baking soda in a large bowl. Set aside.
  4. Whisk the sour cream into the butter mixture, followed by the egg. Whisk the wet ingredients into the dry until combined. Add the hot coffee and whisk just until smooth.
  5. Scrape the batter into the prepared pan and bake for 28-35 minutes, or until a skewer inserted into the center comes out with just a few moist crumbs. Transfer to a wire rack to cool. Once the pan is cool enough to handle, run an offset spatula around the edges and turn the cake out to finish cooling completely.
sourdough chocolate cake sliced

Sourdough Crackers: Lavash and Grissini

sourdough lavash

Crackers are a popular food in our house. My kids love them. They’d probably eat crackers for dinner if they could (or anything else labelled “snacks” for that matter). So while everyone else is whipping out their royal icing and cookie stamps, here I am over here making sourdough crackers.

Don’t get me wrong — there will be plenty of cookies happening in our house too. But right now, I’m just having a little too much fun with crackers! They are actually quite fun to make with kids, too. The dough is easy to handle and roll, and my son never gets tired of adding “sprinkles” to things (even if they’re sesame seeds instead of sugar).

sourdough grissini

This sourdough cracker formula can be used to make either lavash crackers (a crisp flatbread) or grissini (thin, crunchy breadsticks). Leave them plain with just a sprinkling of flaky salt, or add seeds / spices to add texture and additional flavor! (Just be careful with dried herbs and spices as a tiny bit goes a long way.) You can even sprinkle on some grated cheese or knead some into the dough. My favorite cracker flavor combo is smoked paprika, garlic flakes, sesame seeds, poppy seeds, black pepper, and a little flaky salt. Yum!

These sourdough crackers are tasty on their own, but also make a great addition to a nosh or charcuterie plate. They keep well, so make a few batches now to have on hand for your holiday entertaining needs!

sourdough crackers plate

sourdough crackers plate 2

A couple of notes:

  • This is a flexible formula for sourdough crackers that you can easily scale depending on the amount of discard you have. I usually save discard in the fridge for a few days, then bake off a large batch. The easiest way to scale this recipe is as follows:
    • Weigh the amount of starter you have
    • Add half that weight in flour (so if you have 200 grams of starter, add 100 grams flour)
    • Figure out how much flour you have total, including the flour in your starter (100 grams from the starter + 100 grams added = 200 grams total flour)
    • Add 2% of the total flour weight in salt (2% of 200 = 4 g)
    • Add 10% of the total flour weight in olive oil (10% of 200 = 20g)
    • Add 10% of the total flour weight in honey (10% of 200 = 20g)

    (I tried writing this out in baker’s percentages; but since there’s a bit of disparity over how to express starter in a formula, it ended up being more confusing than helpful. So there you go. Mathing for the day over.)

  • The baking temperatures and timing on these crackers are just a guideline and may vary considerably depending on your oven and how thinly you roll or cut your dough. If you like your lavash more like a flatbread (softer), pull it out sooner. If the edges are crisp but the middle needs more time, take out the sheet and carefully trim off the edges, then return the sheet to the oven finish crisping the rest. For grissini, you want more of a “low and slow” approach — you’re basically trying to dry the dough out without the breadsticks burning, so you need a lower temperature + longer bake. Experiment and find out what works best for your oven!
  • For more baking with sourdough discard ideas, see this post.
  • For a DIY Raincoast Crisp recipe, see this post (you can sub in 1 cup of starter for 1/2 cup flour and 1/2 cup buttermilk if you want!).

Sourdough Crackers: Lavash and Grissini

Makes about one baking sheet’s worth of crackers

Ingredients:

  • 100g ripe sourdough starter (100% hydration)
  • 50g flour (I like a mix of bread and wholegrain)
  • 10g olive oil
  • 10g honey
  • 2g salt
  • Assorted seeds (poppy, sesame), spices, and/or flaky salt for topping, if desired

Method:

    1. Stir together the starter, oil, and honey until combined. Add the flour and salt and mix with a spatula until a rough dough forms. Knead for 3-5 minutes, or until the ingredients are well combined and the dough is smooth. It should be a medium-firm consistency and not sticky. (If it is sticky, add flour a tsp at a time until smooth, If it is dry, add water a tsp at a time until hydrated.) Transfer to an oiled container.
    2. Ferment the dough at room temperature until it is doubled in size, about 3-4 hours. (Note: you can also refrigerate the dough for a few hours at this point if you aren’t ready to bake yet. Not sure how long it will hold, but I’ve held mine for about 8 hours and it probably could last longer. No need to bring to room temp before proceeding.)

For lavash crackers:

  1. When the dough is nearly ready, preheat the oven to 400F (with a baking stone if you have one). Turn the dough onto a Silpat or piece of parchment paper cut to fit a baking sheet.
  2. Roll the dough into a rectangle as thinly and evenly as possible. It should be almost paper thin. (Alternatively, you can divide the dough into portions and use a pasta machine to roll them out. I like to get them down to the 2nd-thinnest setting.)
  3. Transfer the dough, still on the Silpat or parchment, to a baking sheet. Dock the surface all over with a fork to keep it from puffing in the oven. Mist with water and sprinkle seeds / spices / flaky salt if desired.
  4. Bake for 10-15 minutes, rotating the sheet halfway through baking, until browned and crisp. Cool on a wire rack, then break into shards and serve. Keeps well in an airtight container or ziplock bag.

For grissini:

  1. When the dough is nearly ready, preheat the oven to 325F and line a baking sheet with a Silpat or parchment paper. If you’d like to coat your grissini with seeds, place the seeds on a plate or small baking sheet.
  2. On a nonstick mat or lightly floured surface, roll the dough into a rectangle between 1/8″ – 1/4″ thick. Cut dough into even strips into desired thickness (I like 1/8″ – 1/4″ inch). Roll them one by one in the bed of seeds, if desired, then transfer to the prepared sheet. If you like, you can hold one end of dough while twisting the other to get a corkscrew effect.
  3. Bake until dry and crisp, about 30-40 minutes (but can vary wildly depending on the size of your grissini). Cool on a wire rack, then store in an airtight container or jar.