Sourdough Pumpkin Hokkaido Milk Bread with Salted Honey Maple Butter

If you follow me on Instagram, you may have noticed my recent obsession with sourdough. My sourdough starter has been the most successful thing I’ve grown; somehow we’re going on two years and it hasn’t died on me yet! This summer I decided to focus on maintaining a strong starter so we could have fresh bread for the long Canadian winter ahead. It’s been a dangerously delicious hobby!

Although most of my efforts have been on artisan hearth breads with a crispy, crunchy crust I’ve also been experimenting with sandwich breads which are easier for my still-relatively-gummy little guy to handle. This sourdough Hokkaido milk bread formula I found on The Fresh Loaf has been popular in our house — it’s delicious for sandwiches, but also simply toasted with jam. Or plain, fresh out of the oven.

In the spirit of pumpkin spice season, I thought it would be fun to try making a pumpkin version. I’m quite happy with how it turned out — just the right festive color! The pumpkin, to be honest, is there more for color and moisture than flavor; I think you could probably add a tablespoon or two more puree, though it’ll depend on the water content of your puree (I used store-bought).

As it is, this is a delightfully soft sandwich bread with a mild sourdough tang. We enjoyed it with salted honey maple butter, but it also made a mean grilled cheese. I think it would also make lovely dinner rolls for a Thanksgiving meal!

A few notes:

  1. I know a lot of people don’t have sourdough starter around; check out this recipe which uses similar ingredients but no starter. I suspect you could probably take your favorite Hokkaido milk bread recipe and add about 1/2 a cup of pumpkin — maybe hold back a couple tablespoons of liquid to start.
  2. I knead this dough by hand, and it starts out very sticky (sourdough or not). It also takes a lot of time, patience, and practice. You will think that it is never going to become a workable dough, but it will. I use this enriched bread dough technique for kneading and it typically takes me 10-15 minutes (it took longer the first time). Avoid the urge to add more flour as this will make your loaf dense. Just keep at it; it’s a good stress reliever! 🙂
  3. This recipe takes a long time from start to finish — about a day and a half (most of it is waiting). Because the dough is enriched it proofs even slower than “regular” sourdough.
  4. I am providing this recipe in grams as that is how I measure my breads. The correct ratios are important so I highly encourage the use of a scale!!!
  5. This bread also makes great cinnamon rolls that stay soft for days. Directions are at the end.
  6. Bread baking is a skill that takes a lot of practice and I certainly am still at the beginning stages of my journey. But I am happy to try answering any questions you might have! And I’d love to hear if this recipe works out for you!

Sourdough Pumpkin Hokkaido Milk Bread

Adapted from The Fresh Loaf | Makes one 8.5″ x 4.5″ loaf

Levain Ingredients

  • 18 g mature sourdough starter (100% hydration)
  • 30 g milk
  • 56 g bread flour

Mix and ferment at room temp (73F) for 10-12 hours. When ready it should be puffy and domed and you should see large bubbles if you pull back the top.

Final dough ingredients

  • 276g bread or AP flour (I used half KAF bread flour and half AP flour for a balance of chewiness and volume)
  • 34g granulated sugar
  • 34g softened unsalted butter
  • 1 large egg, beaten
  • 5g fine grain sea salt
  • 110g whole milk, lukewarm
  • 100g pumpkin puree
  • 15g milk powder
  • Melted butter, for brushing
  • All of the levain

Method:

  1. Mix together all final dough ingredients except the salt and butter until just combined. Cover and autolyse (rest) for 30 minutes.
  2. Add salt, and knead dough until gluten is moderately developed. The dough will start out sticky and rough but should gradually come together and feel quite smooth and stretchy. Add butter in two batches, mixing the first completely before adding the second. Continue kneading until the gluten is very well developed and the dough passes the windowpane test as demonstrated here. The dough should be smooth and supple (and quite lovely to handle!). This will take quite some time, especially if done by hand. Consider it your arm workout for the day!
  3. Transfer to a clean bowl, cover, and bulk rise at room temp (73F) for 2 hours. The dough will be noticeably expanded, but not doubled. Fold, cover tightly with plastic wrap, and refrigerate overnight.
  4. The next day, take the dough out and transfer to a lightly floured surface. Divide it into 3 or 4 equal parts and lightly shape each into a ball. Rest for one hour, covered by lightly oiled plastic.
  5. Using a lightly floured rolling pin, roll each ball into an oval and roll up (like a jelly roll). Rest for 10 minutes. Roll each piece into an oval again, along the seam, and re-roll as tightly as possible. Transfer rolls to a loaf pan, seam sides down. Cover loosely with plastic and allow to rise about 6 hours at room temperature. The dough should be well risen, puffy, and fill the pan about 80%.
  6. About 1 hour before baking, preheat oven to 400F. After the dough has finished proofing, transfer to oven and bake for 40-45 minutes, rotating pan halfway through for even browning. If the loaf is browning too quickly, tent a piece of foil over the top to keep from burning. When the loaf is finished, immediately turn it onto a rack. Brush melted butter over the top and sides while the loaf is still warm. Allow to cool before slicing.

Salted Honey Maple Butter

Ingredients:

  • 1/4 cup softened, unsalted butter
  • 2 tbsp of honey and/or maple syrup (I used about a tbsp of each)
  • Flaky sea salt, such as Maldon

Method:

Using a handheld mixer, whip butter and honey/maple syrup together until combined. Gently stir in a generous pinch of flaky sea salt (such as Maldon). Serve at room temperature, sprinkled with more flaky sea salt.

Pumpkin Cinnamon Rolls Variation:

Prepare bread through step 4, except don’t divide the dough when you take it out of the fridge. After the hour rest, on a lightly floured surface, roll the dough into a rectangle about 12″ x 16″. Spread the surface with a couple tablespoons of melted butter, followed by a generous amount of cinnamon sugar (I like a 1/4 c sugar to 2 tsp cinnamon ratio). Roll up tightly, cut into 9 pieces, and place in a 8″ x 8″ square pan. Continue with proofing as above; bake at 400F for about 25 min. I spread some maple cream cheese frosting on the top when they were still a little warm, which made the frosting a bit melty (which is how we like it). If you prefer more of a frosting, wait until the rolls are completely cool.

Pork Floss Twist Variation:

This version is inspired by a popular Chinese bakery item – pork floss buns. I decided to roll and twist it like a babka because it’s pretty; plus it’s faster than making individual rolls.

pork floss babka

Ingredients:

  • 1 recipe sourdough pumpkin Hokkaido milk bread, prepared through the first rise (you can roll it directly from the fridge; no need to rest for an hour at room temp)
  • 3 T mayo (preferably kewpie)
  • 1/4 c pork floss
  • 2 scallions, finely chopped
  • 3 T toasted sesame seeds, white or black or a mix of the two
  • 1 egg beaten with 1 tsp water or milk, for egg wash
  • 1 T sugar dissolved in 1 T hot water, for the sugar glaze
  • Additional pork floss, scallions (green parts), and sesame seeds, for garnish (optional)

Method

  1. Grease and line a 9×5 loaf pan with parchment paper, leaving an overhang of at least 2 inches on the long sides (for easy removal later).
  2. On a lightly floured surface (I prefer a Silpat), roll out the dough into a rectangle roughly 10 x 12 in. Spread the mayo evenly over the surface, leaving about a 1/2 inch border on all sides. Sprinkle on the sesame seeds followed by the pork floss and scallions. Turn the dough so a short end is facing you. Brush the opposite end with water, and gently but tightly roll up like a jelly roll. Once rolled up, roll gently back and forth a few times to seal. Transfer the log to the fridge or freezer for about 10 minutes to firm up (optional, but recommended).
  3. If desired, trim about 1/2 an inch off each end (I don’t bother because I don’t mind if the ends don’t have filling; but if you do, trim them). Using a bench scraper or sharp knife, cut the dough in half lengthwise. Place the two sides next to each other, cut side up. Gently pinch the tops together and twist the two together, keeping the cut sides up. Transfer twist to the prepared pan. (See here for a some helpful pictures.)
  4. Cover with plastic and proof for about 6 hours at room temperature. When ready, the dough should look very puffy and have risen to the top of the loaf pan.
  5. When the loaf is nearly finished rising, preheat the oven to 400F and prepare the egg wash. Just before baking, brush the surface lightly with egg wash and sprinkle additional sesame seeds over the surface.
  6. Bake for 20 minutes at 400F, then turn the oven down to 375F, rotate the pan, and bake for about 15 more minutes or until the loaf is well browned and registers at least 195F in the center. If the loaf is browning quickly, tent with foil. (I cover mine for the last 10 minutes or so.)
  7. Immediately after taking the loaf out, brush all over with the sugar glaze. Sprinkle on more pork floss and scallions, if desired. Cool in the pan for 5-10 minutes, then transfer to a wire rack to finish cooling.

New York Style Bagels

topdown-1000
A few years ago, I got into a bread baking kick where I wanted to bake ALL THE BREADS. There’s something therapeutic about kneading dough and watching very basic ingredients transform into loaves of deliciousness. (Needless to say, I could never be gluten-free.) Although most bread recipes take quite a bit of time (this one included), a lot of that is simply waiting. And waiting is probably the hardest part!

I love making individual-sized breads and rolls, so bagels have been on my to-bake list for awhile. I’m happy to report they were a resounding success — my husband says they were the best bagels he’s ever tasted! Crisp exterior with just the right amount of salt and a wonderful chew — perfect with a schmear of cream cheese. The original recipe for these New York style bagels is from one of my favorite bread experts: Peter Reinhart. His Bread Baker’s Apprentice is one of my favorite cookbooks and showed me it was possible to good bread in a home oven. While there is a recipe for bagels in BBA, I chose to use a version from Epicurious because it made a smaller batch and the process was a little streamlined.

As with all Peter Reinhart recipes, there are a lot of detailed instructions; and you’ll definitely want to read the recipe through to the end a couple times to get a feel for the process. However, it really isn’t too difficult — if you’ve made soft pretzels before, you’ll find bagel-making very similar.

Notes:

  • I’ve edited the recipe to reflect the methods and timeline I used. Consult the original for other options.
  • The original recipe in BBA suggests high gluten flour as ideal for bagels. I couldn’t find it easily so I just used bread flour. The bagels were satisfyingly chewy, though I do want to try high gluten sometime.
  • The original recipe says the yield is 6-8 bagels. I like mine smaller so I made 12, and they were still pretty good-sized.
  • The original doesn’t call for an egg wash, but after reading comments online I decided to use one to ensure the toppings would stick well.

New York Style Bagels

Adapted from Peter Reinhart via Epicurious | Makes 6 large or 12 small bagels

Ingredients

Dough

  • 1 tablespoon (0.75 oz / 21 g) barley malt syrup, honey, or rice syrup, or 1 teaspoon (0.25 oz / 7 g) diastatic malt powder
  • 1 teaspoon (0.11 oz / 3 g) instant yeast (Note: I used a heaping tsp of active dry, and it worked fine)
  • 1 1/2 teaspoons (0.37 oz / 10.5 g) salt, or 2 1/2 teaspoons coarse kosher salt
  • 1 cup plus 2 tablespoons (9 oz / 255 g) lukewarm water (about 95°F or 35°C)
  • 3 1/2 cups (16 oz / 454 g) unbleached bread flour

Poaching liquid

  • 2 to 3 quarts (64 to 96 oz / 181 to 272 g) water
  • 1 1/2 tablespoons (1 oz / 28.5 g) barley malt syrup or honey (optional)
  • 1 tablespoon (0.5 oz / 14 g) baking soda
  • 1 teaspoon (0.25 oz / 7 g) salt, or 1 1/2 teaspoons coarse kosher salt

Garnish

  • 1 egg beaten with 1 tablespoon water
  • Any mixture of poppy seeds, sesame seeds, dried onion flakes, dried garlic flakes, and coarse salt

Preparation

Do ahead

  1. To make the dough, stir the malt syrup, yeast, and salt into the lukewarm water. Place the flour into a mixing bowl and pour in the malt syrup mixture. If using a mixer, use the dough hook and mix on the lowest speed for 3 minutes. If mixing by hand, use a large, sturdy spoon and stir for about 3 minutes, until well blended. The dough should form a stiff, coarse ball, and the flour should be fully hydrated; if it isn’t, stir in a little more water. Let the dough rest for 5 minutes.
  2. Resume mixing with the dough hook on the lowest speed for another 3 minutes or transfer to a very lightly floured work surface and knead by hand for about 3 minutes to smooth out the dough and develop the gluten. The dough should be stiff yet supple, with a satiny, barely tacky feel. If the dough seems too soft or overly tacky, mix or knead in a little more flour.
  3. Place the dough in a clean, lightly oiled bowl, cover the bowl tightly with plastic wrap, and refrigerate overnight or up to 2 days.

Baking Day

  1. Remove the dough from the refrigerator 60 to 90 minutes before you plan to bake the bagels. Prepare a sheet pan by lining it with parchment paper or a silicone mat, then misting it with spray oil. Divide the dough into 6 to 12 equal pieces. (A typical bagel is about 4 ounces or 113 grams before baking, but you can make them smaller [I made 12]. If you make more than 6 bagels, you may need to prepare 2 sheet pans.) Form each piece into a loose ball by rolling it on a clean, dry work surface with a cupped hand. (Don’t use any flour on the work surface. If the dough slides around and won’t ball up, wipe the surface with a damp paper towel and try again; the slight bit of moisture will provide enough traction for the dough to form into a ball.)
  2. Use both hands (and a fair amount of pressure) to roll the ball into a rope about 8 inches long on a clean, dry work surface. (Again, wipe the surface with a damp towel, if necessary, to create sufficient friction on the work surface.) Taper the rope slightly at each end and moisten the last inch or so of the ends. Place one end of the dough in the palm of your hand and wrap the rope around your hand to complete the circle, going between your thumb and forefinger and then all the way around. The ends should overlap by about 2 inches. Squeeze the overlapping ends together by closing your hand, then press the seam into the work surface, rolling it back and forth a few times to seal. Remove the dough from your hand, squeezing it to even out the thickness if need be and creating a hole of about 2 inches in diameter.
  3. After 1 hour, check whether the bagels are ready for baking using the “float test”: Place one of the bagels in a small bowl of cold water. If it sinks and doesn’t float back to the surface, shake it off, return it to the pan, and wait for another 15 to 20 minutes, then test it again. When one bagel passes the float test, they’re all ready to be boiled. If they pass the float test before you are ready to boil and bake them, return them to the refrigerator so they don’t overproof. About 30 minutes before baking, preheat the oven to 500°F (260°C) and gather and prepare your garnishes (egg wash, seeds, onions, garlic, and so on).
  4. To make the poaching liquid, fill a pot with 2 to 3 quarts of water, making sure the water is at least 4 inches deep. Cover, bring to a boil, then lower the heat to maintain at a simmer. Stir in the malt syrup, baking soda, and salt.
  5. Gently lower each bagel into the simmering poaching liquid, adding as many as will comfortably fit in the pot. They should all float to the surface within 15 seconds. After 1 minute, use a slotted spoon to turn each bagel over. Poach for another 30 to 60 seconds, then use the slotted spoon to transfer it back to the pan, domed side up. (It’s important that the parchment paper be lightly oiled, or the paper will glue itself to the dough as the bagels bake.) Brush the top with the egg wash and sprinkle on a generous amount of whatever toppings you like as soon as the bagels come out of the water.
  6. Transfer the pan of bagels to the oven, then lower the oven heat to 450°F (232°C).
  7. Bake for 8 minutes, then rotate the pan and check the underside of the bagels. If they’re getting too dark, place another pan under the baking sheet. (Doubling the pan will insulate the first baking sheet.) Bake for another 8 to 12 minutes, until the bagels are a golden brown.
  8. Cool on a wire rack for at least 30 minutes before slicing or serving.

Strawberry Yogurt Bread

strawberrybreadLately I’ve been working a lot of early morning shifts, so I wanted to make something I could easily pack for breakfast. Bonus points for something that could be created from the contents of our fridge (and pantry). My default is our House Banana Bread, but I didn’t have any bananas and thought it would be fun to make something seasonal. BTW, I’m so excited for berry season! (One of the best parts of summer, IMO.)

The result was this Strawberry Yogurt Bread. Since this was envisioned as a breakfast bread, my goal was for something not too sweet and reasonably healthy (minimal oil/butter, some whole grains). I’m quite happy with how this turned out, and three days later it’s almost finished…so that’s that! Next time, I might try walnuts or pecans in place of the nuts, or swapping out the strawberries for blueberries or whatever berry is lurking in the fridge. We had a partial tub of sour cream in the fridge, so that got added in — but if you don’t have that lying around, I think you could easily add another 1/4 cup of oil or replace with more yogurt. Yay flexible recipes!

Strawberry Yogurt Bread

Makes 1 9×5 loaf

Ingredients

  • 1/2 c plain Greek yogurt (I used fat free)
  • 1/4 c sour cream
  • 1/4 c vegetable oil
  • 1/4 c granulated sugar
  • 1/4 c dark brown sugar
  • 2 eggs, room temperature
  • 1 Tbsp vanilla extract
  • 1 1/3 c all purpose flour
  • 2/3 c whole wheat flour
  • 2 tsp. baking powder
  • Âœ tsp. baking soda
  • Âœ tsp. salt
  • 1 c strawberries, chopped
  • 1 handful sliced almonds

Topping:

  • 1 Tbsp. Turbinado Sugar
  • 1 strawberry, sliced

Method

  • Preheat oven to 350°.
  • In a medium bowl, mix yogurt, sour cream, oil, sugar, eggs and vanilla extract until blended.
  • In a separate bowl add flours, baking powder, baking soda and salt. Mix together.
  • Make a well in the center of the flour mixture and slowly incorporate the yogurt mixture, being careful not to overmix.
  • Fold in strawberries and almonds.
  • Spoon batter into a greased and floured 9×5-inch loaf pan. The batter will be thick.
  • Arrange sliced strawberry on top, and sprinkle with turbinado sugar.
  • Bake for 50 minutes to 1 hour, or until a wooden pick inserted into center comes out clean. Cool in pan on a wire rack 10 minutes; remove from pan to wire rack.

House Banana Bread

bananaConfession: I don’t like plain bananas. I don’t like the mealy texture in my mouth, especially when they’re overripe. But I don’t mind the taste of bananas, so I’m happy to indulge in smoothies containing bananas, banana “ice cream” (basically, a frozen banana pureed til it tastes like ice cream), and — of course — banana bread.

My mom’s banana bread was a family favorite, and I thought her recipe would be the one I would end up using in my own home. While I still intend on making her version someday, I’ve found a new House Banana Bread that has quickly become a favorite for our little family. I like that it’s reasonably healthy (no trans-fats and some whole grains), not overly sweet, and adaptable depending on what you’ve got available in your kitchen. Examples of previous adaptations:

  • Dropped the oil to 1/4 c and added a couple spoonfuls of sour cream
  • Added a splash of bourbon
  • Made one batch vegan by simply replacing the egg with another ripe banana. (It worked beautifully — even non-vegan friends gobbled it up!)

An added bonus: everything is mixed in one bowl, and there’s no hand mixer (i.e. extra dishes to clean) needed!

House Banana Bread

Adapted from Smitten Kitchen | Makes one 9×5″ loaf

  • 3 large ripe-to-over-ripe bananas
  • 1 large egg
  • 1/3 cup (80 ml) olive oil
  • 1/3 cup (65 grams) light or dark brown sugar
  • 1/4 cup (60 ml) maple syrup
  • 1 teaspoon (5 ml) vanilla extract
  • 1 teaspoon (5 grams) baking soda
  • 1/2 teaspoon kosher salt
  • 1 teaspoon ground cinnamon
  • 1/4 teaspoon freshly grated nutmeg
  • Pinch of ground cloves or all spice
  • 1 1/2 cups (180 grams) white whole-wheat flour (I usually use half all purpose, half whole wheat)
  • 1/4 cup (50 grams) uncooked millet

Method:

Preheat your oven to 350°F and butter a 9×5-inch loaf pan. In the bottom of a large bowl, mash bananas with a potato masher or the back of a wooden spoon until virtually smooth but a few tiny lumps remain. Whisk in egg, then oil, brown sugar, syrup and vanilla extract. Sprinkle baking soda, salt, cinnamon, nutmeg and cloves over mixture and stir until combined. Sift in flour and stir until just combined, then stir in millet.

Pour mixture into prepared pan and bake until a tester comes out clean, about 40 to 50 minutes. Cool loaf in pan on rack.

Chinese Coconut Cocktail Buns (Gai Mei Bao)

buns1My dad works in Chinatown in Seattle, and when my brothers and I were young he’d occasionally bring home a bright pink box filled with Asian bakery treats. These coconut buns (or gai mei bao) were always a family favorite. I’ve been searching for a recipe for awhile, and when I bit into one of these I knew I’d found it. The best part of gai mei bao is the buttery coconut filling, and this recipe doesn’t just nail the flavor — it allows for a generous amount in each bun. These buns are a great introduction to Asian baked goods; and even the non-coconut fans in my life gladly scarf these down.

There are a lot of steps to this recipe; don’t be intimidated! It all comes together quite easily in an afternoon. If you want to split up the work, make the dough on the first day and proof overnight in the fridge. Take out the dough about an hour before you want to wrap the buns so it can get to room temperature. During that time, make the filling and topping.

buns2
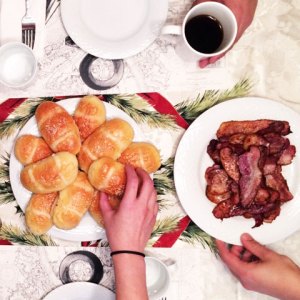
This recipe calls for a couple unusual ingredients (caster sugar and whole milk powder). I found everything I needed at Bulk Barn, though your local Asian market should also carry them. If you have difficulty locating caster sugar (which is basically superfine sugar — NOT powdered), you can whiz regular granulated sugar in the food processor for 10 seconds or so. This recipe also incorporates the tangzhong method, which involves cooking a portion of the flour with liquid in order to give the bread a longer-lasting soft texture. These buns keep well for a few days (I recommend microwaving a few seconds after the first day), and make a delicious breakfast alongside bacon and a cup of coffee.

(Note: I weigh my ingredients — highly recommended! — when making these buns, but have included approximate US equivalents below.)

Chinese Coconut Cocktail Buns (Gai Mei Bao)

Adapted from Christine’s Recipes
Makes 16 buns

Tangzhong Ingredients (will make a little more than needed for this recipe):

  • 50gm / 1/3 c bread flour
  • 250ml / 1 c water (could be replaced by milk, or 50/50 water and milk)

Tangzhong Method:

  1. In a small saucepan, slowly add liquid to flour and mix until smooth. Cook over medium-low heat, stirring constantly with a wooden spoon, whisk or spatula to prevent burning and sticking while you cook along the way.
  2. The mixture will gradually thicken. Once you notice some “lines” appearing in the mixture for every stir you make with the spoon, it’s done. Remove from heat.
  3. Transfer tangzhong to a clean bowl. Cover with a cling wrap sticking onto the surface of tangzhong to prevent from drying up. Let cool. The tangzhong can be used immediately once it cools down to room temperature. Leftover tangzhong can be stored in fridge for a few days. (Note: The chilled tangzhong should return to room temperature before adding into other ingredients.)

Bun Ingredients:

  • 160 ml / 2/3 c milk, warmed (any kind will do)
  • 1 egg, whisked
  • 160 gm / 2/3 c tangzhong (for method, please see above)
  • 6 gm / heaping 1 tsp salt
  • 70 gm / 1/3 c caster sugar
  • 10 gm / 2 tsp whole milk powder
  • 360 gm / 3 c bread flour, plus more if needed
  • 10 gm / 3 tsp active dry yeast
  • 40 gm / 1.5 tbsp butter, melted and cooled to room temperature

Filling Ingredients:

  • 180 gm / 13 tbsp butter, softened at room temperature
  • 80 gm / 2/3 c caster sugar
  • 50 gm / 1/2 c cake flour
  • 60 gm / 4 tbsp milk powder
  • 90 gm / 1 c unsweetened desiccated coconut

Topping Ingredients:

  • 35 gm / 1/3 c cake flour
  • 40 gm / 3 tbsp butter
  • 20 gm / scant 1/8 c caster sugar
  • 1 egg, whisked (with a splash of milk, optional)
  • Sesame seeds for sprinkling on top, to taste

Sugar glaze (optional):

  • 1 tbsp sugar + 1 tbsp water

Method:

  1. In a medium bowl, dissolve yeast in warm milk to activate. Set aside.
  2. In a large bowl, whisk together flour, sugar, salt, and milk powder.
  3. Once the yeast is active and bubbly, add egg and tangzhong and stir to combine.
  4. Make a well in the middle of your dry ingredients. Slowly add the wet to the dry ingredients, incorporating with a spatula or wooden spoon. Dough will be sticky at first. Once in a cohesive ball, add melted butter. Knead until dough becomes smooth and soft, yet pliable (~8 – 10 minutes). If the dough is too sticky and will not come together, add additional flour a couple teaspoons at a time until it does.
  5. Cover dough with cling wrap or a linen towel and set aside in a warm area until doubled in size (or proof in the refrigerator overnight).
  6. While dough is proofing, make filling and topping (see below).
  7. Transfer proofed dough to a clean floured surface. Gently deflate and divide the dough into 16 equal portions. Form into ball shapes. Cover with cling wrap and let rest for 15 minutes.
  8. Roll or press out each portion of the dough into an oval shape. Place a portion of filling in the middle of the oval lengthwise. Fold the bottom third up over the filling, then fold the top third down over the other layers (like a letter). Pinch seam closed. Turn bun over and tuck the ends underneath, pinching to seal.
  9. Transfer bun to a parchement lined baking tray with seam facing down. Repeat this step with the remaining dough portions and fillings. Cover with a plastic wrap and let them proof for about 45 to 60 minutes, or until doubled in size.
  10. Preheat oven to 350F.
  11. Lightly brush whisked egg on the surface of each dough. Pipe two lines of toppings and sprinkle some sesame seeds. Baked for about 15 minutes, or until golden brown. About 5 minutes before finished, remove from oven and brush tops carefully with sugar glaze, if desired. Return to oven. Remove from the oven and brush on a second coat of sugar glaze. Let cool on a wire rack. Enjoy!

Filling:

  1. Combine the butter and sugar well. Sift in in milk powder, cake flour, and coconut. Mix to combine.
  2. Form filling mixture into a long tube. Divide into 16 equal portions. Set aside. (I like to put in the fridge while dough is proofing to make it easier to handle.)

Topping:

  1. Mix the softened butter with sugar well. Sift in the cake flour and combine well.
  2. Transfer into a ziplock bag and snip off a corner. Pipe over the tops of buns after egg wash.