Cranberry Lime Shortbread Tart + Cookbook Giveaway!

cranberry lime shortbread tart
Every year around this time, I start thinking about edible gifts to make for the holiday season. I remember a few people who would annually gift us an assortment of homemade treats. We would look forward to receiving those gifts every year, and it’s a goal of mine to come up with my own traditional holiday treat box. I’m still a little ways off, but hopefully this year I’ll get a little closer with the help of my friend Fanny Lam’s new cookbook Oh Sweet Day!: A Celebration Cookbook of Edible Gifts, Party Treats, and Festive Desserts!

Fanny and I have been internet foodie friends for a couple years now (she runs a lovely blog and posts delicious treats on her Instagram page); so when I received a copy of her cookbook, I knew it would packed with delightful yet approachable recipes perfect for sharing with loved ones. As Fanny writes in her introduction, “A lovely dessert doesn’t require a demanding recipe. It needs love! It needs personality! I hope this book will inspire you to go beyond your comfort zone, try something new, play with abandon, share with your loved one, make it a tradition, and let it be a memory.”

Trying out Fanny’s famous shortbread cookies and cheesecakes are high on my to-bake list, but the first thing I knew I had to make was this gorgeous cranberry lime shortbread tart — a lovely press-in shortbread crust filled with a velvety, vibrant curd. And let’s not forget that showstopping natural color! This dessert would be perfect for Thanksgiving dinner — it’s tangy, creamy, and bright, the perfect foil for a rich meal. Plus, it can be made ahead of time — always a bonus on busy cooking days!

cranberry lime shortbread tart 2

Update: Winner of the giveaway is Quyen Weng. Congrats!I’m happy to be giving away one copy of Oh Sweet Day!: A Celebration Cookbook of Edible Gifts, Party Treats, and Festive Desserts to one of my readers! To enter, comment below with your favorite edible gift to give or receive. For more entries, you can also follow me on Instagram and enter on the related photo. Deadline to enter is Sunday, October 28, 2018, at 5pm EST. Winner will be announced here and on Instagram. Open to residents of USA and Canada.
oh sweet day cookbook cover

cranberry lime shortbread tart from side

A few notes:

  • I decorated the cranberry lime shortbread tart with a bit of melted white chocolate (about 25 grams), tinted the faintest of pink with a bit of cranberry powder. I transferred the melted chocolate to a ziplock bag and cut a tiny hole in one of the corners, then quickly piped it on. In her recipe, Fanny suggests topping the tart with whipped cream and lime zest (instructions included below).
  • I didn’t have quite enough lime juice, so I used about half lime and half orange juice (both freshly squeezed). The orange juice gave the curd a beautiful deep pink color; if you use all lime juice as the recipe states the color will be just as vibrant and beautiful but probably a little lighter.
  • The curd can be made up to 5 days ahead and refrigerated with a piece of plastic pressed against the surface to keep a skin from forming. The tart shell can also be made a couple of days ahead and kept covered at room temperature. Assemble the tart the day you’ll be serving — just make sure to allow a full 4 hours for it to chill so you can get nice clean slices.
  • For clean slices, use a sharp knife cleaned with hot water after each cut.

Cranberry Lime Shortbread Tart

Makes one 9-inch tart

Ingredients

For the Vanilla Shortbread Crust

  • 113g (1/2 cup) unsalted butter, softened
  • 40g (1/4 cup) powdered sugar
  • 1/2 Tbsp. vanilla extract
  • 125g (1 cup) AP flour
  • 1/4 tsp. kosher salt

For the Cranberry Lime Curd

  • 454g (4 cups) cranberries, fresh or frozen
  • 200g (1 cup) granulated sugar
  • 1/2 cup lime juice
  • 2 tsp. lime zest

  • 1/2 cup water
  • 4 large egg yolks
  • 1 Tbsp. cornstarch
  • 28g (2 Tbsp) unsalted butter, softened

For the Whipped Cream Topping

  • 1/2 cup heavy whipping cream, cold
  • 1 Tbsp. powdered sugar
  • 1/4 cup fresh cranberries

  • 1 tsp. lime zest

Method:

For the Vanilla Shortbread Crust

  1. Preheat oven to 350 F. Grease a 9-inch tart pan with a removable bottom.
  2. In the bowl of a standing mixer fitted with a paddle attachment, beat the butter and powdered sugar on medium speed until light and fluffy, about 5 minutes.
  3. Mix in the vanilla until combined.
  4. Sift in the flour and salt. Mix on low speed until just incorporated.
  5. Press the mixture onto the bottom and sides of the prepared pan.
  6. Freeze the crust for 10 minutes.
  7. Bake the crust for 15 to 20 minutes. Let cool completely.

For the Cranberry Lime Curd:

  1. Cook the cranberries, 1/2 cup sugar, lime juice, lime zest, and water on medium heat for 10 minutes, stirring occasionally, until the cranberries are popped and release their juice.
  2. Pulse the mixture in a food processor.
  3. Blend in the egg yolks, remaining sugar, and cornstarch until combined.
  4. Cook the mixture again on low heat while whisking for 10 minutes until thickened.
  5. Remove from heat. Whisk in the butter until combined.
  6. Strain the mixture to make it smooth.
  7. Let cool to room temperature.
  8. Fill the cooled crust with the cranberry lime curd.
  9. Refrigerate the tart until set, at least 4 hours.

For the Whipped Cream Topping:

  1. Whisk the cream and sugar until firm peaks form. Transfer the whipped cream to a piping bag with a star tip.
  2. Remove the tart from the pan.
  3. Pipe the whipped cream along the edges of the tart.
  4. Top with cranberries and lime zest.

Recipe from Oh Sweet Day!: A Celebration Cookbook of Edible Gifts, Party Treats, and Festive Desserts, reprinted by permission of Front Table Book, an imprint of Cedar Fort, Inc.

Buckwheat Plum Berry Crumble

This post is sponsored by Weight Watchers Canada. Find out more about the WW Freestyle program, which encourages the freedom to eat the foods you love while nudging you towards healthier choices using the SmartPoints system. As always, all ideas and opinions expressed here are my own.

I love a good rustic fruit dessert. Galettes, crisps, crumbles, pies — yes, please and thank you, to all of them. Homey and unfussy, they’re the kind of thing you want on a summer evening after a casual cookout with good people — a la mode, of course.

If you’ve been around these parts long, you probably know I like incorporating whole grains into baked goods when I can — not just for added health benefits but also for flavor! The nutty, toasty tones of whole grains pair especially well with fruit and give simple crumbles such as this one extra depth. In this plum berry crumble I’ve used buckwheat and oats; but you could easily substitute spelt, kamut, rye, or whole wheat if that’s what you have on hand. If whole grains aren’t your thing you can use all AP, but I encourage you to try some new flours if you have the opportunity! It really opens up a whole new world of flavors.

This crumble is very adaptable — substitute whatever fresh summer fruit you have on hand. You can also make the topping ahead of time and store it in the fridge or freezer — a great thing to have on hand for impromptu BBQs. And this is quite wonderful cold from the fridge with a bit of yogurt, should you want this to double as breakfast. (I always do.)

crumble a la mode

Buckwheat Plum Berry Crumble

Serves 9

Ingredients

For the buckwheat crumble:

  • 40g buckwheat flour
  • 80g AP flour
  • 30g rolled oats
  • 40g walnuts, chopped
  • 50g light brown sugar
  • 25g turbinado sugar
  • 1.5 tsp ground ginger
  • 1/4 tsp kosher salt
  • 100g cubed, unsalted butter, room temperature

For the plum berry filling:

  • 3 c plums, chopped
  • 3 c mixed berries, chopped if large
  • Juice of half a lemon
  • 2-3 Tbsp arrowroot starch (Use 3 if your fruit is particularly juicy or if you have a large proportion of strawberries)
  • 50g granulated sugar (or to taste)
  • A few turns of black pepper
  • Pinch of salt

Method

  1. Preheat the oven to 375F and lightly grease an 8×8 pan or 9-inch pie plate.
  2. First, make the crumble. In a medium-sized bowl, whisk together all the dry ingredients. Add the cubed butter and, using your fingers, rub it into the dry ingredients until crumbs form. The crumbs shouldn’t be uniform in size — a variety of large and small pieces are good to have. Refrigerate while you prepare the filling (topping can be refrigerated for several days, or frozen for longer storage).
  3. Combine the fruit in a large bowl. Add the lemon juice and stir gently to combine. Whisk together the remaining ingredients, pour over the fruit, and stir gently to combine. Scrape filling into prepared pan.
  4. Sprinkle the crumble mixture evenly over the fruit, squeezing some of it together to form larger pieces so you have a nice variety of crumb sizes.
  5. Bake until the filling is bubbling, 35-45 minutes. Allow to cool slightly before serving.

Almond Creme (Almond Jello)

This post is sponsored by Weight Watchers Canada. Find out more about the WW Freestyle program, which encourages the freedom to eat the foods you love while nudging you towards healthier choices using the SmartPoints system. As always, all ideas and opinions expressed here are my own.

While visiting my family over the holidays, I spent some time going through my mom’s recipe box, looking for gems from my childhood. Almond Creme popped up, and I couldn’t believe I hadn’t thought to ask my mom for this recipe sooner! It’s no bake and quite light, perfect for warm summer days when no one feels like turning on the oven.

My family calls this dessert “Almond Jello”, but the texture reminds me more of panna cotta or silken tofu — smooth and creamy, and not at all rubbery. It’s a little too soft to unmold, so if you want to be fancy I’d suggest chilling it in individual glasses or ramekins. (Personally I’m lazy and just chill it in one dish and scoop it into bowls.) We ate this with fruit cocktail or canned mandarin oranges when I was a kid, but these days I prefer it with fresh fruit — sliced strawberries or mangoes would be my top choices.

Almond Creme

Serves 4-6

  • 1 1/2 c water, divided into two 3/4 c portions
  • 1 pkg powdered gelatin (7 g)
  • 75g granulated sugar
  • 1 1/4 c evaporated milk
  • 1/2 tsp vanilla extract
  • 1/2 tsp almond extract
  • Sliced fresh fruit (strawberries or mangoes are my favorite), to serve

Method:

  • Prepare an 8×8 square pan (or similar sized pan, or six small ramekins).
  • Measure 3/4 c cold water into a small bowl. Sprinkle gelatin evenly over cold water. Let stand while you prepare the other ingredients.
  • Combine evaporated milk, remaining 3/4 cup water, and sugar in a small saucepan. Bring just to the boil over medium heat, stirring frequently to dissolve the sugar. Remove from heat and add gelatin mixture, stirring to dissolve the gelatin completely. Add vanilla and almond extract and stir to combine.
  • Pour mixture into prepared pan(s). If any bubbles form on the surface, use a silicone spatula to push them to the edge of the dish and they should pop. Refrigerate until set, at least 4 hours (preferably overnight).
  • Served with sliced fruit.

Apple Frangipane Galette with Salted Caramel

Thanks to moving, prepping for baby #2, and some unusually mild Canadian weather, this summer has disappeared just like that. I can’t say I’m sad about it. While there’s nothing like summer produce, fall is by far my favorite season. I love the crisp mornings, changing colors, and chunky sweaters.

Oh, and apple pie.

I don’t usually make my first apple dessert until a little later in the year. But last week I took my little guy to a nearby farm, and to my surprise they had a couple varieties of apples ready for picking. I couldn’t resist taking home a small bag full of Zestars! (yes, the “!” is an official part of its name), which I’d never tasted before but read were good for eating and baking. And they are lovely — mildly tart and crisp with a firm texture that holds up well in the oven.

I didn’t quite have enough apples for a full-on pie, but these babies were just begging to be baked up in a buttery crust. (OK, maybe that was me begging.) And so this galette was born.

I know galettes are supposed to be unfussy and casual; and the many components of this one may be off-putting. But seriously. I think this is one of the best apple desserts I’ve ever made, and it really looks harder than it is. You could definitely use store bought salted caramel sauce if you wanted, but it’s so delicious and easy to make yourself that you really won’t regret cooking up a batch. (Plus, this recipe makes more than enough for the galette so you’ll have extra for stirring into coffee, drizzling over ice cream, or just eating from the jar.) I’m also having a moment with frangipane — not only is it just plain delicious, but in the case of a galette it acts as a moisture barrier, keeping the bottom crust beautifully crisp.

Speaking of the crust — it may sound weird to use sourdough starter in a pastry recipe, but trust me, it’s delicious! I really do believe sourdough adds a depth of flavor to pie crust; and if your starter is healthy and fresh you shouldn’t notice any tang. But if you don’t have sourdough starter lying around, you can certainly use your favorite pie crust recipe instead.

Apple Frangipane Galette with Salted Caramel

Serves 6-8

Ingredients

For the sourdough crust (makes enough for 2 galettes):

  • 300g flour (I use 100g whole grain, 200g AP)
  • 227g unsalted butter, cold and cubed
  • 1 Tbsp granulated sugar
  • 1 tsp kosher salt
  • 200g ripe sourdough starter, cold (100% hydration)
  • 2 Tbsp cold milk or water

For the salted caramel sauce:

  • 200g granulated sugar
  • 1/2 c heavy cream, at room temperature
  • 54g unsalted butter, at room temperature
  • 1 tsp flaky sea salt, such as Maldon

For the frangipane:

  • 95g almond flour
  • 50g granulated sugar
  • 20g flour (AP or whole grain)
  • 30g unsalted butter, at room temperature
  • Pinch of salt
  • Splash of vanilla extract
  • 1 large egg, at room temperature

For the fruit:

  • 3 medium-large baking apples, cored, peeled, and thinly sliced
  • Juice of 1/2 a lemon
  • 50g brown sugar
  • 1 Tbsp AP flour
  • Pinch of cinnamon
  • 1/4 c salted caramel sauce

To finish:

  • 1 Tbsp cream
  • 1 Tbsp coarse sugar
  • Salted caramel sauce

Method

For the sourdough crust:

  1. In a large bowl, whisk together the flour, sugar and salt. Add the cubed butter and smash into flat pieces with your fingers, tossing to distribute evenly. Don’t overwork — you want to keep the butter pieces fairly large (nickel to quarter size) for flakiness.
  2. Use a fork to whisk the cold milk/water and starter together. Pour the wet mixture over the butter-flour mixture and, using a silicone spatula or wooden spoon, gently toss to combine. The dough will seem shaggy at first, but should hold together if you squeeze it. If not, dribble in additional cold water/milk a teaspoon at a time (tossing after each addition) until it does.
  3. Using the heel of your hand, take handfuls of dough and smear them up the side of the bowl (this “fraisage” method creates streaks of butter that makes for an extra flaky crust). Once all the dough has been smeared, divide the in half and gently press and flatten each portion into a circle. Wrap one half in plastic and chill or freeze for a future galette or pie. If your remaining dough feels at all soft or melty at this point, wrap it in plastic and chill for about 10 minutes before proceeding (you want it cold, but not hard).
  4. On a piece of floured parchment paper or Silpat, roll the dough into a circle about 12-14 inches in diameter, about 1/4-in thick. Roll from the middle and rotate the dough about 1/4 turn between rolls to help keep the shape and even thickness. Flour your pin and dough as needed to avoid sticking. When you’re done rolling, transfer the dough still on the parchment/Silpat to a sheet pan, cover with plastic, and chill for at least 2 hours before assembling the galette.

For the salted caramel sauce:

  1. In a medium saucepan, melt the sugar over medium-high heat. Swirl the pan occasionally for even heating.
  2. When the sugar reaches a copper color, remove it from the heat and add the salt and butter, whisking continuously. Be careful as the mixture will bubble up! Return the pot to medium-low heat and whisk for a minute or so.
  3. Still continuously whisking, add the cream in a slow, steady stream — again, taking caution as the mixture will bubble and rise. Continue whisking over medium-low heat to thicken the mixture slightly.
  4. Remove from the heat and transfer to a heat-safe container. Once cool, cover and refrigerate. Sauce will thicken as it cools. Rewarm in the microwave for about 20 seconds for easy pouring.

For the frangipane:

  • Whisk together the flours, sugar, and salt in a small bowl. Rub the butter in with your fingers until the mixture resembles wet sand. Add the egg and vanilla and mix with a spatula to combine.

For the fruit:

  • Juice the lemon into a medium bowl and add the apple slices, tossing to coat. Add the sugar, flour, and cinnamon and toss to combine.

To assemble:

  1. Preheat the oven to 375F. Remove the chilled pastry from the fridge. Spread the frangipane evenly in a circle in the center of the pastry, leaving a 1.5-2 inch border. Starting from the outermost edge of the frangipane, arrange the apple slices in concentric, overlapping circles. Fold the edges of the pastry over the filling to create a crust. Refrigerate the galette for 15-20 minutes to firm the pastry.
  2. When the pastry is firm, brush the crust with the heavy cream and sprinkle with coarse sugar. Drizzle 1/4 c of salted caramel sauce over the apples (not on the crust). Bake in the preheated oven for 40-45 minutes, rotating the pan halfway through, until the pastry is a deep, golden brown and the apples are bubbling. Transfer to a cooling rack. Serve at room temperature with extra salted caramel sauce.

Cherry Berry Almond Crumble

cherry berry almond crumble

Every summer I tend to have a fall-back dessert: something quick and simple that can easily be adapted to whatever fresh fruit is hanging out in the fridge. Previously there’s been cobbler and fruit crumb bars; and this year it’s a good old fashioned crumble.

cherries

It’s about as unfussy and simple as it gets: toss fruit with a little sugar and spice, and mix up a quick, buttery crumb to sprinkle on top. No softening of butter or mixer needed. Eat with yogurt for breakfast or ice cream for dessert, warm or cold. Repeat.

cherry berry almond crumble 2

Cherry Berry Almond Crumble

Makes one 8×8 pan

Ingredients

For the filling:

  • ~6 c cherries and/or berries, pitted and sliced/halved if necessary (I used equal parts sour cherries, sweet cherries, and strawberries)
  • 60-100g / 1/3-1/2 c sugar, depending on sweetness of fruit and preferably a mix of brown and granulated
  • Pinch of salt
  • Dash of vanilla extract
  • Juice of 1/2 a lemon or lime
  • 3 Tbsp arrowroot or tapioca starch

For the almond crumble:

  • 120g / 1 c AP flour
  • 4T almond flour
  • 113g / 8 Tbsp butter, cold and diced
  • 1/2 tsp salt
  • 1/2 tsp cinnamon
  • 50g / 1/4 c brown sugar
  • 25g / scant 2 Tbsp granulated sugar

Method

  1. Preheat oven to 375F.
  2. Stir together all filling ingredients in a medium bowl. Set aside while you prepare the crumble.
  3. In another medium bowl, whisk together all crumble ingredients except for the butter. Add the butter and, using your fingers, rub the butter into the dry ingredients until the mixture begins forming crumbs. Squeeze the mixture together to form large clumps.
  4. Pour the filling into an 8×8 square pan. Sprinkle the crumble evenly over the top.
    Bake until the filling is bubbling and the top is golden brown, about 35-45 minutes. Allow to cool for about an hour before serving, if you can.

Rhubarb Frangipane Tart

rhubarb frangipane tart before bake

I know, I know. Rhubarb is so April/May and I should be baking all the berry pies and strawberry shortcakes right about now. But to be honest, I saw my first good batches of rhubarb just a week ago. Maybe it’s the Canadian weather, but I find we’re a month or two behind everyone else when it comes to produce. Strawberry picking usually starts at the end of June, and peaches come up right around Labor Day. The good news is that if rhubarb season is long over where you’re living, this versatile frangipane tart base adapts well to other seasonal fruits. Apricots, nectarines, raspberries, figs — whatever looks good in your area, use it!

This shortcrust tart dough is adapted from Dorie Greenspan. I love how it comes together so easily and doesn’t shrink on me. Whereas I like making my pie crusts by hand, I typically use a food processor for tart dough. I like my tart crusts to be more crispy than flaky, so I’m not as concerned with big butter pieces and keeping all the ingredients super cold. That being said, if you don’t have a food processor or prefer not to use one, you can mix this dough by hand too (just do it as you would pie dough). Definitely don’t skip the chilling and freezing steps; it’s what keeps the dough from shrinking! At any rate, if you do have some cracking and shrinking, you can use any leftover dough to do a quick patch job after you take the foil off during the pre-bake step.

rhubarb frangipane tart after bake

Rhubarb Frangipane Tart

Makes one 9-inch tart

Ingredients

For the shortcrust pastry

  • 188g / 1.5 cups AP flour
  • 63g / 1/2 c icing sugar
  • 1/4 tsp kosher salt
  • 128g / 9 Tbsp very cold unsalted butter, cut in 1-inch cubes
  • 1 egg, lightly whisked

For the frangipane

  • 115g / 4 ounces / 1 stick unsalted butter, at room temperature
  • 100g / 1/2 cup granulated sugar
  • 2 large eggs, at room temperature
  • 130g / 1 cup almond flour
  • 2 tsp vanilla extract
  • Generous pinch of salt

To finish

  • ~1/4 c strawberry or raspberry jam
  • 1/2 lb rhubarb, trimmed and cut into ~2-3in. pieces
  • Honey or confectioner’s sugar, for serving

Method

For the shortcrust pastry

  1. Place the flour, icing sugar, and salt in the bowl of a food processor. Pulse a few times to combine.
  2. Scatter the butter over the top of the flour mixture. Pulse several times until the butter is cut in (you want irregular pieces ranging in size from a pea to a quarter).
  3. Add the egg in stages, pulsing after each addition. Once the egg is added, pulse in 10 second increments until the dough forms clumps (you don’t want it completely smooth). Once the dough reaches this stage, dump it onto a clean countertop or silpat and gently knead until the dough comes together. Place the dough between two Silpats (or pieces of plastic wrap) and roll it out into a roughly 12-inch circle of about a 1/4″ thickness. Refrigerate for at least an hour.
  4. Lightly grease a 9-inch tart tin. Remove the chilled dough from the fridge and let it stand for about 5 minutes, just to make it pliable. Turn dough into the tart tin and trim the overhang to about 1/2 an inch. Fold the overhang in to reinforce the edges. If there are any tears or cracks, use some of the extra dough to patch it up. Pierce the dough all over with a fork, then wrap in plastic and freeze for at least 30 minutes.
  5. Preheat the oven to 375F. Grease a piece of foil and fit it firmly over the chilled tart dough. Put the tart tin on a baking sheet and bake for 20-25 minutes. Remove the foil (if the crust has risen at all press it down gently with the back of a spoon). If any cracks have formed, use some of the reserved dough to patch it. Bake crust for another 5-10 minutes, or until firm and golden brown. Allow to cool completely before filling.

For the frangipane

  1. Beat butter and sugar together on high speed until fluffy, about 1 minute.
  2. Add the eggs one at a time, beating the first in thoroughly and scraping down the bowl before adding the second.
  3. Stir in the almond flour, followed by the vanilla and salt (either by hand or on the lowest mixer setting).

Finish the tart

  1. Preheat oven to 375F. Spread the jam evenly over the bottom of the cooled tart shell. Spread the frangipane over the jam using an offset spatula. Arrange the rhubarb pieces on top and gently press them into the frangipane.
  2. Bake the tart for 35-45 minutes, or until frangipane is puffed and golden. Serve at room temperature or chilled, with a sprinkling of icing sugar or a drizzle of honey. Leftovers keep well in the fridge for several days.

Cardamom cake with roasted strawberry jam

cardamom cake

This cake. Oh, this cake. I spent a lot of time imagining the different components before actually baking it, and was so happy that it just worked. It’s actually one of the layers of my brother’s upcoming wedding cake, where my guidelines were cardamom plus something fruity. The cake part was pretty easy — just a slight tweak to my favorite vanilla cake was all it took. For the filling I finally settled on a very lightly sweetened strawberry jam. Strawberries + balsamic is a favorite in our house, and I think it matches well with that woodsy cardamom flavor. Next time I’m making a double batch of jam — it’s so delicious, whether spread between cake layers, stirred into yogurt, or just eaten out of the jar. Not to mention easy — just mix and roast!

This white chocolate mascarpone buttercream is a grown-up version of cream cheese frosting. Normally I don’t care much for white chocolate, but here it offsets the tanginess of the cheeses nicely. (Definitely don’t skimp on the quality of chocolate, though! Good chocolate will make or break this frosting.) The mascarpone mellows out the flavor, though you can replace with more cream cheese if you prefer. This frosting spreads and pipes well if used right away too — and no icing sugar means no grittiness! Winning.

cardamom cake top

Cardamom Cake with Strawberry Jam and White Chocolate Mascarpone Buttercream

Makes one 3-layer, 6-inch cake

Ingredients

For the Cardamom Cake
Adapted from Cake Paper Party

  • 100g all-purpose flour
  • 113g cake flour
  • 1 tsp baking powder
  • 1/4 tsp baking soda
  • 1/2 tsp salt
  • 1 tsp freshly ground cardamom
  • 225g granulated sugar
  • 2.5 large eggs, at room temperature (I crack an egg into a bowl to weigh it, beat it with a fork and add half to my other eggs. The rest gets used in omelets or for an egg wash.)
  • 170g / 6 oz. sour cream, at room temperature
  • 1/2 Tbsp vanilla bean paste
  • 113g / 1/2 cup unsalted butter, very soft
  • 4 Tbsp neutral vegetable oil

For the Roasted Strawberry Balsamic Jam

  • 1 pound strawberries, tops trimmed and halved (frozen is fine; keep whole and no need to defrost)
  • 3 Tbsp sugar
  • 1.5 Tbsp balsamic vinegar
  • 1 tsp vanilla extract

For the White Chocolate Mascarpone Buttercream

  • 255g / 9oz best quality white chocolate, chopped
  • One 8oz package regular or light cream cheese, softened
  • 4oz mascarpone cheese, room temperature
  • 113g / 1/2 c unsalted butter, softened
  • 1 Tbsp fresh squeezed lemon juice (or to taste)

To Finish

Method

For the cardamom cake:

  1. Preheat oven to 350F. Line the bottoms of three 6-inch cake pans with parchment paper and grease and flour the pans.
  2. In a small bowl, whisk together eggs, sour cream and vanilla bean paste. Set aside.
  3. Combine flours, baking powder, baking soda, salt, cardamom, and sugar in a medium bowl and mix on low 30 seconds to blend.
  4. Add butter and vegetable oil to flour mix and mix on low for 30 seconds to moisten dry ingredients. The mixture should look like wet sand.
  5. Add half of egg mixture and beat on medium-high for 1 minute. Add the remaining egg mixture and beat on low for 30 seconds more.
  6. Divide evenly between the prepared pans and smooth the tops with an offset palette knife. Bake for about 25-35 minutes until the cake is well done (the top should feel springy to the touch and a toothpick inserted into the center should come out clean). Cool 10-20 minutes in pan and then turn out to a cooling rack. Cool completely before frosting; wrap in two layers of plastic wrap and refrigerate/freeze if using more than a day later. (I definitely recommend chilling the cakes completely before assembling.)

For the Roasted Strawberry Balsamic Jam:

  1. Combine all ingredients in a roasting pan and stir to combine well. Allow mixture to sit for 15-30 minutes to macerate. Meanwhile, preheat oven to 275F.
  2. Roast for 1.5-2 hours, stirring occasionally. The mixture should look dark and syrupy.
  3. Remove from the oven and allow to cool before transferring to a jar and refrigerating. I let the jam cool completely in the fridge and puree it in a food processor before using as cake filling. You can strain the jam beforehand if you like a thicker jam, though I didn’t find this necessary. If you choose to strain, definitely reserve the syrup for brushing on cake layers / adding to drinks / drizzling on ice cream!

For the White Chocolate Mascarpone Buttercream:

  1. Place white chocolate in a microwaveable bowl.
  2. Microwave at 15 second intervals, stirring after each interval, until chocolate is mostly melted. Before chocolate is completely melted, stir until smooth allowing the residual heat to finish the melting process. Set aside and allow to cool slightly.
  3. Place softened cream cheese, mascarpone and butter in a large bowl and beat on low speed until creamy.
    Beat mixture on low speed until creamy and well combined.
  4. Add melted white chocolate and continue mixing on low to incorporate. Scrape down the side of the bowl as necessary.
  5. Add in lemon juice and beat until smooth. Use immediately.

To Assemble:

  1. Tint your buttercream and level cakes if desired. Place one cake round on a cake board and brush generously with simple syrup.
  2. Pipe a dam of buttercream around the edge and fill the center with about 1/4 c strawberry jam. Repeat process until all layers have been used, placing the last layer cut side down.
  3. Spread an even layer of buttercream over the entire cake to seal in the crumbs. If you’re doing the ruffle pattern as pictured, I suggest doing a thick crumb coat (i.e. try not to have cake layers visible). Chill cake for 20-30 minutes to set the frosting.
  4. Complete frosting as desired. I followed this tutorial for the ruffle pattern. For the top, I tinted the buttercream slightly darker and used an open star tip to pipe rosettes and stars, then finished with a light dusting of white sprinkles.

cardamom cake 2

Banana Bundt Cake with Chocolate Sour Cream Ganache Drizzle

banana bundt
Summer is almost upon us and that means BBQs, picnics, and backyard get-togethers! While I love me a good layer cake, sometimes you just want a simple, unfussy dessert to take to a potluck; and this is is just that sort of cake. This delicious banana cake is a snap to whip up, and it’s totally fine to make ahead — it actually gets more moist after an overnight rest. Do use your blackest, deadest bananas for this recipe for the best flavor. Typically I keep a bag of overripe bananas (peeled) in the freezer and just defrost what I need in the microwave.

I made this cake in my 6-Cup Nordic Ware Heritage bundt pan. It’s my favorite shape because it’s dramatic and doesn’t really need any embellishment; but chocolate + banana is always a good idea so this cake got a little chocolate sour cream ganache drizzle. If you have a 10-12 cup bundt pan, double all the ingredients.

Banana Bundt Cake with Chocolate Sour Cream Ganache Drizzle

Serves 8

Ingredients

For the Banana Bundt Cake:

  • 210g all purpose flour
  • 1 tsp baking soda
  • Heaped 1/4 tsp kosher salt
  • 113g butter, room temperature
  • 200g / 1 cup sugar
  • 1 large egg, room temperature
  • 115g / 1/2 cup sour cream, room temperature
  • 1/2 tsp pure vanilla extract
  • 325g / about 2 large very ripe mashed bananas

For the Chocolate Sour Cream Ganache:

  • 40g good quality chocolate, milk or dark, chopped
  • 40g sour cream

Method

For the Banana Bundt Cake:

  1. Preheat the oven to 350F. Grease and flour a 6-cup bundt pan.
  2. In a medium bowl, whisk together the flour, baking soda, and salt. Set aside. In a small bowl or jug, whisk together the sour cream, vanilla, and bananas. Set aside.
  3. In a large bowl, cream together the butter and sugar on medium-high speed until pale and creamy (about 5 minutes). Add the egg and mix in thoroughly.
  4. On low speed, mix in the dry ingredients until just combined. Gently mix in the sour cream/vanilla/banana mixture until you have a smooth batter.
  5. Pour into the prepared bundt pan and level the top with an offset palette knife. Bake for 45-55 minutes, or until a skewer inserted into the center comes out clean. If the cake is browning too quickly, cover it with a piece of foil to prevent scorching.
  6. Cool on a wire rack for 10-15 minutes before turning out of the bundt pan. Allow cake to cool completely before glazing.

For the Chocolate Sour Cream Ganache:

  1. Combine the chocolate and sour cream in a heatproof bowl and heat over a bain-marie. Whisk constantly until the chocolate is melted and the mixture is smooth. Alternatively, you can melt the chocolate in 20 second increments in the microwave, then whisk in the sour cream. Just ensure that the sour cream is at room temperature; otherwise, the ganache may curdle.
  2. Allow to cool at room temperature slightly before drizzling over the cake.

Brown Butter Rice Krispie Treats

rice krispie treat stack

Here’s the thing: I don’t mind complicated recipes. Since I break a lot of my baking into multiple days, a long list of directions doesn’t usually put me off. Plus, there’s something really satisfying about seeing larger projects come to life!

But sometimes you just need simple, 30-minutes-no-oven-required back pocket recipes; and this is one of those gems. These are not your back-of-the-box Rice Krispie treats. These are BROWN BUTTER RICE KRISPIE TREATS. But good news, they’re practically just as easy as the original recipe. What makes them special?

  • Brown butter. If you’re going to melt the butter anyways, why not take a few extra minutes and brown it for that extra delicious nutty edge? Oh yeah, this also calls for double the butter compared to the original recipe, because you only live once (don’t worry, it’s not so much that they’re greasy).
  • More marshmallows. WAY more marshmallows. And some are left unmelted for an extra surprise. Nothing is worse than a dry Rice Krispie Treat.
  • Thick, bakery-style pieces. I like my treats tall, so I make them in an 8×8 pan (I do the same thing with brownies). Double the recipe if you’re making this in a 9×13 pan; no thin and wimpy Rice Krispie treats here!
  • Salt. One of my pet peeves is under-salted baked goods. Especially when you’ve got all the sweetness from the marshmallows in there — you need a little bit of salt to round out the flavor. You might as well throw a dash of vanilla in there while you’re at it.

OK, enough talking. Here we go!

rice krispie treats close up

Brown Butter Rice Krispie Treats

Makes 9 – 16 treats, depending on how big you like them

Ingredients

  • 113g / 8 Tbsp unsalted butter
  • 425g / 10 cups mini marshmallows, divided
  • 1/2 teaspoon coarse kosher or sea salt
  • Dash of pure vanilla extract
  • 160g / 6 cups crispy rice cereal, such as Rice Krispies (about half a 12-ounce box)

Method

  1. Line an 8×8 pan with foil. Lightly butter or oil the foil for easy removal. Measure out all your ingredients — this is a quick and simple recipe, but once you start, you do need to move quickly!
  2. In a large pot over medium-low heat, brown the butter. It will melt, foam, turn clear gold, then finally start browning (and smelling nutty). Stir frequently with a silicon spatula or wooden spoon, scraping the sides and bottom of the pan as needed.
  3. When the butter has browned, take the pan off the heat and add the salt, vanilla, and 8 cups of marshmallows. Stir constantly until the marshmallows are melted and you have a smooth mixture. If the residual heat from the butter isn’t enough to melt the mallows completely, turn the heat back to low.
  4. Add the cereal and stir until evenly coated with the marshmallow mixture. Stir in the remaining two cups of mini marshmallows.
  5. Immediately scrape the mixture into the prepared pan and, using a greased silicon spatula or a piece of greased parchment/wax paper, press it firmly into an even layer. Let cool completely at room temperature before cutting into squares.
  6. Store in an airtight container and eat within 3 days.

rice krispie treats in hand

rice krispie treats marshmallows

Fall Cliche Cake for a Virtual Pumpkin Party!

fall cliche cake

About this cake.

We were faced with a fridge full of stuff people enamored with fall buy: canned pumpkin, apple cider, cream cheese. Meanwhile, I was in a baking mood but couldn’t decide what to make: apple cider donuts? Pumpkin bundt cake? Cream cheese danishes? Well, yes to all, but my waistline doth protest.

So one evening, in a rare burst of spontaneous baking, I set out to make a cake using only what we had in our fridge. Normally my layer cake baking is a 2+ day affair, mainly because I have an active toddler who only naps once a day. But fueled by coffee and inspiration from a little too much Great British Baking Show, I was determined to churn something out.

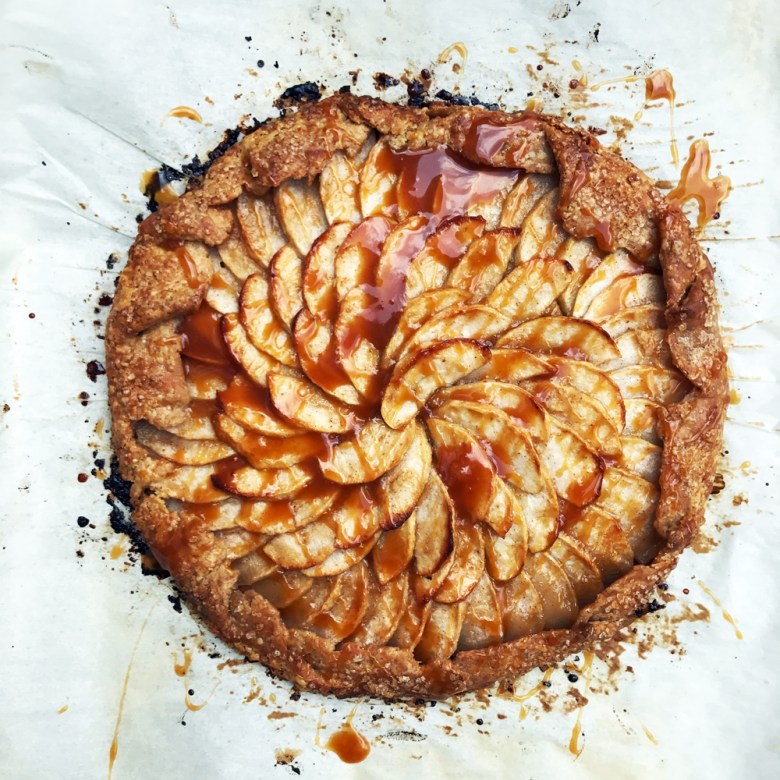
The result? I present to you the Fall Cliche Cake: pumpkin spice cake layers glued together with maple cream cheese frosting, drizzled with mulled apple cider caramel sauce. This is the cake version of what you order when you can’t decide between a Pumpkin Spice Latte and a Caramel Apple Cider and you hope your significant other orders one so you can actually have a bit of both. This is what you want to eat while admiring the fall foliage and wearing your boots and chunky sweater. All in all, this took me about 4 hours start to finish (not including the scrub-down of the kitchen, sadly), and I couldn’t be more pleased with the result. In fact, this cliche may become our new tradition.

inside3

This cake was also created with a party in mind — a Virtual Pumpkin Party hosted by bloggers Sara at Cake Over Steak and Aimee at Twigg Studios. It’s an honor to be able to participate in this take-over-the-internet-with-all-things-pumpkin recipe extravaganza with so many talented bloggers. I just wish the party were in person so I could try all the amazing dishes. Please check out the entire recipe list at the bottom of this post!

A few recipe notes:

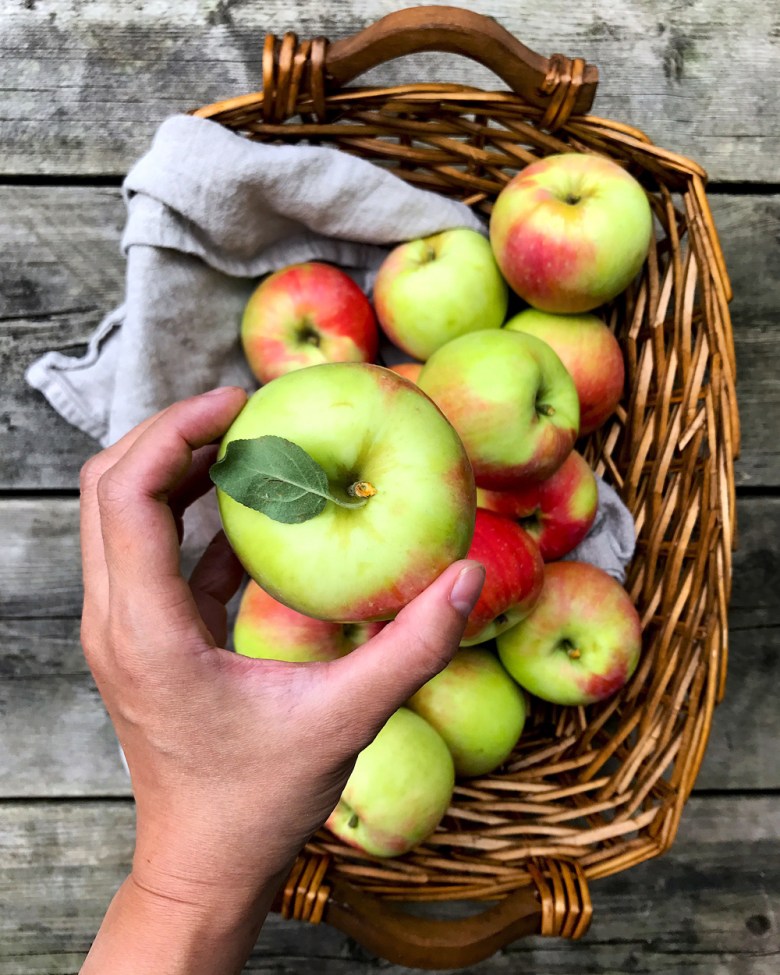
  1. If you don’t have mulled cider sitting around in the fridge, you can make this with regular apple cider. Or, steep your cider with a cinnamon stick, a few cloves, a couple star anise, a few cardamom pods, and a chunk of nutmeg for as long as you can, then proceed with the recipe. Alternatively, you could add a pinch of cinnamon to the caramel when you add the vanilla.
  2. Use COLD cream cheese for the frosting. I know, I thought the same thing…room temperature everything! But the cold cream cheese actually doesn’t take that much longer to incorporate, plus it helps the frosting keep its body a bit better instead of becoming a soft, unworkable mess.
  3. Layer cakes are much easier to assemble when the cake is completely cooled, preferably chilled. Normally I make the layers a day ahead and chill them overnight, but in this case I just stuck them, uncovered, in the freezer for about 10 minutes after they’d come to room temperature. Worked great.
  4. There is enough frosting here to scantily ice a 3-layer, six inch cake. If you want to go fully frosted, double the recipe.

Fall Cliche Cake

Makes one 6-inch, 3-layer cake | Cake adapted from Sweetapolita / Frosting adapted from Call Me Cupcake

Ingredients

For the pumpkin spice cake:

  • 1 cup (200 g) granulated sugar
  • 1/2 cup (100 g) packed light brown sugar
  • 3 large eggs, room temperature
  • 3/4 cup (180 ml) grapeseed oil
  • 1 teaspoon pure vanilla extract
  • 1 1/4 cups (300 ml) pumpkin puree (I used canned)
  • 2 cups (260 g) all-purpose flour
  • 1 Tablespoon baking powder
  • 2 teaspoons ground cinnamon
  • 1 teaspoon ground ginger
  • 3/4 teaspoon nutmeg
  • 1/4 teaspoon allspice
  • 3/4 teaspoon kosher salt

For the maple cream cheese icing:

  • 150 g unsalted butter, softened
  • 1 1/4 c (180g) powdered sugar
  • 200 g cream cheese, COLD and cubed
  • 1-2 Tbsp maple syrup

For the apple cider caramel sauce:

  • 2 cups apple cider (preferably mulled)
  • 1 cup (200 g) light brown sugar, packed
  • 1 Tbsp corn syrup
  • 4 Tablespoons unsalted butter
  • 1/2 cup heavy cream
  • 1 teaspoon vanilla extract
  • 1 generous pinch sea salt

To finish:

  • Chopped pecans
  • Pumpkin seeds
  • Fresh thyme branches

Method

For the Pumpkin Spice Cake Layers:

  1. Spray three 6-inch round cake pans with cooking spray and line the bottoms with parchment paper rounds. Spray and flour the pans.
  2. In the large bowl, beat the sugar and eggs together on medium-high speed until light and fluffy, about 5 minutes. Add the oil and vanilla and beat on medium until combined, about 30 seconds.
  3. Add the pumpkin and mix until combined, about another 30 seconds.
  4. In a medium bowl, whisk together the flour, baking powder, cinnamon, ground ginger, nutmeg, allspice, and salt, and with the mixer on the lowest speed, gradually add to pumpkin/egg mixture.
  5. Evenly distribute batter into the prepared pans (weigh them if possible with digital kitchen scale for about 370 g per pan), smooth with a small offset palette knife and place in the center of the middle rack of the oven, about 2 inches apart. Bake until a knife or skewer inserted into the center comes out clean, about 20-25 minutes.
  6. Let pans cool on a wire rack 10 minutes. Invert cakes onto rack and cool them completely.

For the Maple Cream Cheese Icing:

  1. Beat butter until pale, about 2 minutes.
  2. Add powdered sugar and continue beating until frosting is very pale and fluffy, about 3-5 minutes.
  3. Add cream cheese and beat until just smooth. Beat in maple syrup a tablespoon at a time, tasting after the first to check the flavor. Add the second if necessary. Use immediately.

For the Apple Cider Caramel Sauce:

  1. Add the apple cider to a medium sauce pan over medium-high heat and bring to boil. Allow the apple cider to cook down to about 1/3 cup.
  2. Add the brown sugar and corn syrup and stir just until the sugar is dissolved. Heat without stirring until the mixture reaches 240F on a candy thermometer.
  3. Remove from heat and stir in butter, heavy cream, and vanilla. Return to cook over medium heat, stirring occasionally, until the caramel thickens and coats the back of a wooden spoon.
  4. Remove from heat and add a pinch of sea salt; stir to combine. Allow to cool for about 15 minutes before transferring to a heat-safe jar.
  5. Store at room temperature for 3 days or in the fridge for several weeks.

To assemble:

  1. Level your cakes (this is easiest to do when they’re completely cool; I like to stick them in the freezer for about 10-15 minutes right before assembly). Choose a layer for the bottom and put bottom-side down on a cake board.
  2. Spread about a 1/2 cup of icing evenly over the layer, followed by a generous drizzle of caramel sauce. Repeat with the next two layers, ending with just a layer of frosting on the top. Add a thin layer of icing over the entire cake. Refrigerate for 15-20 minutes to set.
  3. When the cake is chilled and the caramel is your desired drizzle consistency (test a drip on the side to see), drizzle the caramel on the sides and spread a layer on top. I like to use a squirt bottle for the side drips, but you can use a spoon or just pour over the top and nudge it to the edges with a palette knife if you’re brave.
  4. Decorate with chopped pecans, pepitas, and thyme branches, if desired.

Virtual Pumpkin Party!

Cake Over Steak • Quick Pumpkin and Kale Risotto + Arancini

Twigg Studios • Sausage Stuffing Baked in a Pumpkin

Donuts, Dresses and Dirt • Pumpkin Spice Latte Popsicles

Cloudy Kitchen • Pumpkin Cake with Vanilla German Buttercream

Vegetarian Ventures • Smoky Pumpkin & Black Sesame Hummus

Eat Boutique • Pumpkin Scallion Dumplings

A Little Saffron • Pumpkin Stuffed Shells

Two Red Bowls • Pumpkin & Maple Caramel Baked French Toast

Wallflower Kitchen • Mini Pumpkin & Cinnamon Sugar Donuts

Wit & Vinegar • Pumpkin Butterscotch Banana Split

Style Sweet CA • Pumpkin Creme Brulee Cake

Nommable • Pumpkin Biscuits with Mushroom Thyme Gravy

With Food + Love • Cinnamon Raisin Pumpkin Seed Bread

Hortus • Creamy Roasted Squash Soup + Pumpkin Risotto

Sevengrams • Vegan Pumpkin Pie Ice Cream

Jojotastic • 1 Pumpkin, 2 Ways: Pumpkin Trail Mix & Dog Treats

Grain Changer • Pumpkin Spice Baked Oatmeal

Girl Versus Dough • Pumpkin Cranberry Flax Crisps

Earthy Feast • Pumpkin Grits + Pumpkin Home Fries + a Fried Egg

Harvest and Honey • Truffled Pumpkin Papardelle Alfredo with Frizzled Sage

Tasty Seasons • Pumpkin Chocolate Chip Cake

Broma Bakery • Pumpkin Butter Pop Tarts

Tending the Table • Roasted Pumpkin and Barley Salad

The Sugar Hit • Super Soft Pumpkin Cinnamon Rolls

Delicious Not Gorgeous • Waffles with Spiced Pumpkin Butter and Brown Sugar Walnut Crumble

Taste Love and Nourish • Pumpkin Bread Pudding

The Green Life • Pumpkin Spice Chocolate Chunk & Hazelnut Skillet Cookie (Vegan)

Foolproof Living • Pumpkin Creme Fraiche Pasta with Sage

The Monday Box • Pumpkin Mini Bundt Cakes

Design Crush • Pumpkin Bourbon Hot Toddy

The Road to Honey • Pumpkin Pie & Chocolate Layer Cake

My Name is Yeh • Roasted Pumpkin with Yogurt and Hazelnut Dukkah

Give Recipe • Orange Chocolate Pumpkin Bread

Heartbeet Kitchen • Magic Vegan Pumpkin Pie Fudge

Beard and Bonnet • Marbled Pumpkin Muffins

Eat Within Your Means • Vegan Pumpkin Blender Muffins

Snixy Kitchen • Pumpkin Tapioca Pudding with Candied Pumpkin Seeds

Ruby Josephine • Moroccan Sweet Pumpkin + Beef Tagine

Lab Noon • Pasta Bake with Roasted Pumpkin and Saffron Sauce, Pistachio and Goat Cheese

An Edible Mosaic • Pumpkin Spice Chia Seed Pudding

Hey Modest Marce • Mascarpone Pumpkin Pie

Inspired By the Seasons • Pumpkin Applesauce Smoothie

CaliGirl Cooking • Pumpkin Praline Cinnamon Rolls with Spiked Cream Cheese Glaze

Sally’s Baking Addiction • Pumpkin Cream Cheese Bundt Cake

Well and Full • Spicy Chipotle Pumpkin Hummus

Appeasing a Food Geek • Cheese Fondue Stuffed Roasted Pumpkin

SweetPhi • Pumpkin Chili Biscuit Bake

Warm Vanilla Sugar • Buttermilk Pumpkin Doughnuts

Mademoiselle Poirot • Cinnamon-Pumpkin Mousse on Honey Panna Cotta topped with Hazelnut Brittle

Heart of a Baker • Pumpkin Sticky Buns with Vanilla Bean Frosting

Flourishing Foodie • Massaman Curry with Pumpkin and Chickpeas

Ginger & Toasted Sesame • Pumpkin Jeon

Lindsay Jang • Best Ever DIY Pumpkin Spiced Latte

Fix Feast Flair • Hokkaido Pumpkin + Sage Mac and Gouda

Will Frolic for Food • Pumpkin Kale Patties with Coconut Cilantro Rice

A Couple Cooks • Pumpkin Pecan Baked Steel Cut Oats

Vermilion Red • Pumpkin Pie Souffle

  1. Britnell • Vegan Pumpkin Pie

Displaced Housewife • Brown Butter Pumpkin Donuts

Sweet Gula • Pumpkin Cake with Cream Cheese Frosting

La Pêche Fraîche • Pumpkin and Condensed Milk Cakes

Kitchen Konfidence • Pumpkin Ricotta Gnocchi with Rosemary Brown Butter Sauce

Loves Food, Loves to Eat • Savory Pumpkin Bread Pudding

Kale & Caramel • Goat Cheese & Sage-Stuffed Pumpkin Challah

Okie Dokie Artichokie • Pumpkin Chorizo Chili with Sweet Potatoes + Pinto Beans

Salted Plains • Easy Pumpkin Bread

Liliahna • Chicken Legs with Pumpkin and Tortellini

TermiNatetor Kitchen • Whole Wheat, Pumpkin & Brown Sugar Brioche

Vermilion Roots • Sweet Rice Dumplings with Pumpkin

Celebrate Creativity • Pumpkin Mini Cheesecake Tarts

Serendipity Bakes • Pumpkin Chocolate Cheesecake

So Much Yum • Vegan Maple-Glazed Pumpkin Spice Doughnuts

The Brick Kitchen • Pumpkin, Pecan & White Chocolate Ice Cream Sandwiches

Lisli • Pumpkin Pie Cake

Cookie Dough and Oven Mitt • Pumpkin Pie Dip

Fig+Bleu • Pumpkin Granola

The Speckled Palate • Pumpkin Caramel Cream Cheese Swirl Blondies

Cook Til Delicious • Fall Cliche Cake (Pumpkin Spice Cake / Maple Cream Cheese Frosting / Apple Cider Caramel Sauce)

Floating Kitchen • Chicken and Pumpkin Chili

The Wood and Spoon • Pumpkin Pecan Cake with Burnt Sugar Frosting

Fork Vs Spoon • Pumpkin Streusel Muffins

Lemon & Vanilla • Pumpkin and Coconut Caramel Flan

Dunk & Crumble • Pumpkin Chocolate Icebox Cake

Chicano Eats • Pumpkin Butter Pan de Muerto

On the Plate • Pumpkin Pancakes, Salted Caramel & Pecans

Rough Measures • Cosy Pumpkin Spice Latte (Caffeine and Dairy Free)

Brewing Happiness • Pumpkin Ginger Breakfast Cookies

A Butterful Mind • Pumpkin Cheesecake with Vanilla Whipped Cream

The Little Loaf • Pumpkin Oatmeal Chocolate Chunk Cookies

Fork to Belly • Pumpkin Gnocchi

The Little Epicurean • Chocolate Hazelnut Pumpkin Pie

Bourbon and Honey • Spicy Roasted Pumpkin with Honey and Feta

What to Cook Today • Spicy Pumpkin Noodle Soup

Food by Mars • Pumpkin Pie (Grain-Free, Diary-Free)

The Bojon Gourmet • Pumpkin Butterscotch Pudding

Oh Honey Bakes • Pumpkin Cake with Gingersnap Toffee

Long Distance Baking • Layered Pumpkin Cheesecake

The Jam Lab • Pumpkin Madeleines Dipped in White Chocolate

The Lemon Apron • Pumpkin Gingerbread Loaf with an Olive Oil Glaze

Sun Diego Eats • Thai Pumpkin & Sticky Rice Cakes

A Cozy Kitchen • Pumpkin Chai Scones with Black Tea Glaze

A Cookie Named Desire • Pumpkin Shrubs

Eating Clean Recipes • Vegan Pumpkin Chia Pudding

Kingfield Kitchen • Vegan Fresh Pumpkin Soup

Drink and Cocktail Recipes • Pumpkin Dirty Chai

The Pig & Quill • Pumpkin Sage Cannelloni (Dairy-Free)

My Lavender Blues • Pumpkin, Banana & Olive Oil Bundt Cake

Betty Liu • Pumpkin + Pear Butter Baked Melty Cheese

Happy Hearted Kitchen • Cinnamon Roasted Pumpkin with Tahini Yogurt + Hazelnut Dukkah

InHappenstance • Pumpkin Scones with Maple Butter

Live Eat Learn • Pumpkin Gingerbread Hot Cocoa