Labneh Panna Cotta

labnehpannacotta
I really like experimenting in the kitchen, but I’m also kinda cheap. The contents of my fridge inspire many of my food experiments (and dinner plans). Lately I’ve been on a labneh kick. And as much as I really like labneh on toast, sometimes you need to mix it up a bit. I’ve also been on a cake and cake decorating streak. And while I love the process of making fancy layer cakes, sometimes you want a dessert that takes less than 10 minutes and zero oven time. This, my friends, fits that bill.

This panna cotta is on the thicker, more pudding-y side. It’s also quite lightly sweetened, making it breakfast-appropriate in my book. You can dress this up or down as you like. I think panna cotta is improved with some contrasting textures, so I like adding toasted nuts, granola, or even some Momofuku cornflake crunch. Some fresh fruit is also excellent; or even just a drizzle of honey. Let your fridge inspire you.

Labneh Panna Cotta

Serves 4-6 | Adapted from A Brown Table

Ingredients

  • 1 cup milk, low or full fat (I used soy)
  • 80 g / 4 tablespoons honey + extra for drizzling, if desired
  • 7 g / 1 packet gelatin
  • 6 tablespoons cold water
  • 1/2 tsp vanilla extract or paste
  • 1 lb labneh, lightly whipped

Method:

  1. Place the milk in a small saucepan along with the honey and vanilla and bring it to a simmer over medium-high heat. While the milk is heating, sprinkle the gelatin in a small mixing bowl containing the cold water. Allow the gelatin to bloom for 5 minutes.
  2. Once the milk has come to a simmer and the honey is dissolved, remove from heat and add the bloomed gelatin, stirring to combine.
  3. Pour the milk mixture into a large mixing bowl containing the labneh. Whisk to combine evenly, ensuring no lumps remain. Divide the mixture among serving glasses, or into a 9-inch pie plate. Refrigerate for at least 2 to 4 hours until firm.

Raspberry Lime Pie

full-topped
One of my pet peeves is having little bits of ingredients taking up space in the fridge. It seems like I always have a touch of sauce or cream or frosting leftover and I feel wasteful throwing it away. The bright side is that this forces me to get creative with dessert flavor combinations, and I end up making things I wouldn’t have otherwise considered.

This pie, for example.

swirlOriginally I’d planned on just making plain old key lime pie, as it’s one of David’s favorites. (Confession: I’ve never been able to easily find key limes, so I always use plain old limes…someday, someday.) But I had a couple spoonfuls of raspberry sauce leftover from one cake, and a handful of crushed pistachios from another. And also some sour cream from…something. So in they all went. I’m quite happy with the end result — it’s a nice springy twist on an old standby.

I’ve never been very happy with my graham cracker crusts — they’ve either shrunk or bled butter. This adaptation from the Momofuku Milk Bar cookbook has been the most successful to date. I’ve also found freezing the crust before baking helps minimize shrinkage, and you can use a piece of parchment paper to gently “fix” slumps or unevenness while the crust is still warm.

Raspberry Lime Pie

Makes one 9-inch pie | Adapted from Milk and Smitten Kitchen

Graham Pistachio Crust Ingredients

  • 190 g / 1.5 c graham cracker crumbs
  • 35 g / 1/4 c crushed raw unsalted pistachios
  • 20 g / 1/4 c milk powder
  • 14 g / 1 tbsp brown sugar
  • 5 g / 1 tsp kosher salt
  • 55 g / 4 tbsp butter, melted
  • 55 g / 1/4 cup heavy cream

Method:

  1. Preheat oven to 350F. Combine dry ingredients in a medium bowl and toss to evenly distribute.
  2. Whisk butter and heavy cream together. Add to the dry ingredients and toss to evenly distribute. The mixture should hold its shape if squeezed tightly in the palm of your hand.
  3. Press evenly into a greased 9-inch pie pan. Freeze crust until hard, about 10 minutes.
  4. Bake for 8-10 minutes in preheated oven. If crust slumps during baking, use a piece of parchment paper to gently reshape it while still warm. Allow crust to cool completely on a wire rack before filling.

Raspberry Lime Filling Ingredients

  • 1 1/2 tablespoons finely grated lime zest
  • 4 large egg yolks
  • 1 14-ounce (396-gram) can sweetened condensed milk
  • 2/3 cup (155 ml) fresh lime juice (from about 1 dozen tiny key limes or 4 persian/regular limes)
  • 2 T seedless raspberry preserves or jam

Method:

  1. Preheat oven to 350F. Zest limes into the bottom of a medium bowl until you have 1 1/2 tablespoons. Beat zest and egg yolks with an electric mixer until pale and thick, about 5 minutes.
  2. Add sweetened condensed milk and beat until thickened again, about 3 minutes more.
  3. Squeeze zested limes until you have 2/3 cups juice. Whisk into yolk mixture until combined. Pour filling into graham crust.
  4. Using a spoon or squeeze bottle, drop dots of raspberry preserves on top of filling. Use a toothpick or knife to swirl into the filling.
  5. Bake pie for 10-15 minutes, until set but not browned on top at all. Let pie cool completely before adding topping (ideally, chill at least a couple hours in the fridge).

Topping Ingredients

  • 3/4 – 1 c heavy whipping cream
  • 1 to 2 tablespoons powdered or granulated sugar, to taste
  • 1 to 2 tablespoons sour cream (optional)
  • Lime zest and crushed pistachios (optional garnish)

Method:

In a medium bowl, beat cream until soft peaks are formed. Add sugar and sour cream, if using, and beat until desired thickness (do not overbeat). Spread over top of chilled pie. Ideally, pie should be chilled at least another 2 to 3 hours with the cream on top so that it can fully set before you take a slice.

slice

Chinese Swiss Roll

sliced swiss roll

Sometime last year, I thought it would be fun to make a Swiss roll. Even though my family didn’t eat much cake when I was growing up, we did all enjoy these roulade cakes from the local Asian supermarket — usually plain, but also coffee or chocolate flavored. If you’ve never had one before, Swiss rolls are a light and fluffy sponge cake usually rolled up with whipped cream. They are a nice, not-too-sweet dessert that pairs well with coffee or tea.

Anyways, my first Swiss roll attempt was a flop. The cake broke when I flipped it out of the pan. It tasted ok, though the bake was a bit uneven (probably because I didn’t rotate the pan and slightly underbaked it). I didn’t try again until last week, when I was looking for a recipe to use up some whipping cream from my last cake.

Second attempt: also a fail. The cake made it out of the pan in one piece, but it stuck to the paper and broke when I tried to roll it.

At this point, it became less about actually wanting to eat Swiss roll and more about wanting to BEAT MY NEMESIS. I read a bunch of Swiss roll recipes and tips and decided to try a different baking method. I was really careful about measuring out all the ingredients ahead of time and prepping the various baking utensils and surfaces. And…success! The cake came out in one piece and actually resembled a roll when all was said and done. I tried again a couple days later just to make sure it wasn’t a fluke, and it worked again! Very exciting.

untrimmed swiss roll

Some things I learned:

  • Measure out all your ingredients ahead of time and read the instructions through to the end a few times. The batter isn’t hard to put together, but it does require you to move quickly so your batter doesn’t collapse.
  • I highly recommend weighing your ingredients for best results.
  • Watch the cake carefully at the end, checking every 30 seconds or so when it’s near the end. Because it’s so thin, it can go from underdone to overdone just like that. That being said, make sure the cake is completely done before you take it out our you’ll end up with gross mushy cake.
  • I’ve tried to explain the rolling process below, but it’s easier to watch it. This video from Fine Cooking is helpful.

uncut swiss roll

Chinese Swiss Roll

Serves 8

Ingredients

Batter A

  • 3 large egg yolks, at room temperature
  • 50g / 1/2 c caster sugar
  • 1/4 tsp salt
  • 85g / 1/3 c milk, at room temperature
  • 55g / 1/4 c neutral oil
  • 1/4 tsp vanilla extract
  • 100g / 1 c cake flour, sifted
  • 1 tsp. baking powder

Batter B

  • 3 large egg whites, at room temperature
  • 1/8 tsp. cream of tartar
  • 50g / 1/2 c caster sugar

Other

  • 1-2 tbsp icing sugar

Filling & Garnish

  • 1/2 c whipping cream
  • 3-4 tsp caster sugar or to taste
  • Icing sugar, optional garnish

Method

  1. Preheat the oven to 350F.
  2. Line a 13″ x 9″ inch baking pan with parchment paper. Set aside.

Batter A:

  • In a large mixing bowl, whisk together egg yolks, caster sugar and salt into a thick batter. Pour in milk and mix well. Pour in oil and vanilla extract and mix thoroughly. Sift in cake flour and baking powder into the batter and stir slowly into a thick batter. Do not overmix.

Batter B:

  • In a clean mixing bowl, beat egg whites and cream of tartar on high speed until foamy. Slowly add in the caster sugar and beat to stiff peaks.

Combine:

  1. Fold in 1/3 of the egg whites into the egg yolk batter. When they are almost combined, add another 1/3 of the whites. When almost combined, add the final 1/3. Fold gently, but thoroughly. When you are finished, the batter should be a uniform color with no streaks of white remaining.
  2. Immediately pour batter into prepared oven and spread evenly with a knife. drop the tin on the counter several times to pop and large air bubbles. Bake in the pre-heated oven for 15-17 minutes, rotating pan once after 10 minutes, or until the cake is springy to the touch and a tester comes out clean.
  3. While the cake is baking, prepare a clean linen tea towel (larger than the cake) and measure out some icing sugar.
  4. As soon as the cake is done, run a knife around the edges. Allow to cool for a minute or two. Sift the icing sugar over the top of the cake. Spread the tea towel over the cake, and place a large sheet pan or cutting board on top of the tea towel. Invert the cake onto the towel. Gently remove the parchment paper. Starting on a short end, gently but tightly roll the cake up with the towel inside. Allow cake to cool completely inside the towel.
  5. When the cake is cool, beat the whipping cream and sugar to taste to stiff peaks. Gently unroll the cake and remove the towel. On one short end of the cake (whichever looks more curled), use a sharp knife to score three parallel lines about 1/2 a centimeter apart (this will help the rolling process). Spread the cream evenly over the cake, leaving about an inch around the edges so the filling doesn’t seep out. Starting from the scored end, gently roll the cake back up. Transfer seam side down to a serving plate, and refrigerate at least an hour before serving.

To serve

  • Slice the ends off the cake and dust with additional icing sugar if desired.

Another Chocolate Cake

full
This past Valentine’s Day, I asked David what kind of cake he wanted. He told me, “I like that chocolate raspberry one.” I like that one too, but was also itching to try some new recipes. So I made another chocolate raspberry cake, this time with Swiss meringue buttercream (more on that later), espresso ganache, and more of that raspberry sauce from the original cake, because it’s just that good.

I never baked layer cakes until last year. My family wasn’t really into cake (often we’d just turn a carton of ice cream into birthday “cake” by decorating it with candy and sprinkles), so there wasn’t much reason to learn. While I think I’m still more of a pie person in general, I’ve started to find real enjoyment in making layer cakes. In a weird way it reminds me of planning a themed concert, which was one of my favorite parts of running a chamber music collective. We’d start out with a theme, and then try to think of different ways of representing that theme. Contrast was important, but all the components still had to make sense together. Other considerations included timing, instrumentalists available, and audience.

With layer cakes, you choose a general cake flavor, then the contrasting / complimenting ones. You have to plan when to make each component so that that everything will be ready at the same time. In my very limited experience, I’ve learned that it’s a 3 day process for me — bake the cake layers first so they can chill/freeze, then make all the components (frosting, filling, glazes etc.), and finally assemble everything and decorate. I’m sure it could be done in a single day, but I usually don’t have that much uninterrupted time; plus, it keeps me from burning out and getting lazy (which is when I tend to forget / drop things).

Anyways, if you got through all that cheesy analogy stuff, wow — thanks. You’re probably a good friend of mine or a family member, ha. So about this cake…

I’d been wanting to bake this particular chocolate cake for awhile as I’ve seen it raved about on The Vanilla Bean Blog, Hummingbird High, and a few other baking blogs. Also, it has coffee, which is never a bad thing in my book.

The consensus: this cake is a keeper. It’s moist and not too sweet, with a beautiful dark color from the cocoa + coffee combo and a rich chocolatey flavor. The other cake has a finer crumb and a nice buttery mouth feel, but this one is more moist. Let’s just say I’d make both of them again.
chocodrips

Buttercream: frosting is my least favorite part of cake (unless it’s cream cheese frosting) because it’s often so cloyingly sweet. So, I wanted to try making Swiss meringue buttercream, because it seems to be the preferred frosting for a lot of pro bakers — main reasons being it’s easy to work with and not too sweet. However, it’s also a bit finicky to make because you have to dissolve the sugar in the egg whites and make sure all the ingredients are the right temperature before combining everything. There are lots of articles about “how to fix buttercream” and “why your buttercream broke” etc. etc., so I knew I was in for a bit of a challenge.

Honestly, I didn’t have a lot of fun making this buttercream. I don’t own a stand mixer, so it took a LOOOOOOONG time to beat the egg white mixture with my handheld until it was cool enough to add the butter. I also made it the night before decorating (because that was when el bebe was asleep for the night and I’ve learned not to attempt lenghty-ish processes during the day), so I had to re-beat it the next day anyways. I found it difficult to keep at a good temperature for decorating because our kitchen was a smidge warm, plus I did get interrupted a few times by the infant child. So I had to keep refrigerating and re-beating and it got a little annoying. In the end it turned out ok — it was much less sweet than American buttercream. There are a ton of recipes out there, so next time I might try one with a higher proportion of egg whites to butter because I’d like to get it even lighter and silkier. Also, I’d probably borrow a stand mixer. And make it the day of decorating. Basically I need more practice and experimentation.

Ganache/Glaze: SO GOOD, and so easy. I had to freeze the leftovers so I wouldn’t eat it all with a spoon. I basically let it sit while I wrestled with the buttercream. Definitely not high maintenance. If I ever feel like making truffles, I’d fill them with this ganache.

top

Chocolate Cake with Raspberry Buttercream and Espresso Ganache

Makes one 2-layer, 8-inch cake

Ingredients

  • 2 cups (200g) cake flour
  • 2 cups (400g) granulated sugar
  • 3/4 cup (69g) good cocoa powder (I used dutch processed)
  • 2 teaspoons baking soda
  • 1 teaspoon baking powder
  • 1 teaspoon kosher salt
  • 1 cup buttermilk, shaken (I substituted 1T vinegar plus enough milk to equal 1 cup)
  • 1/2 cup vegetable oil
  • 2 large eggs, at room temperature
  • 1 teaspoon vanilla
  • 1 cup freshly brewed hot coffee (I used dark roast)

Method

  1. Preheat the oven to 350F. Grease two 8×2 inch round cake pans. Line with parchment paper, then grease and flour the pans.
  2. Sift the flour, sugar, cocoa, baking soda, baking powder and salt into a large bowl and whisk to combine.
  3. In a medium bowl, combine the buttermilk, oil, eggs and vanilla. With a mixer on low speed, slowly add the wet ingredients to the dry. With the mixer still on low, add the coffee and stir just to combine, scraping the bottom of the bowl with a rubber spatula.
  4. Divide the batter between the prepared pans (it will be very liquidy) and bake for 35-40 minutes, until a cake tester comes out clean. Cool in the pans for 30 minutes, then turn them out onto a cooling rack and cool completely, removing parchment paper. Note: these cakes are quite delicate, so I recommend refrigerating and then freezing the layers overnight before decorating so they will be easier to handle.

Buttercream

Use your favorite vanilla buttercream (this is a good start) with a few spoonfuls of raspberry sauce and/or food coloring to get your desired shade of pink.

Espresso Ganache / Glaze

Makes one cup

Ingredients

  • 6 ounces bittersweet chocolate, broken into 3/4 -inch pieces
  • 3/4 c (6 oz) heavy cream
  • 1/2 teaspoon instant espresso powder

Method

Put the chocolate in a heatproof bowl. In a small saucepan, heat the cream until bubbles appear around the edge; remove from the heat (this can also be done in the microwave). Add the espresso powder and stir to dissolve. Pour the hot cream over the chocolate and let stand for several minutes. Stir the chocolate until melted and smooth. Let the ganache stand at room temperature until firm enough to spread.

Raspberry Sauce

Make one portion of the recipe here.

To Assemble

  1. Allow cake rounds to chill completely. Level if necessary.
  2. Set one layer on a cake round or platter and spread with a layer of ganache (you can be fairly generous, though reserve at least 1/3 cup or so if you want to glaze the top and sides), topped with a layer of raspberry sauce (leave a thin border around the edge so your fillings don’t seep out from the weight of the top layer).
  3. Set the other layer on top; spread a thin layer of buttercream over the top and sides. Chill for at least half an hour before spreading a heavier layer of frosting over the entire cake.
  4. Chill again for at least half an hour before adding ganache drips along the sides and spreading it over the top (you will need to gently heat the ganache to get it to a glaze consistency — this was about 20 seconds in the microwave for me). Style Sweet CA has a great tutorial on drippy cakes.
  5. Garnish as desired (I used fresh raspberries, cocoa nibs, and crushed pistachios). Chill if not serving right away, but serve at room temperature with plenty of raspberry sauce. Cake keeps well in the refrigerator for several days.

Strawberry Rhubarb Cobbler

cobblerOne of my favorite parts of spring is the opening of local farmer’s markets. We have two near our house, one of which started up a couple weeks ago. Last week rhubarb was for sale, and I bought some not quite knowing what I’d do with it. After perusing our fridge contents — part of a tub of sour cream, strawberries, butter, half a lemon — I settled on a cobbler with a sour cream biscuit topping. It was a lovely sweet-tart spring dessert, perfect with a scoop of vanilla ice cream.

Strawberry Rhubarb Cobbler

Serves 6-8

Topping Ingredients:

  • 1 1/2 cups all-purpose flour
  • 3 tablespoons granulated sugar
  • 1 1/2 teaspoons baking powder
  • 1/2 teaspoon kosher salt
  • 6 tablespoons (3/4 stick) chilled unsalted butter, cut into 1/2″ pieces (I like to cut butter into pieces and freeze for about 1/2 an hour before making dough)
  • 1/2 cup plus 1 tablespoon sour cream

Filling Ingredients:

  • 3 1/2 cups (about 1 1/2 pounds, untrimmed) rhubarb, in 1/2-inch thick slices
  • 3 1/2 cups (about 1 pound) strawberries, hulled and sliced
  • 1/2 cup granulated sugar
  • 1/4 cup light or dark brown sugar
  • 1 tablespoon lemon juice
  • 1/2 teaspoon kosher salt
  • 1/4 cup quick-cooking tapioca

Method

Preheat oven to 375°F. Whisk 1 1/2 cups flour, 3 tablespoons sugar, baking powder, and salt in a large bowl. Add butter; using your fingertips, incorporate until only pea-size lumps remain. Gently mix in sour cream. Knead in bowl until a biscuit-like dough forms, 5-7 turns (do not overmix).

Stir together filling ingredients in a large bowl. Pour into an 9-inch pie dish or divide among six 6-ounce ramekins. Tear biscuit topping into quarter-size crumbles; scatter over fruit.

Bake cobbler until juices are thick and bubbling and topping is cooked through and deep golden brown, 20-25 minutes for ramekins or 45-50 minutes for pie dish. Let cool for at least 1 hour.

Mini Chocolate and Red Velvet Cakes

minicakes2I love the idea of mini cakes because they’re so cute and festive and don’t require a cupcake pan. I’ve had my eye on these rainbow mini cakes on Molly Yeh’s blog. I decided to try my hand at a simpler, two-layer version (mostly because I was too lazy to go out to buy matcha powder for the green tea layer…next time).

I like a huge cake to frosting ratio (i.e. waaaaaay more cake than frosting because I don’t really like frosting, except for the carrot cake cream cheese variety) so I left my minis naked. But the frosting recipe definitely makes enough for you to frost the tops and sides if you so choose.

Mini Chocolate and Red Velvet Cakes

Assembly:
Make one portion each of the chocolate, red velvet, and buttercream recipes below. Freeze cake layers for at least one hour, or overnight. Use round biscuit cutters to cut out rounds (I used 2-inch and got about 20 mini cakes total). Frost and decorate as desired. Store at room temperature in an airtight container.

Magnolia Bakery Super Rich Chocolate Cake

(Original source)

Ingredients:

  • 1 cup plus 1 tablespoon granulated sugar
  • 1 3/4 cups all-purpose flour
  • 3/4 cup plus 2 tablespoons unsweetened cocoa powder
  • 3/4 teaspoons baking powder
  • 3/4 teaspoons baking soda
  • 3/4 teaspoons salt
  • 1 large egg
  • 1/2 cup milk
  • 1/4 cup vegetable oil
  • 1/2 tablespoon vanilla
  • Scant 1/2 cup boiling water

Method:

  1. Preheat convection oven to 350 degrees or conventional oven to 375 degrees. Whisk together sugar, flour, cocoa powder, baking powder, baking soda and salt in a large bowl.
  2. Whisk together eggs, milk, oil and vanilla in a separate bowl. Whisk the egg mixture into the sugar-flour mixture by hand until combined. Whisk in boiling water just until combined. The batter will be watery.
  3. Pour batter into parchment lined 9″ x 13″ pan. Bake until a tester inserted into the center comes out clean, 22 to 25 minutes in a convection oven or 25 to 30 minutes in a conventional oven. Cool in pan 10 minutes; remove to a wire rack to cool completely.

Southern Red Velvet Cake

(Original source)

Ingredients:

  • 1 1/4 cups all-purpose flour
  • 3/4 cups sugar
  • 1/2 teaspoon baking soda
  • 1/2 teaspoon fine salt
  • 1/2 teaspoon cocoa powder
  • 3/4 cups vegetable oil
  • 1/2 cup buttermilk, at room temperature
  • 1 large egg, at room temperature
  • 1/2 tablespoons red food coloring
  • 1/2 teaspoon white distilled vinegar
  • 1/2 teaspoon vanilla extract

Method:

  1. Preheat the oven to 350 degrees F. Line a 9″ x 13″ dish with parchment paper.
  2. In a large bowl, sift together the flour, sugar, baking soda, salt, and cocoa powder. In another large bowl, whisk together the oil, buttermilk, eggs, food coloring, vinegar, and vanilla.
  3. Using a standing mixer, mix the dry ingredients into the wet ingredients until just combined and a smooth batter is formed.
  4. Pour batter into prepared cake pan. Bake, rotating the pans halfway through the cooking, until the cake pulls away from the side of the pans, and a toothpick inserted in the center of the cakes comes out clean, about 20 minutes.
  5. Remove the cake from the oven. Invert onto a plate and then re-invert onto a cooling rack, rounded-sides up. Let cool completely.

Vanilla Buttercream

(Original source)

Ingredients:

  • 1 cup (2 sticks) unsalted butter, softened
  • 6 to 8 cups confectioners’ sugar
  • 1/2 cup milk
  • 2 teaspoons vanilla extract

Method:
Place the butter in a large mixing bowl. Add 4 cups of the sugar and then the milk and vanilla. On the medium speed of an electric mixer, beat until smooth and creamy, about 3 to 5 minutes. Gradually add the remaining sugar, 1 cup at a time, beating well after each addition (about 2 minutes), until the icing is thick enough to be of good spreading consistency. You may not need to add all of the sugar. If desired, add a few drops of food coloring and mix thoroughly. (Use and store the icing at room temperature because icing will set if chilled.) Icing can be stored in an airtight container for up to 3 days.

Yield: enough for 2 dozen cupcakes or 1 (9-inch) layer cake

minicakes1

Chinese Coconut Cocktail Buns (Gai Mei Bao)

buns1My dad works in Chinatown in Seattle, and when my brothers and I were young he’d occasionally bring home a bright pink box filled with Asian bakery treats. These coconut buns (or gai mei bao) were always a family favorite. I’ve been searching for a recipe for awhile, and when I bit into one of these I knew I’d found it. The best part of gai mei bao is the buttery coconut filling, and this recipe doesn’t just nail the flavor — it allows for a generous amount in each bun. These buns are a great introduction to Asian baked goods; and even the non-coconut fans in my life gladly scarf these down.

There are a lot of steps to this recipe; don’t be intimidated! It all comes together quite easily in an afternoon. If you want to split up the work, make the dough on the first day and proof overnight in the fridge. Take out the dough about an hour before you want to wrap the buns so it can get to room temperature. During that time, make the filling and topping.

buns2
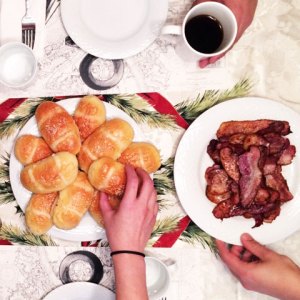
This recipe calls for a couple unusual ingredients (caster sugar and whole milk powder). I found everything I needed at Bulk Barn, though your local Asian market should also carry them. If you have difficulty locating caster sugar (which is basically superfine sugar — NOT powdered), you can whiz regular granulated sugar in the food processor for 10 seconds or so. This recipe also incorporates the tangzhong method, which involves cooking a portion of the flour with liquid in order to give the bread a longer-lasting soft texture. These buns keep well for a few days (I recommend microwaving a few seconds after the first day), and make a delicious breakfast alongside bacon and a cup of coffee.

(Note: I weigh my ingredients — highly recommended! — when making these buns, but have included approximate US equivalents below.)

Chinese Coconut Cocktail Buns (Gai Mei Bao)

Adapted from Christine’s Recipes
Makes 16 buns

Tangzhong Ingredients (will make a little more than needed for this recipe):

  • 50gm / 1/3 c bread flour
  • 250ml / 1 c water (could be replaced by milk, or 50/50 water and milk)

Tangzhong Method:

  1. In a small saucepan, slowly add liquid to flour and mix until smooth. Cook over medium-low heat, stirring constantly with a wooden spoon, whisk or spatula to prevent burning and sticking while you cook along the way.
  2. The mixture will gradually thicken. Once you notice some “lines” appearing in the mixture for every stir you make with the spoon, it’s done. Remove from heat.
  3. Transfer tangzhong to a clean bowl. Cover with a cling wrap sticking onto the surface of tangzhong to prevent from drying up. Let cool. The tangzhong can be used immediately once it cools down to room temperature. Leftover tangzhong can be stored in fridge for a few days. (Note: The chilled tangzhong should return to room temperature before adding into other ingredients.)

Bun Ingredients:

  • 160 ml / 2/3 c milk, warmed (any kind will do)
  • 1 egg, whisked
  • 160 gm / 2/3 c tangzhong (for method, please see above)
  • 6 gm / heaping 1 tsp salt
  • 70 gm / 1/3 c caster sugar
  • 10 gm / 2 tsp whole milk powder
  • 360 gm / 3 c bread flour, plus more if needed
  • 10 gm / 3 tsp active dry yeast
  • 40 gm / 1.5 tbsp butter, melted and cooled to room temperature

Filling Ingredients:

  • 180 gm / 13 tbsp butter, softened at room temperature
  • 80 gm / 2/3 c caster sugar
  • 50 gm / 1/2 c cake flour
  • 60 gm / 4 tbsp milk powder
  • 90 gm / 1 c unsweetened desiccated coconut

Topping Ingredients:

  • 35 gm / 1/3 c cake flour
  • 40 gm / 3 tbsp butter
  • 20 gm / scant 1/8 c caster sugar
  • 1 egg, whisked (with a splash of milk, optional)
  • Sesame seeds for sprinkling on top, to taste

Sugar glaze (optional):

  • 1 tbsp sugar + 1 tbsp water

Method:

  1. In a medium bowl, dissolve yeast in warm milk to activate. Set aside.
  2. In a large bowl, whisk together flour, sugar, salt, and milk powder.
  3. Once the yeast is active and bubbly, add egg and tangzhong and stir to combine.
  4. Make a well in the middle of your dry ingredients. Slowly add the wet to the dry ingredients, incorporating with a spatula or wooden spoon. Dough will be sticky at first. Once in a cohesive ball, add melted butter. Knead until dough becomes smooth and soft, yet pliable (~8 – 10 minutes). If the dough is too sticky and will not come together, add additional flour a couple teaspoons at a time until it does.
  5. Cover dough with cling wrap or a linen towel and set aside in a warm area until doubled in size (or proof in the refrigerator overnight).
  6. While dough is proofing, make filling and topping (see below).
  7. Transfer proofed dough to a clean floured surface. Gently deflate and divide the dough into 16 equal portions. Form into ball shapes. Cover with cling wrap and let rest for 15 minutes.
  8. Roll or press out each portion of the dough into an oval shape. Place a portion of filling in the middle of the oval lengthwise. Fold the bottom third up over the filling, then fold the top third down over the other layers (like a letter). Pinch seam closed. Turn bun over and tuck the ends underneath, pinching to seal.
  9. Transfer bun to a parchement lined baking tray with seam facing down. Repeat this step with the remaining dough portions and fillings. Cover with a plastic wrap and let them proof for about 45 to 60 minutes, or until doubled in size.
  10. Preheat oven to 350F.
  11. Lightly brush whisked egg on the surface of each dough. Pipe two lines of toppings and sprinkle some sesame seeds. Baked for about 15 minutes, or until golden brown. About 5 minutes before finished, remove from oven and brush tops carefully with sugar glaze, if desired. Return to oven. Remove from the oven and brush on a second coat of sugar glaze. Let cool on a wire rack. Enjoy!

Filling:

  1. Combine the butter and sugar well. Sift in in milk powder, cake flour, and coconut. Mix to combine.
  2. Form filling mixture into a long tube. Divide into 16 equal portions. Set aside. (I like to put in the fridge while dough is proofing to make it easier to handle.)

Topping:

  1. Mix the softened butter with sugar well. Sift in the cake flour and combine well.
  2. Transfer into a ziplock bag and snip off a corner. Pipe over the tops of buns after egg wash.